
Connect Coding Tools
Bring Ardot design context into your day-to-day coding tools through MCP. Two options are available: Remote MCP requires no client installation—once authorized, you can read the design files you have access to right in the conversation; Desktop MCP is served by the Ardot client on your machine, requires no authorization, and operates directly on the design file you currently have open.
Overview
Any AI agent that supports MCP over HTTP can connect to Ardot MCP, via either Remote or Desktop mode. Confirm the connection details before you start:
| Parameter | Remote MCP | Desktop MCP |
|---|---|---|
| Server name | ardot-remote | ardot-local |
| Transport | HTTP | HTTP |
| Auth | OAuth | None |
| Server URL | https://ardot.tencent.com/mcp | http://127.0.0.1:50501/api/v1/mcp |
| Prerequisites | None | Start the Ardot client, open a design file, and connect Desktop MCP |
The setup takes four steps (steps marked Remote only can be skipped for Desktop MCP):
- Add the server: enter the server name and URL.
- Confirm trust: allow the tool to call the MCP server.
- Remote only Authorize your account: complete the OAuth flow in the browser.
- Verify the connection: call it in a new conversation to confirm it works.
Note
Desktop MCP is served automatically by the Ardot client when a design file is open. If the port is taken, the client switches automatically—always rely on the value shown in the "MCP settings" entry at the top-right of the client home page, where you can also enable it with one click. Each section below provides "Remote MCP" and "Desktop MCP" tabs with their own steps.
Two setup paths are described below. If your AI agent can write the configuration for you, use Option 1; if you need to set it up manually, pick your AI agent in Option 2.
Option 1: Let the AI agent configure it for you
Paste the matching prompt into your AI agent chat and let it write the MCP configuration.
Paste the following prompt into your AI agent chat:
Please configure Ardot Remote MCP for me: server name ardot-remote, type http, URL https://ardot.tencent.com/mcp. If trust confirmation or OAuth authorization is needed afterwards, prompt me to complete the authorization flow of the current AI agent.Tip
If your AI agent cannot write the configuration directly, use Option 2 below to add it manually.
Option 2: Add the MCP server manually
Pick your AI agent to see the matching steps. For Remote, use server name ardot-remote and URL https://ardot.tencent.com/mcp; for Desktop, use server name ardot-local and URL http://127.0.0.1:50501/api/v1/mcp. Each section provides "Remote MCP" and "Desktop MCP" tabs—switch between them to see the matching steps.
 WorkBuddy — configure in Connectors
 CodeBuddy Code — add from the command line
 Claude Code — add from the command line
 Codex CLI — add from the command line
 Cursor — add on the Customize page
 VS Code — add from the command palette
- Other MCP-capable AI agents — use the generic HTTP configuration
WorkBuddy
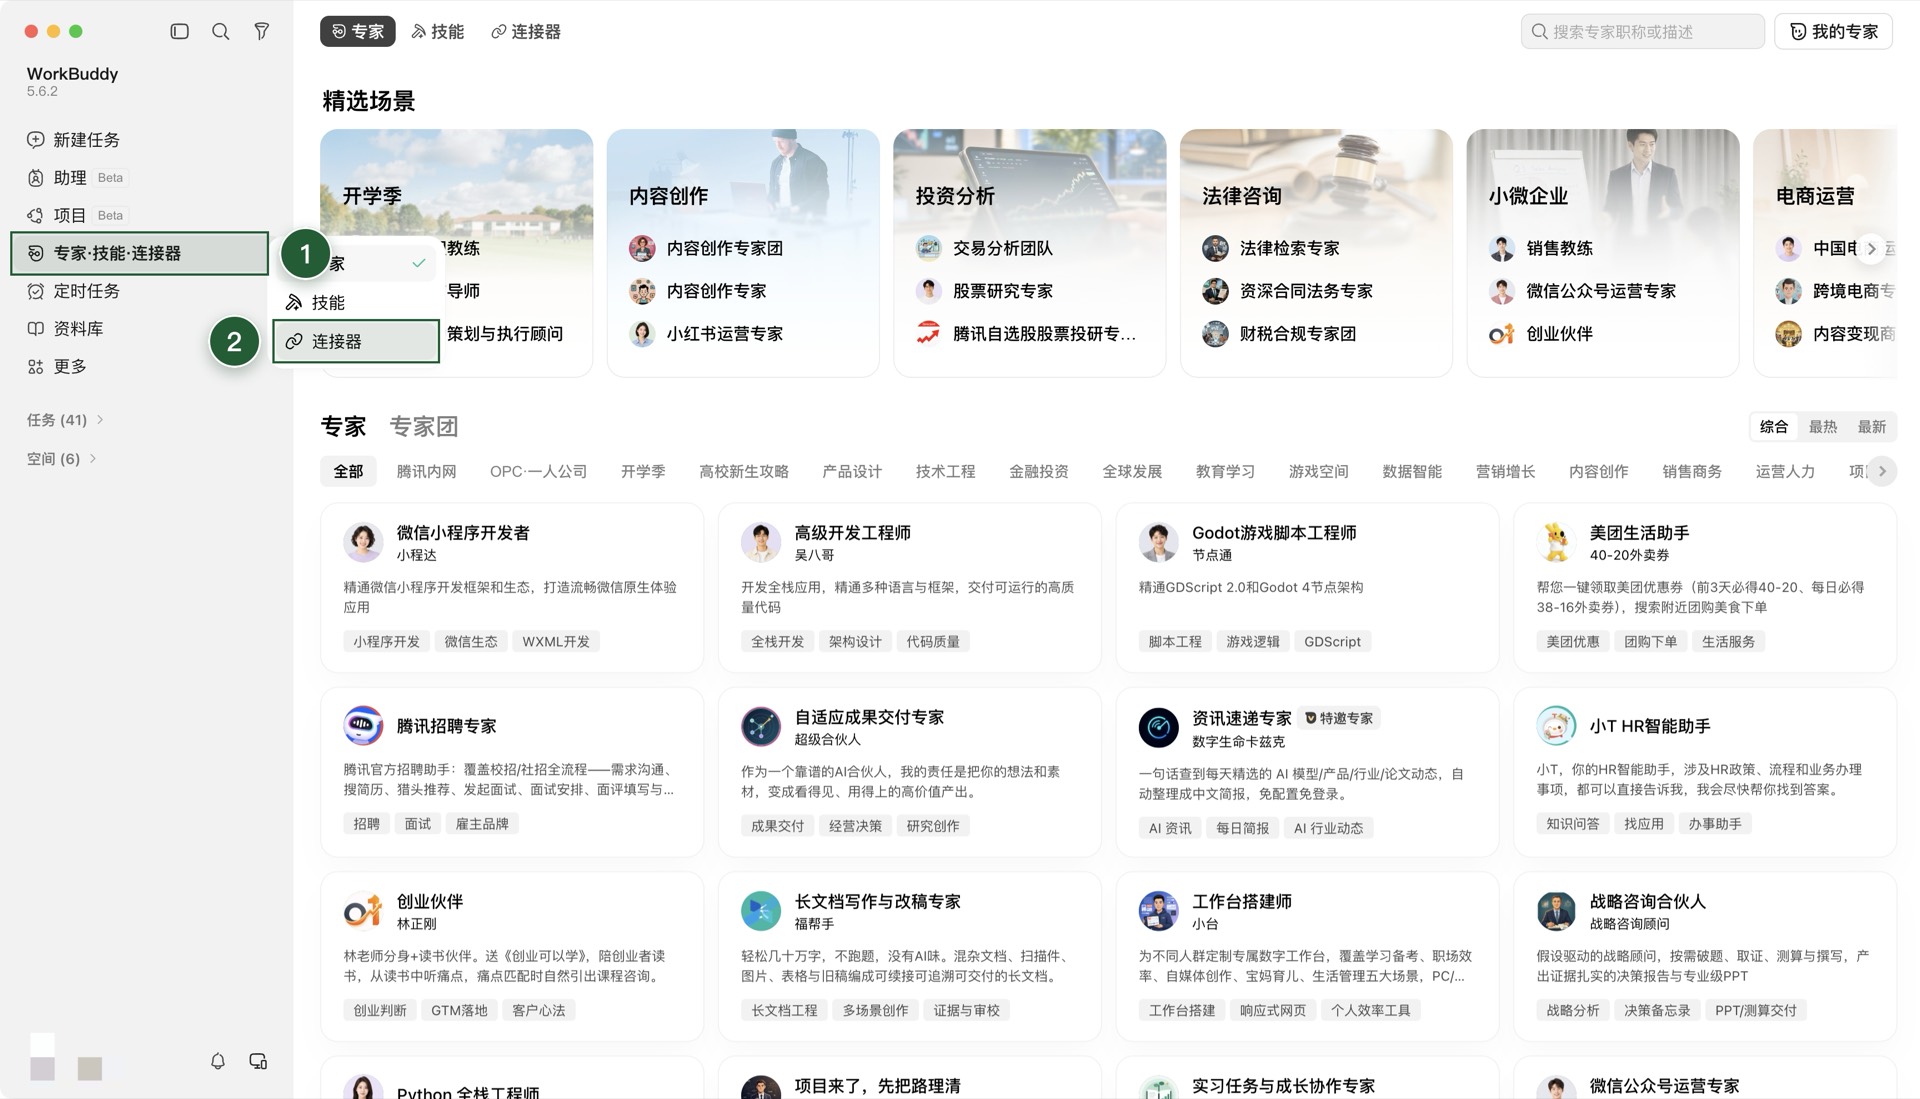
Open WorkBuddy, click Experts · Skills · Connectors in the left sidebar, then select Connectors.
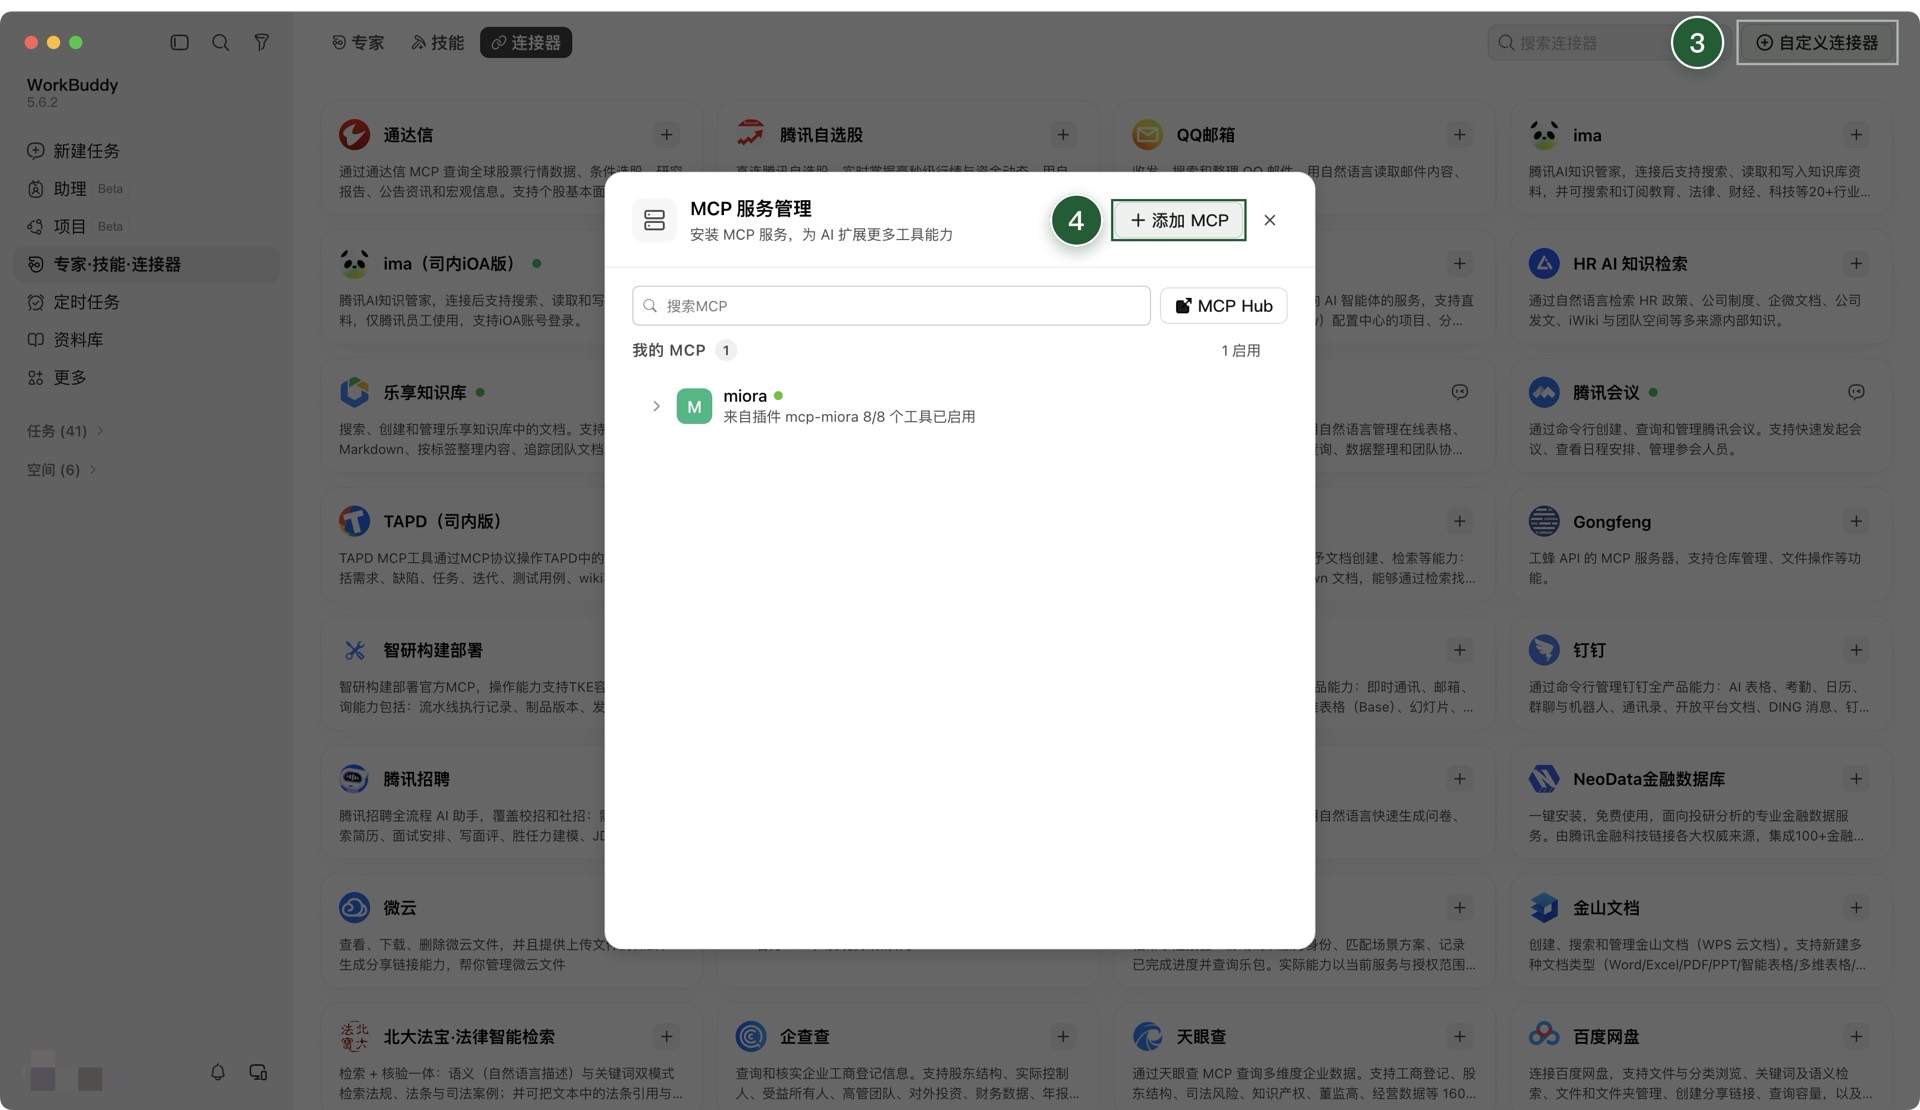
Click Custom connector in the top-right corner to open "MCP server management", then click Add MCP.
In the
mcp.jsoneditor, add the following insidemcpServers(keep any existing entries), then click Save.json{ "mcpServers": { "ardot-remote": { "type": "http", "url": "https://ardot.tencent.com/mcp" } } }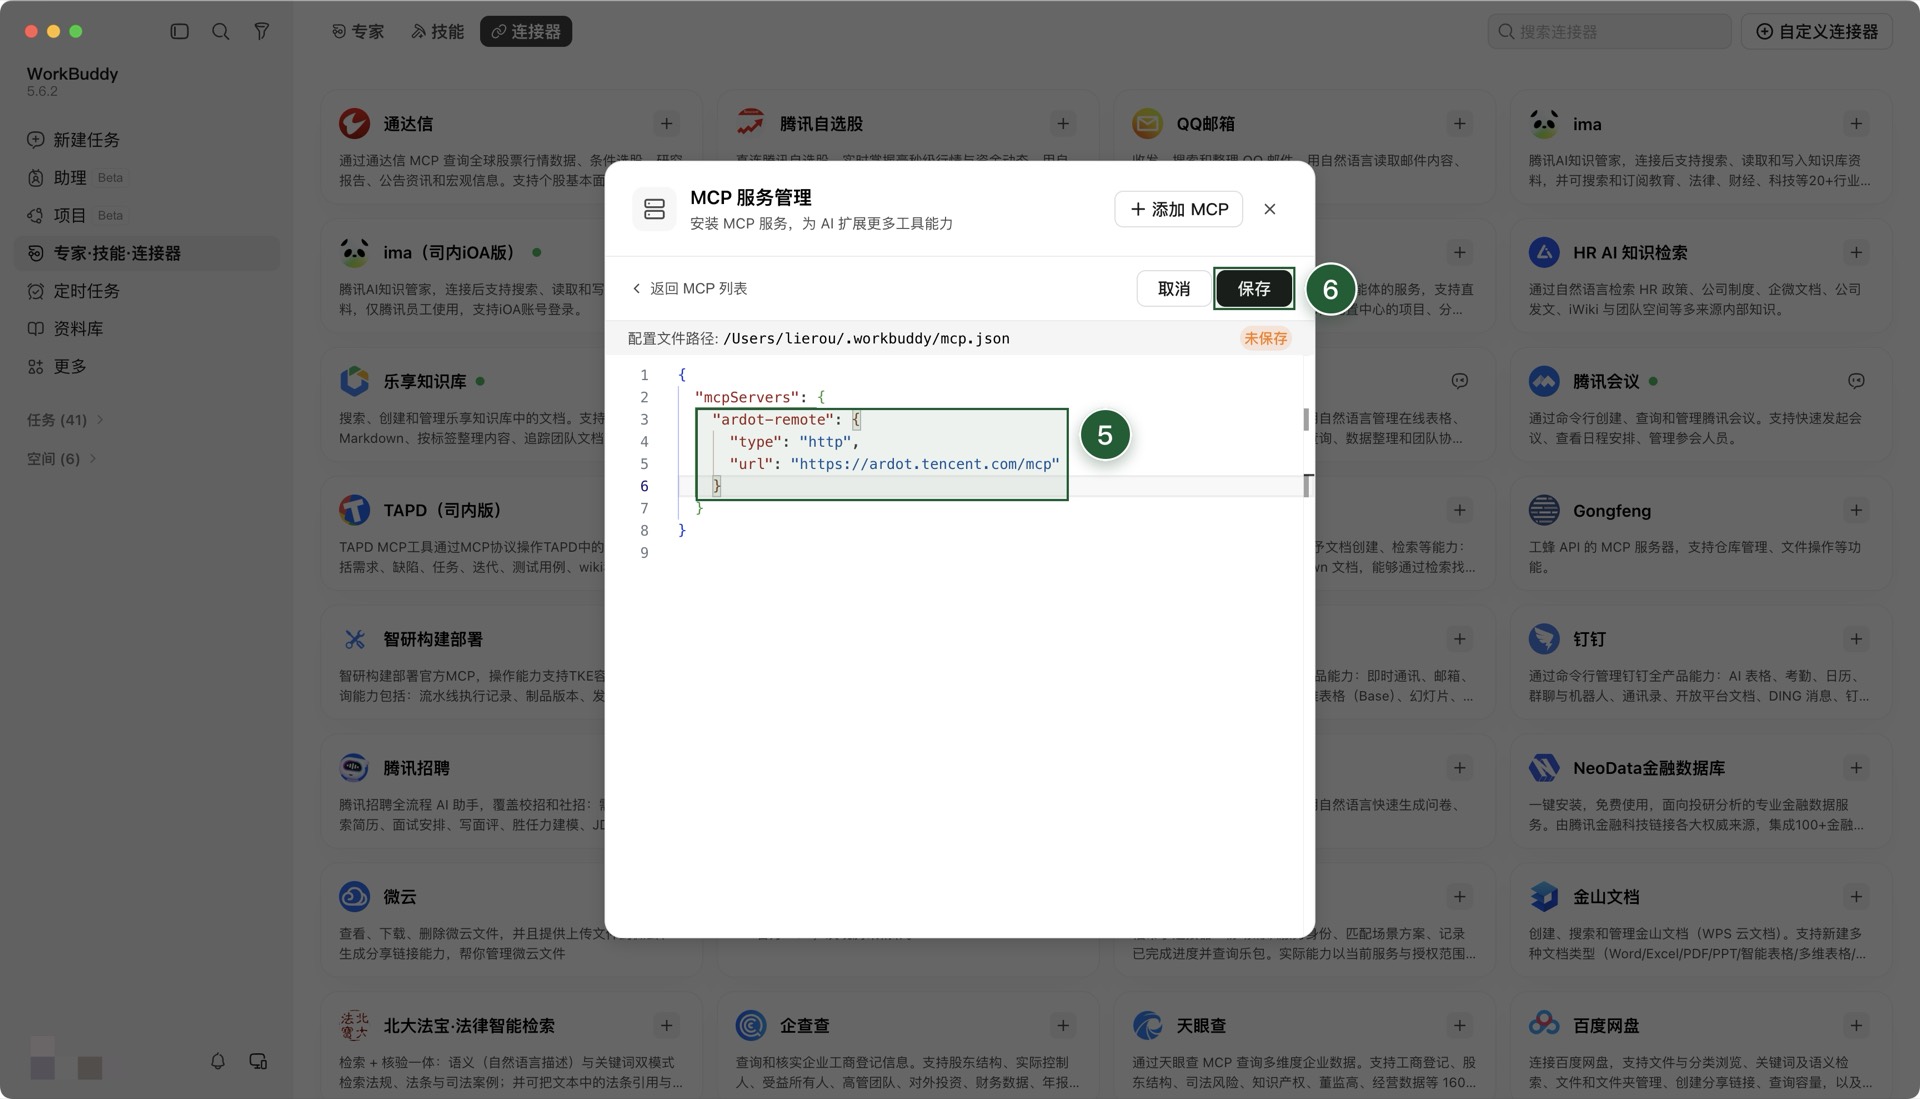
On first use, WorkBuddy asks you to confirm trust for the MCP server. Click Trust.
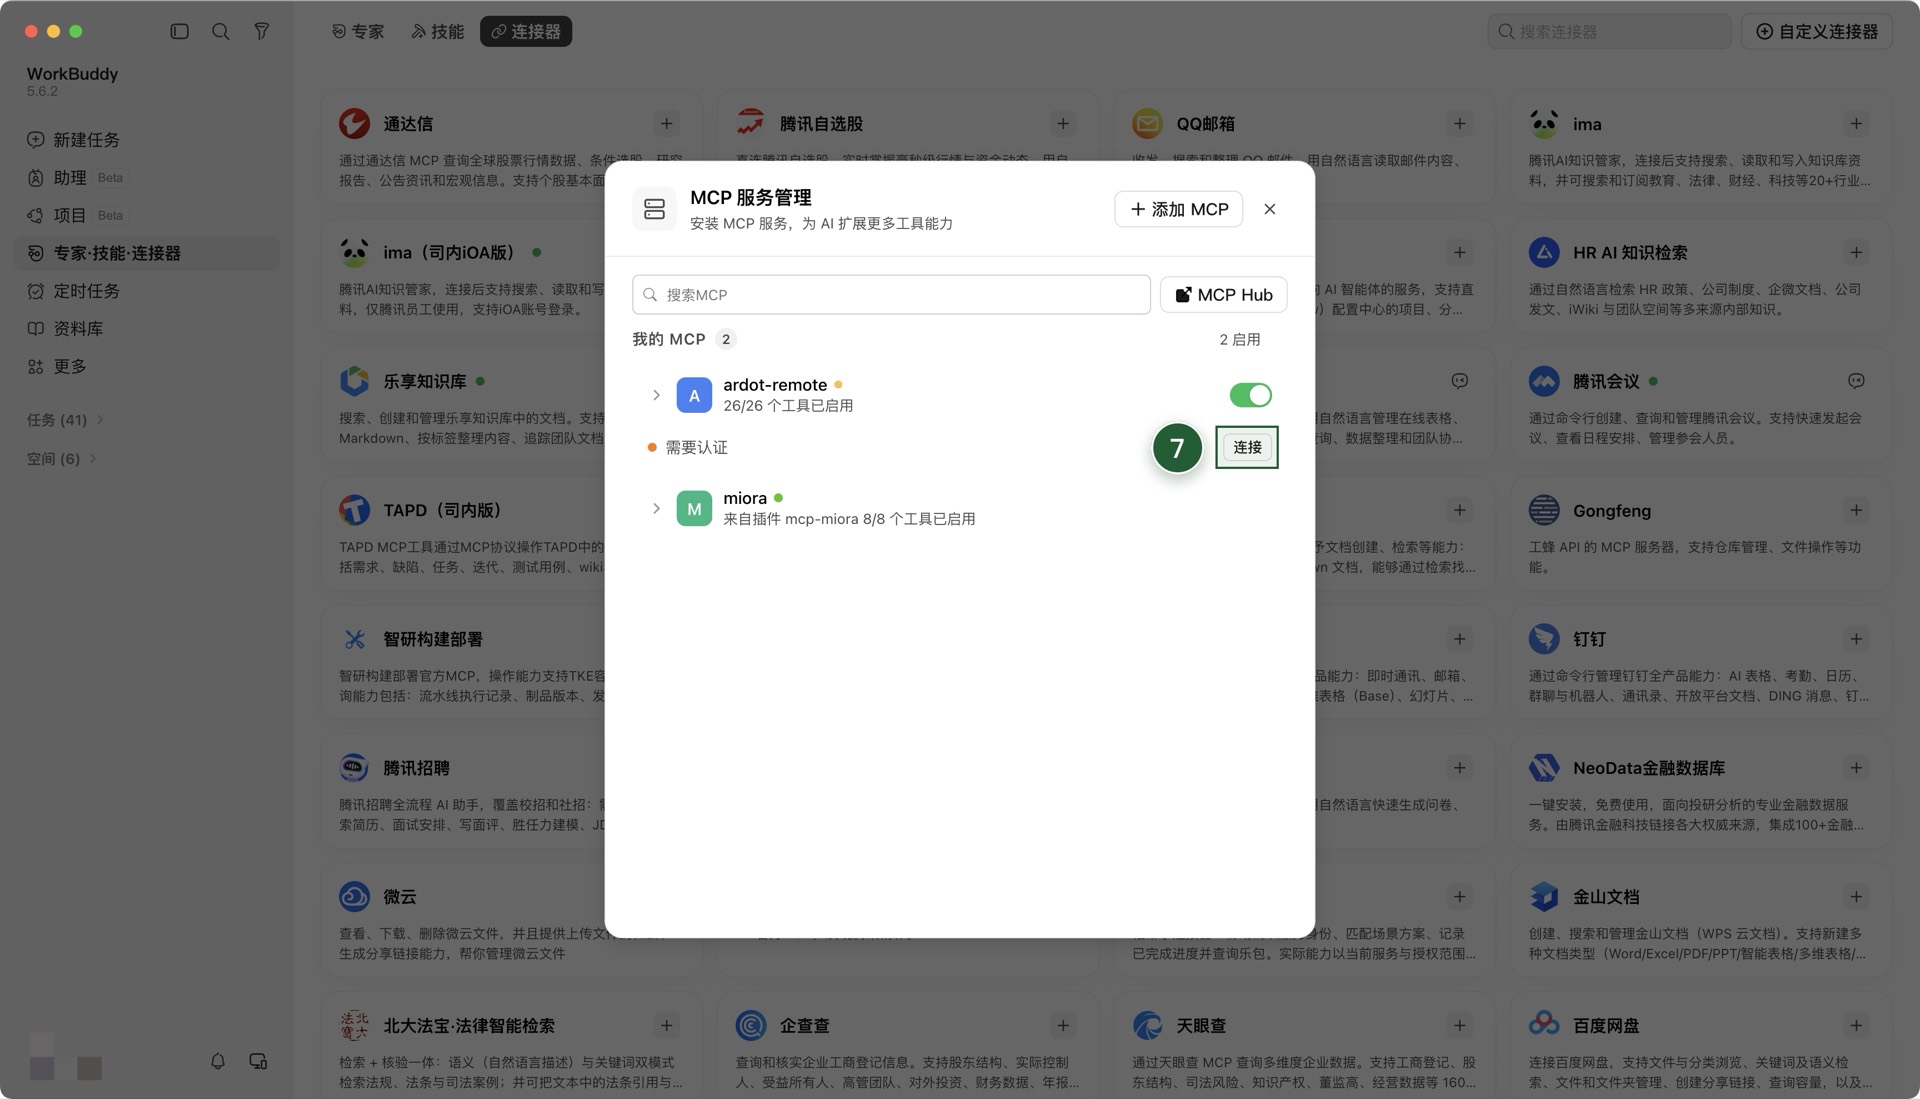
Once the status shows "Authentication required", click Connect.
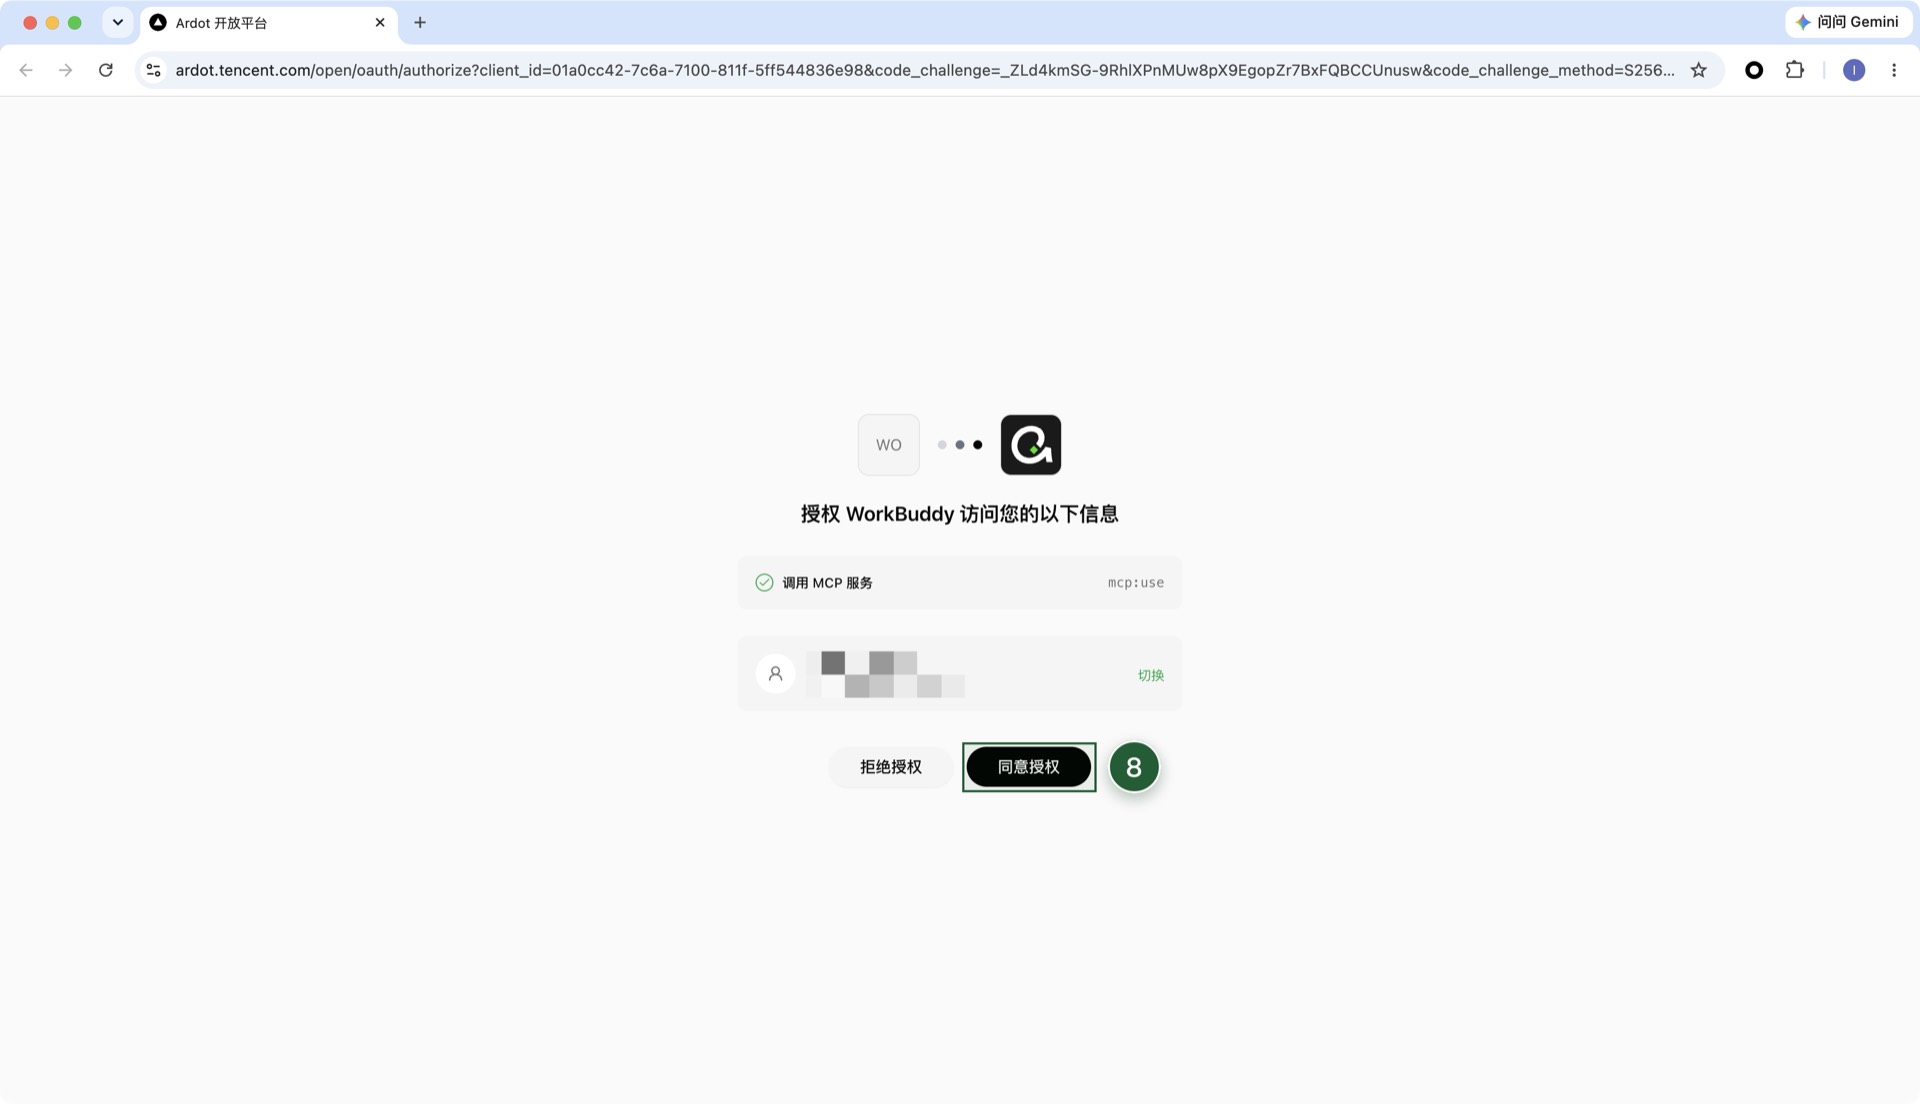
The Ardot authorization page opens in the browser. Confirm the account and click Authorize.
Verify the connection: back in "MCP server management",
ardot-remoteshould show as enabled with its available tools listed.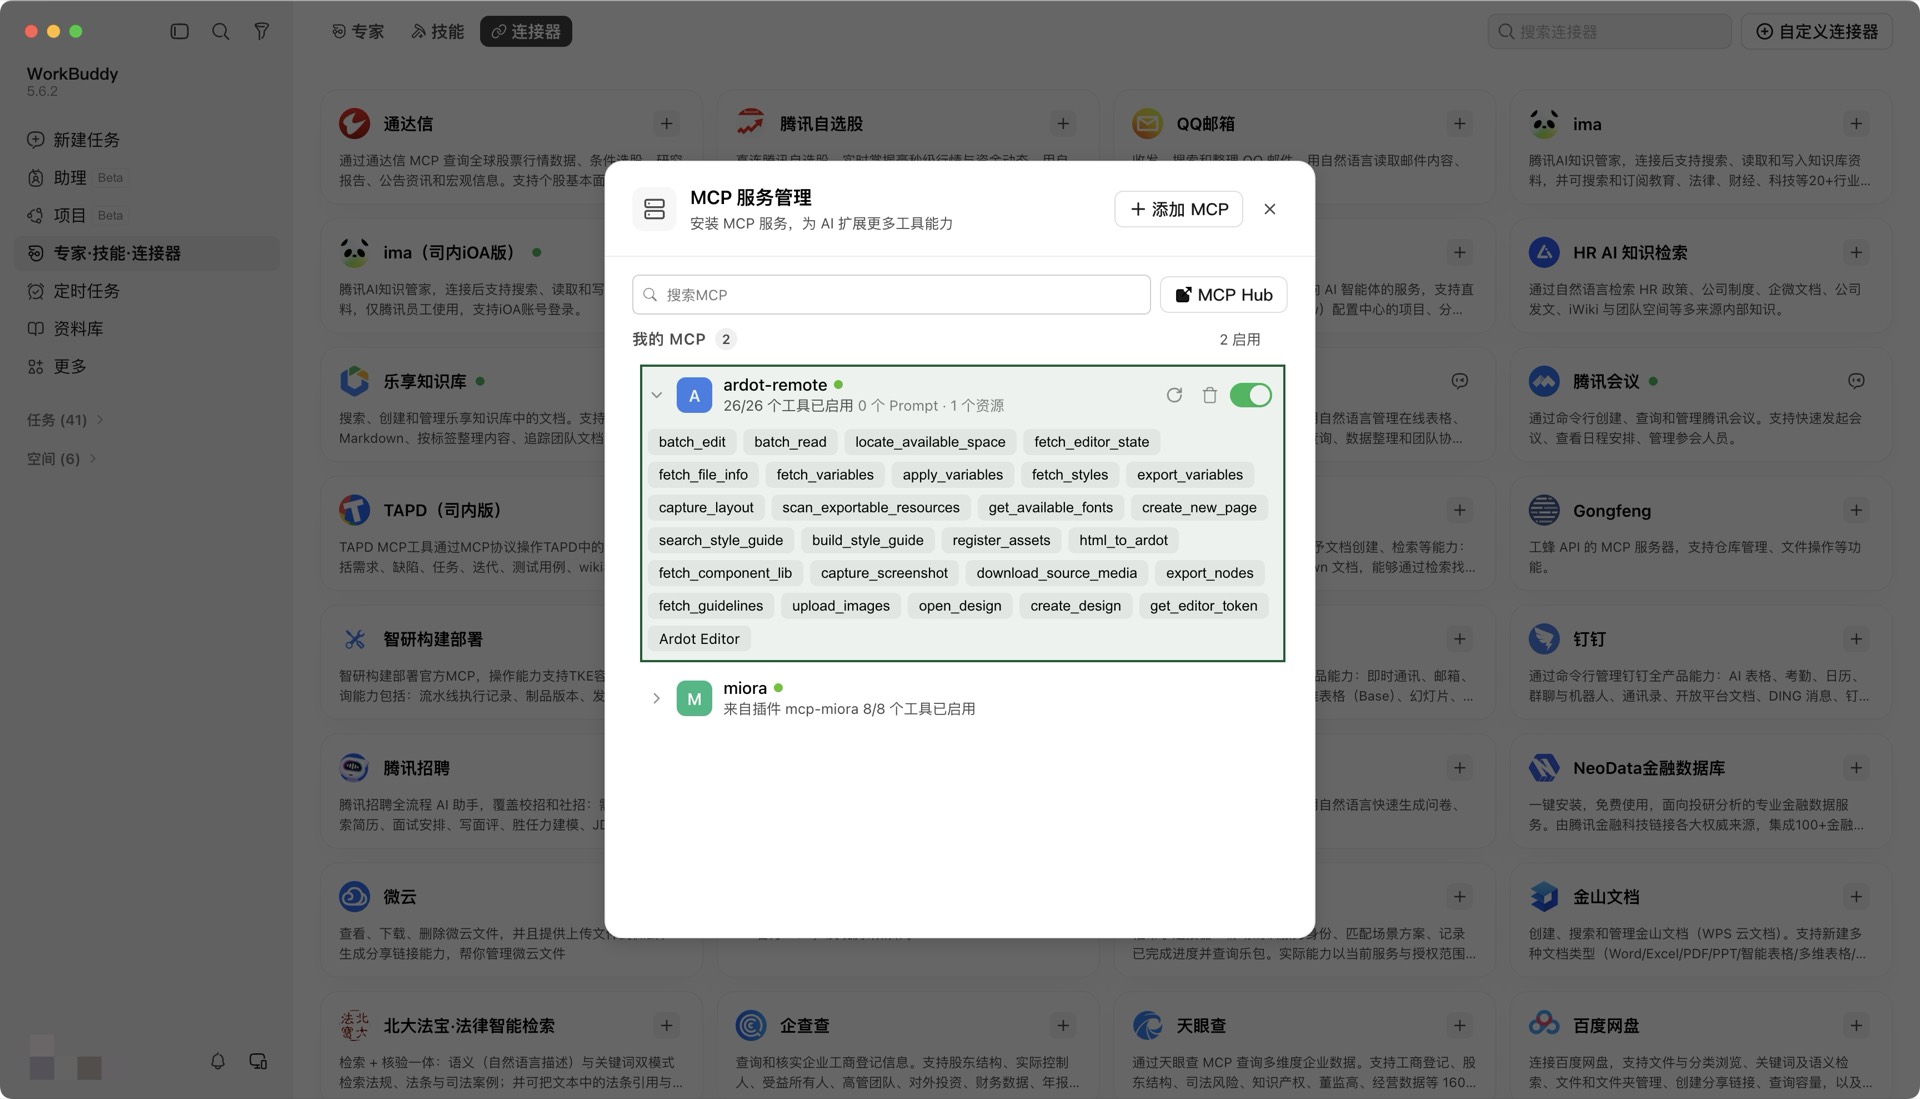
CodeBuddy Code
Requirements
Node.js 18.0+
Run the following command in the terminal.
bashcodebuddy mcp add ardot-remote --transport http https://ardot.tencent.com/mcp --scope user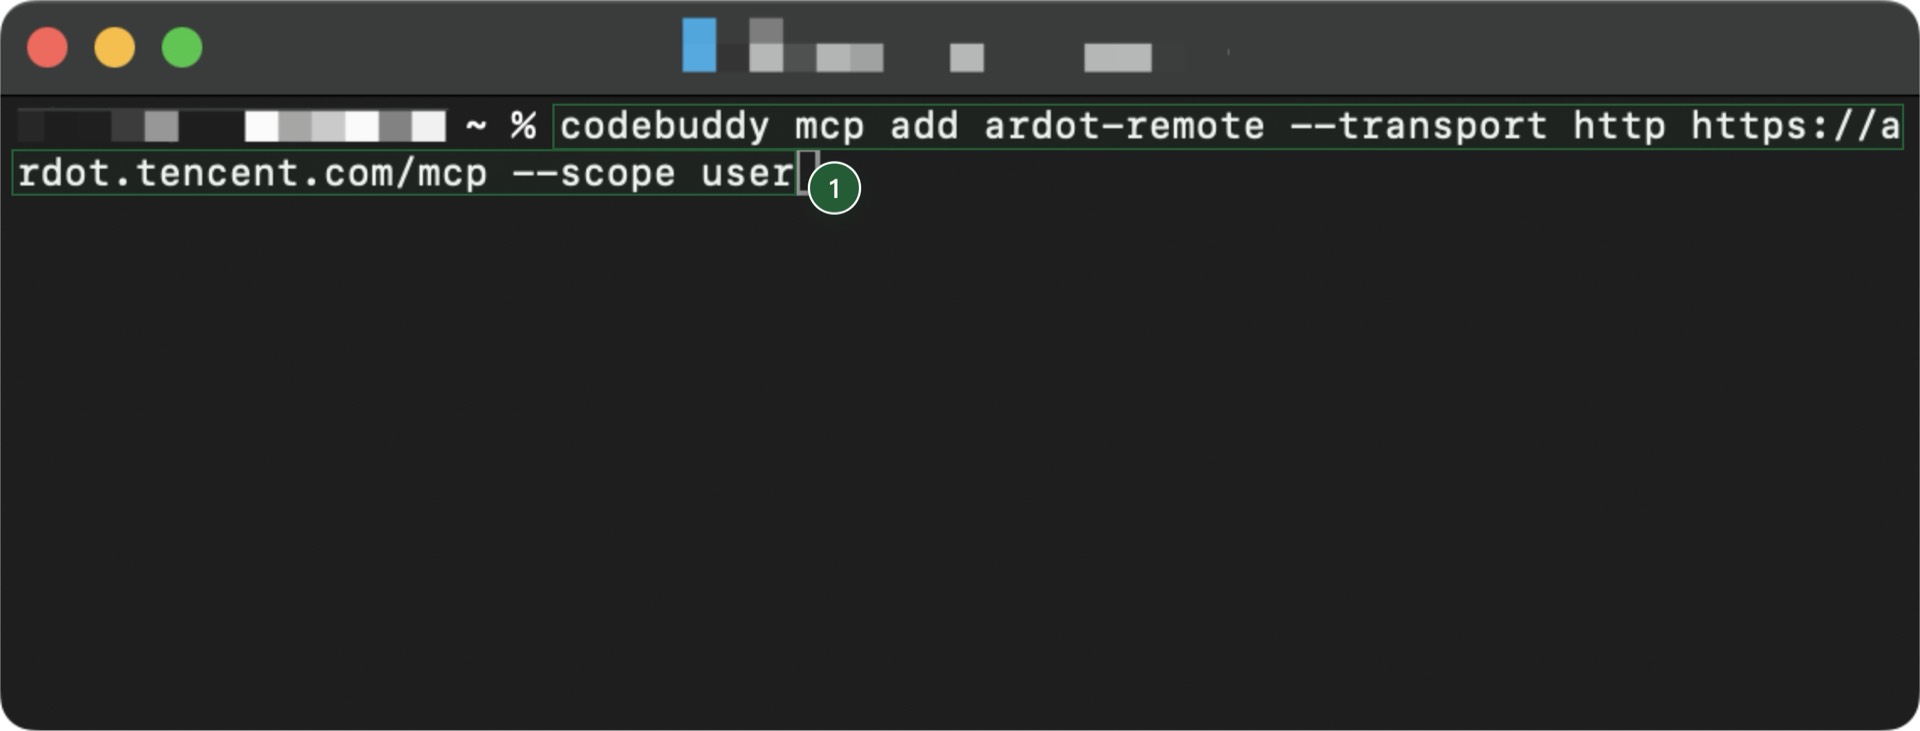
Run
codebuddyto enter CodeBuddy Code, then run/mcp. The newardot-remoteentry appears and shows that OAuth is required.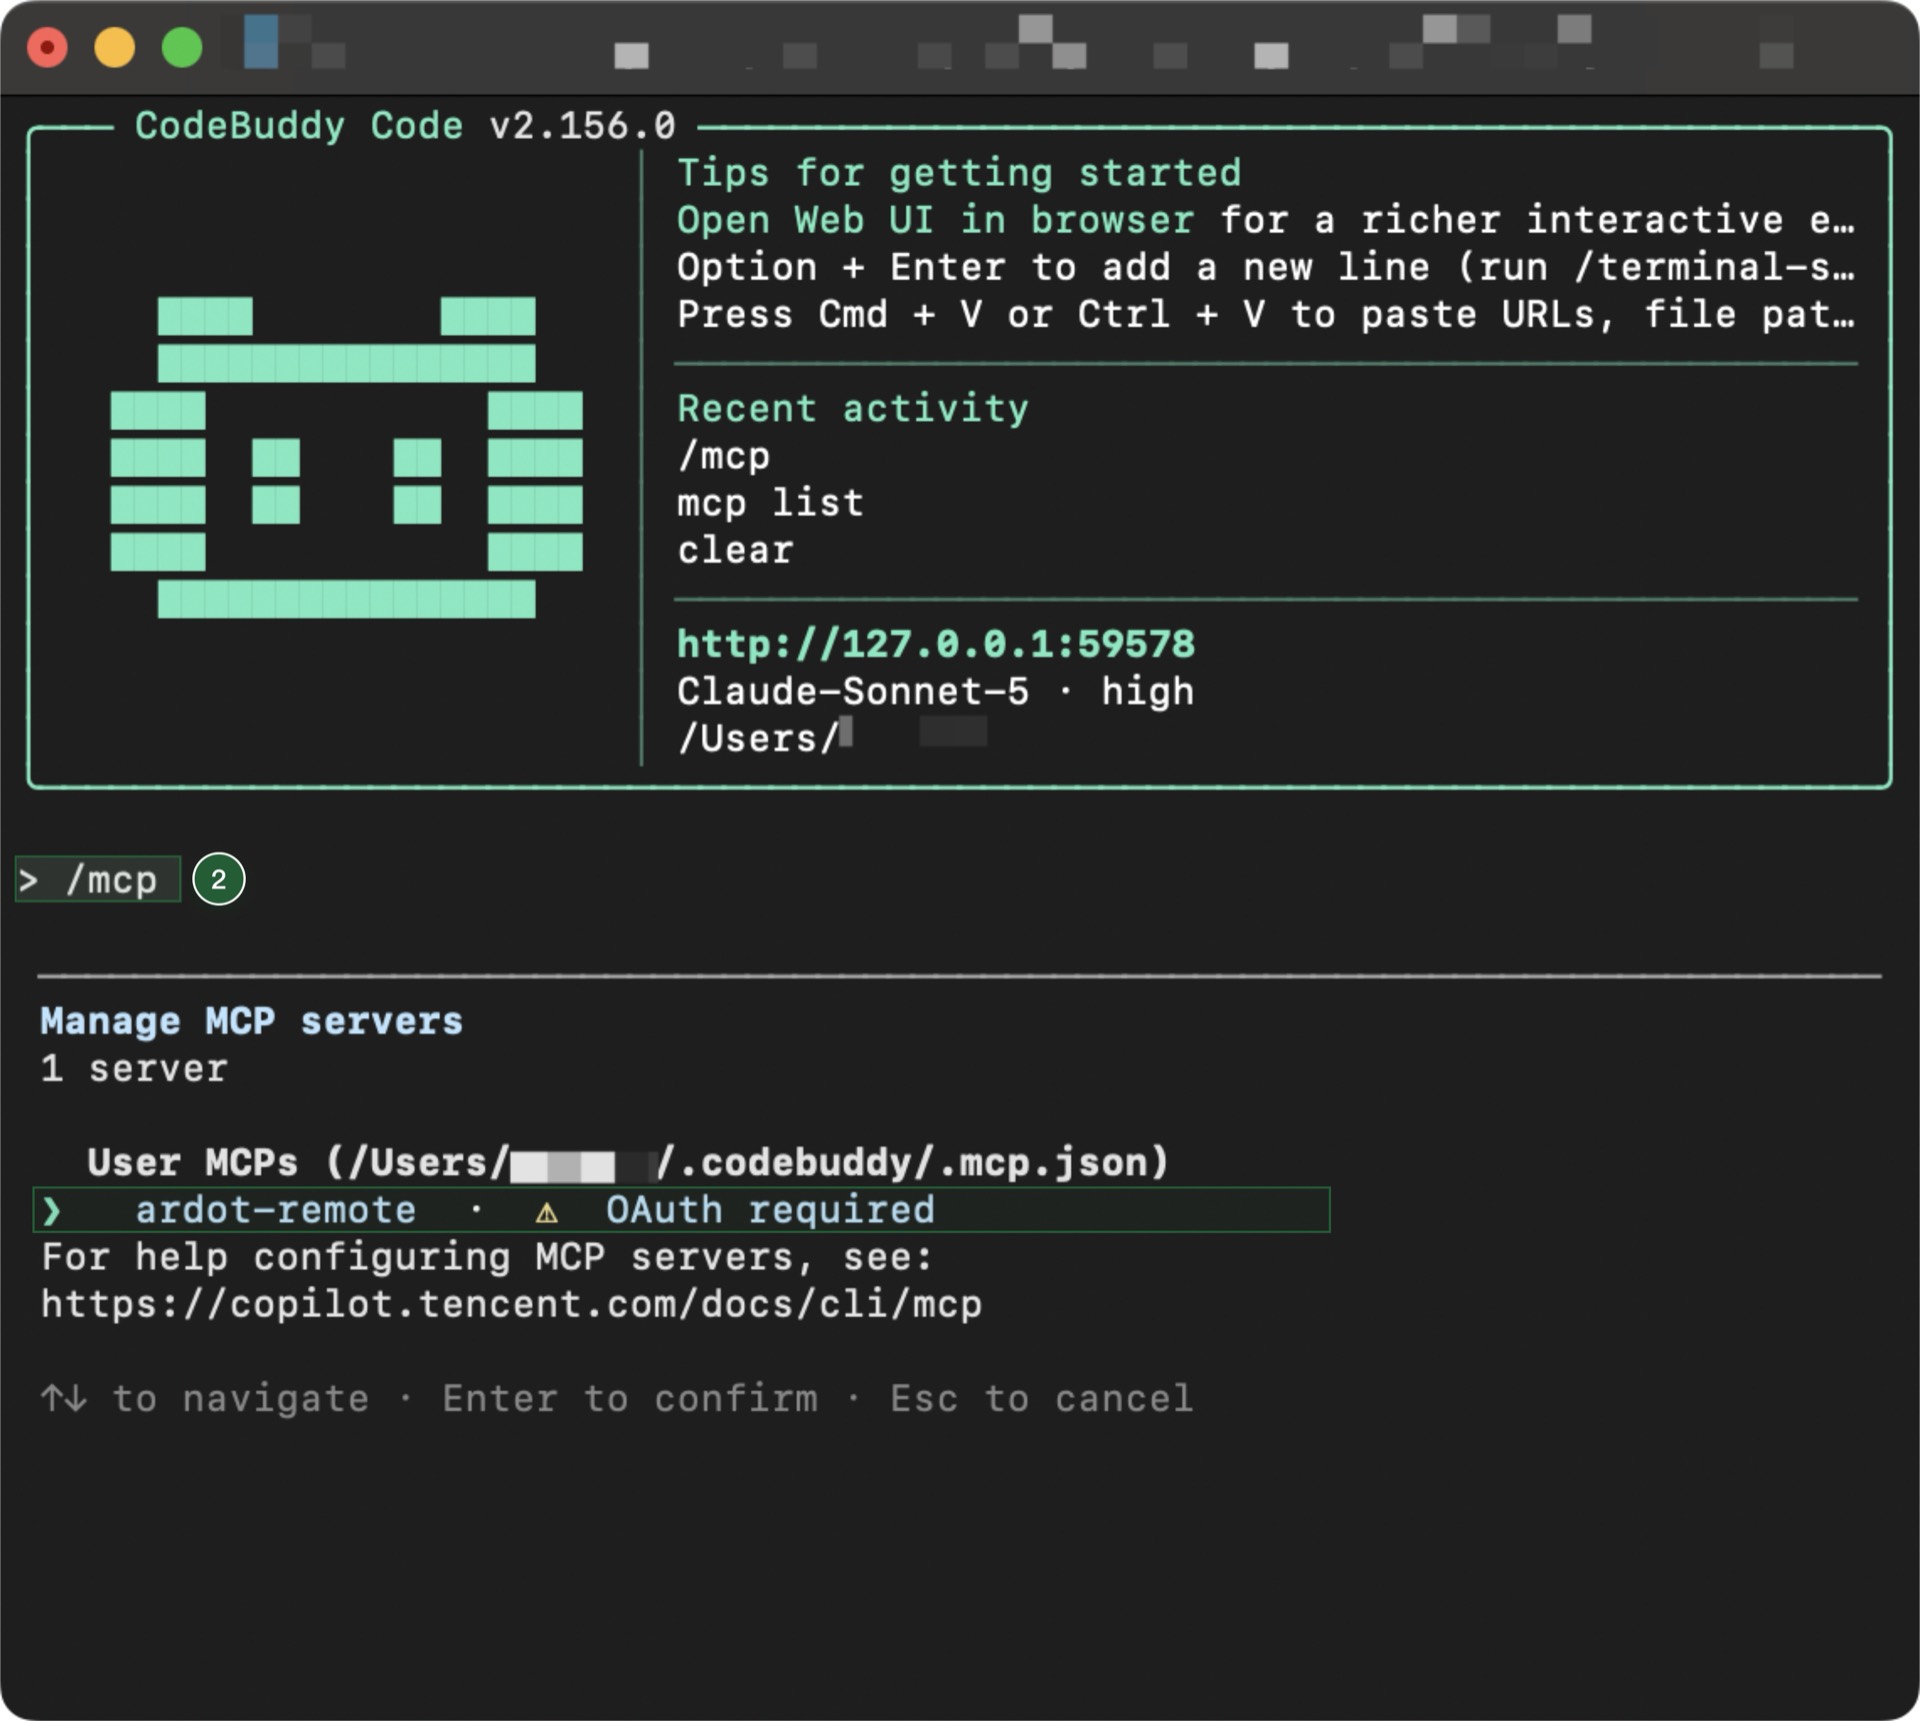
Select the entry and press Enter to open its submenu, choose
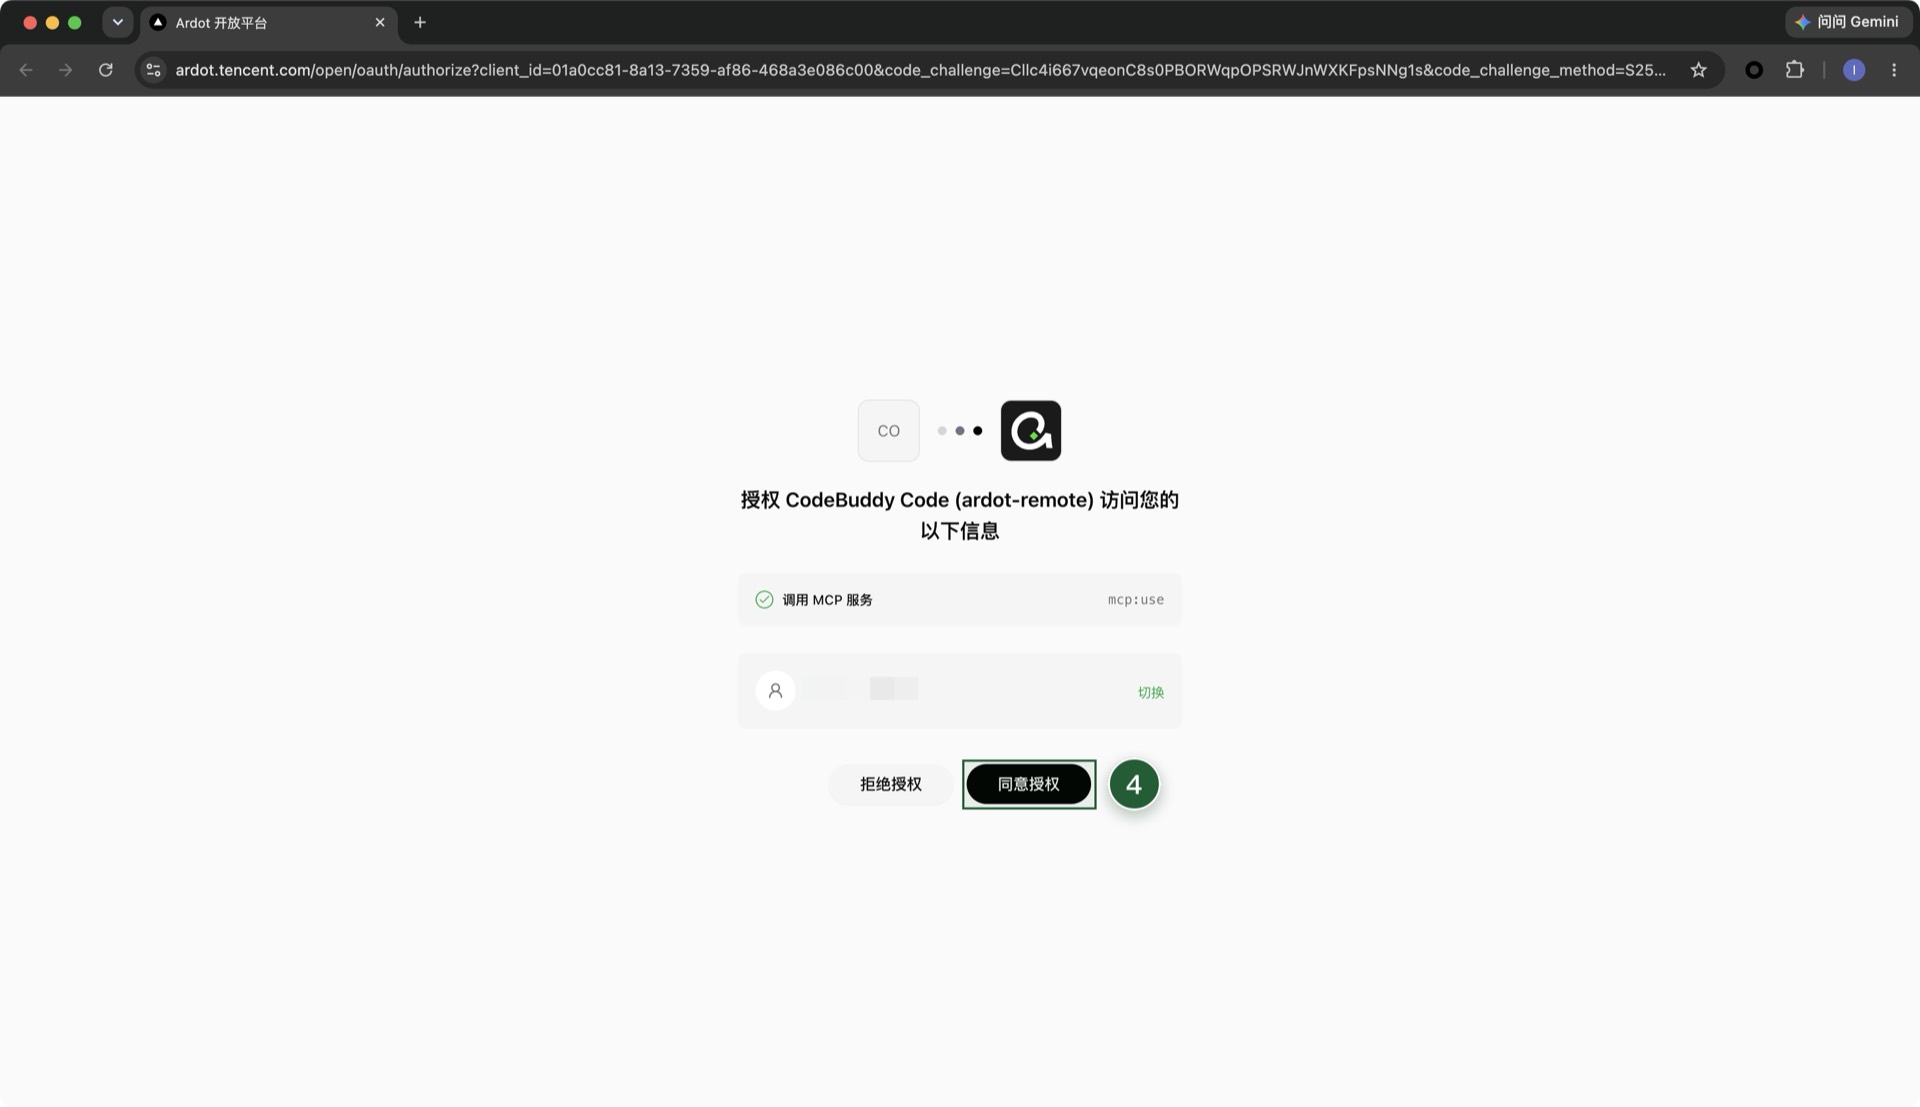
Authenticateand press Enter. The authorization page opens in the browser—confirm the account and click Authorize.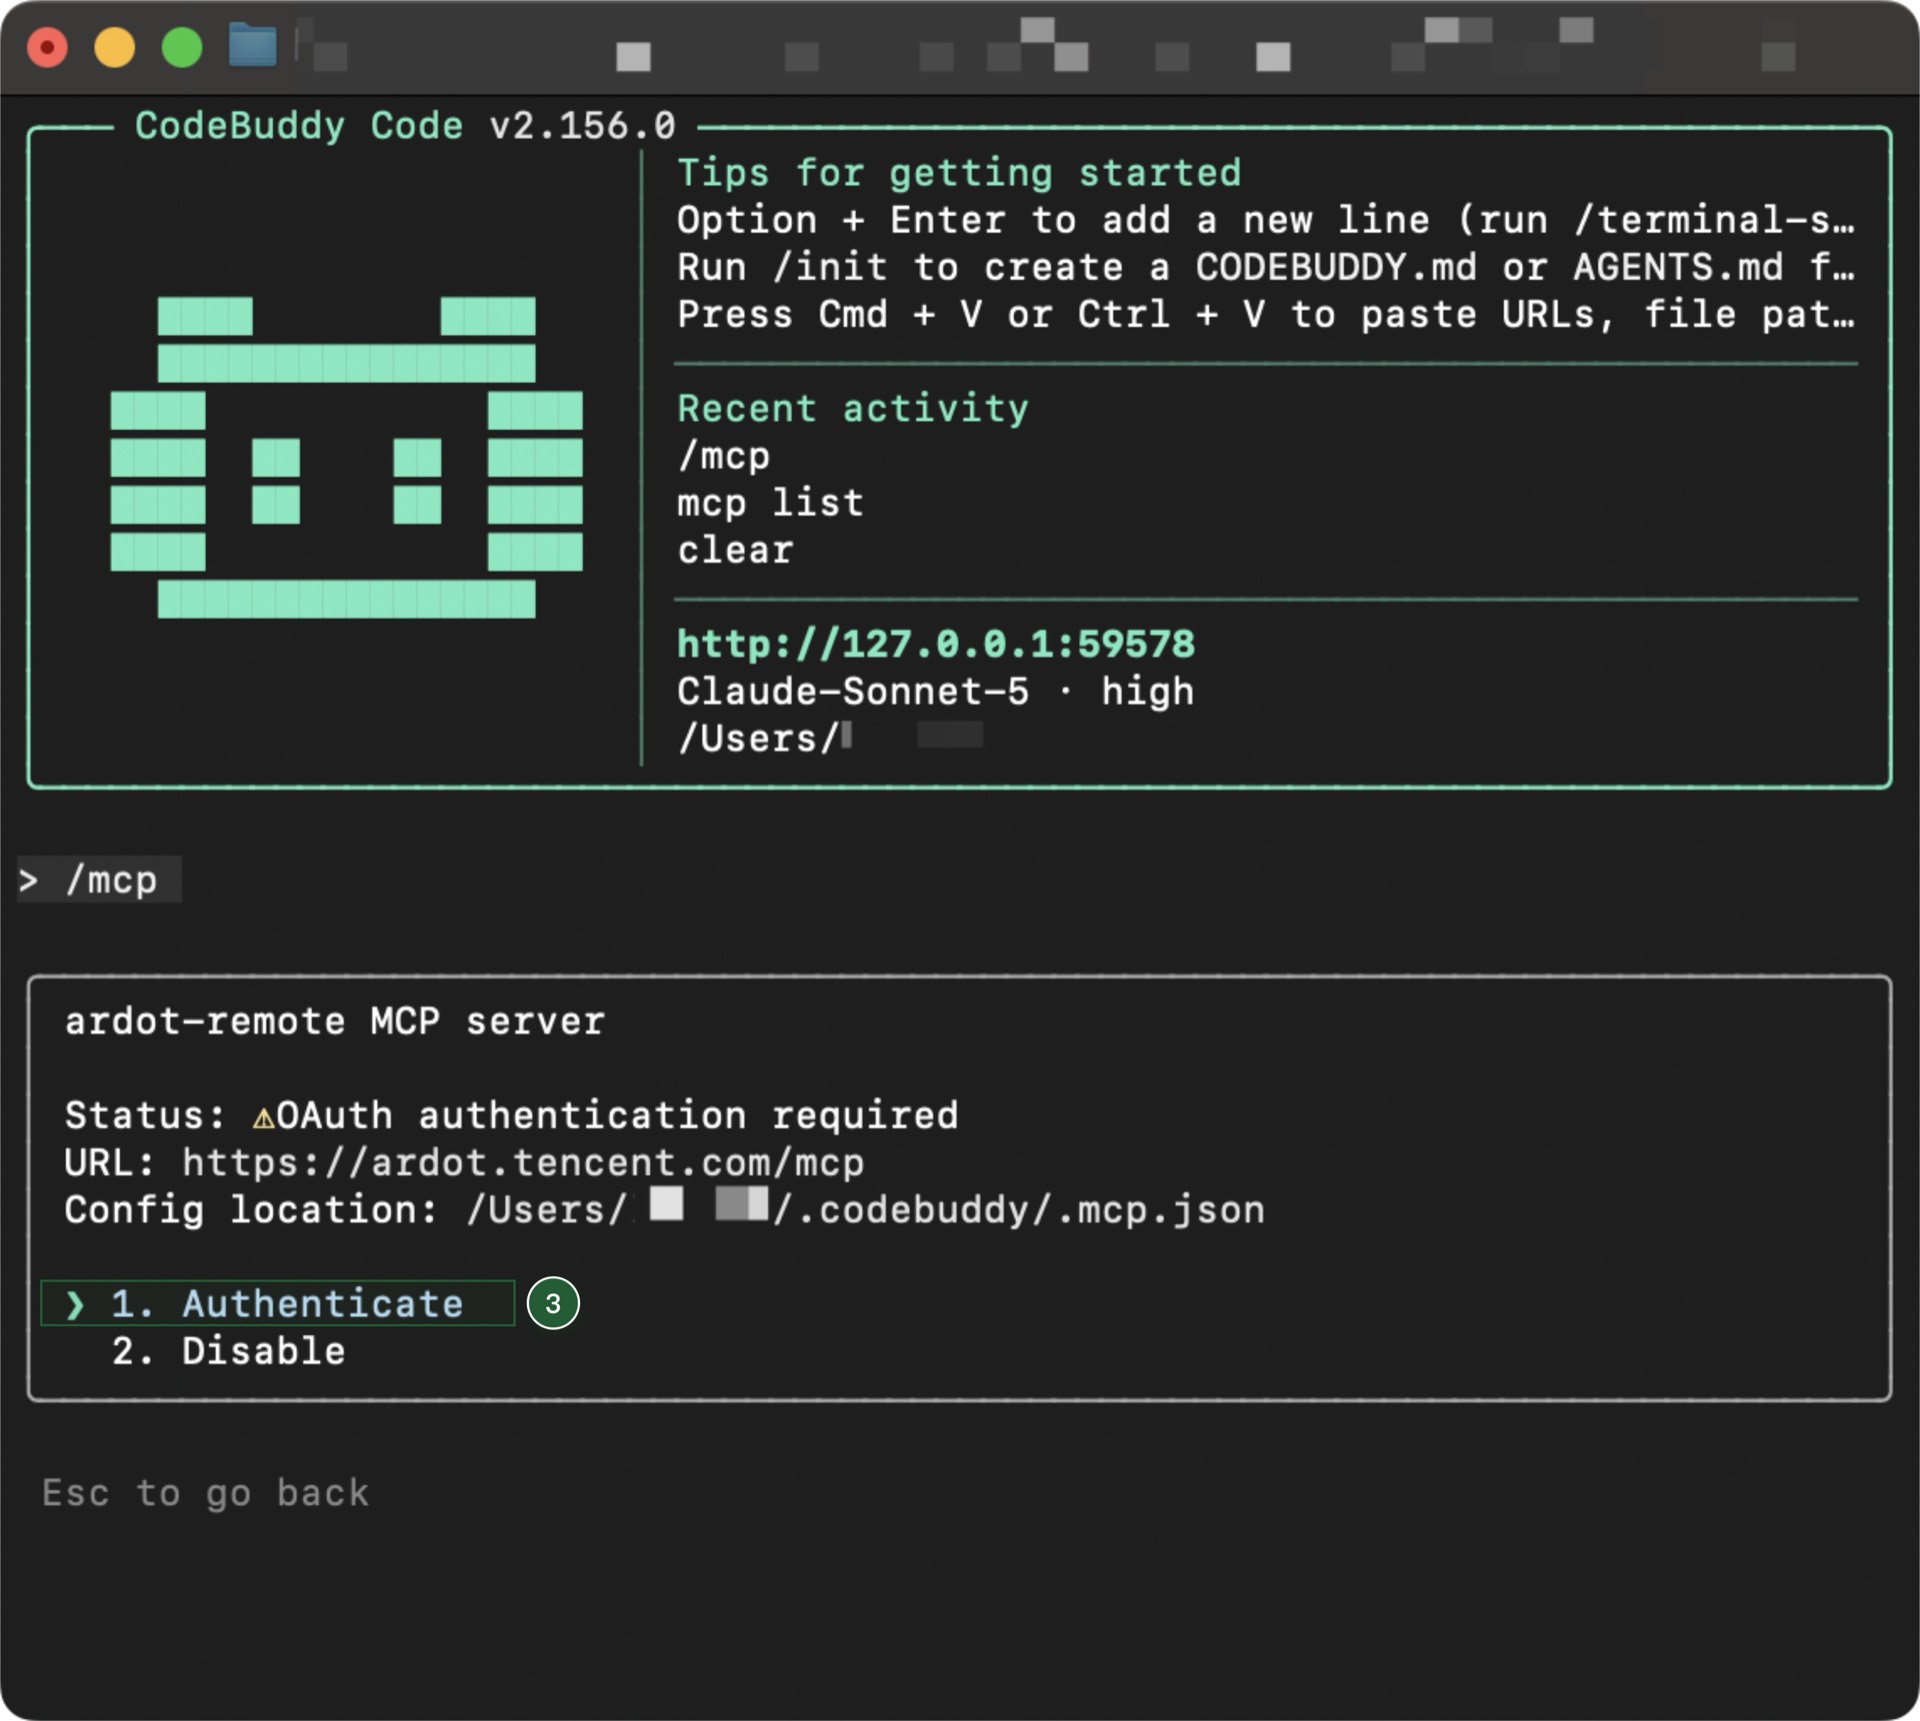
Verify the connection: run
codebuddy mcp listto check that the MCP server is connected.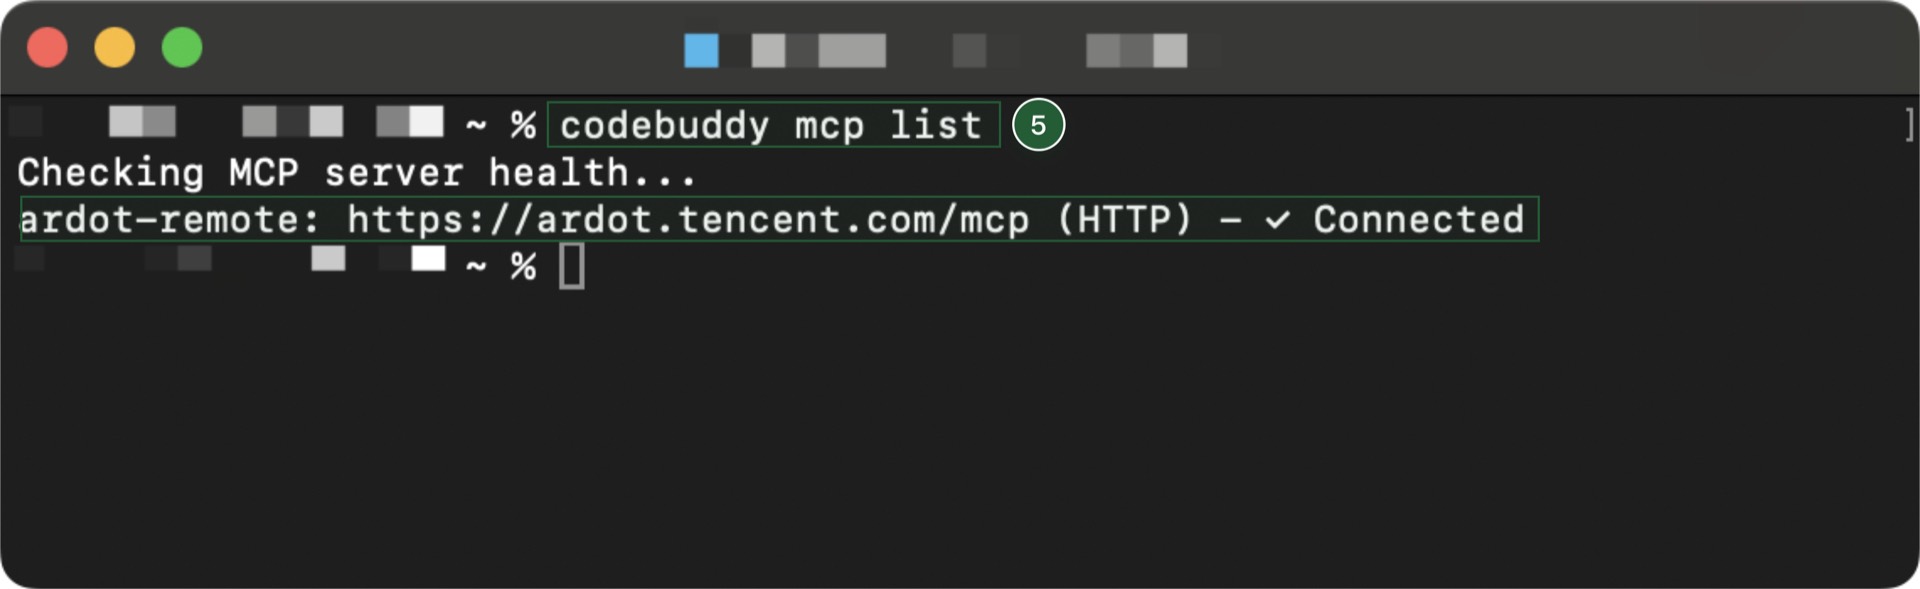
See the CodeBuddy Code docs for more configuration details.
Claude Code
Run the following command in the terminal.
bashclaude mcp add ardot-remote --transport http https://ardot.tencent.com/mcp --scope user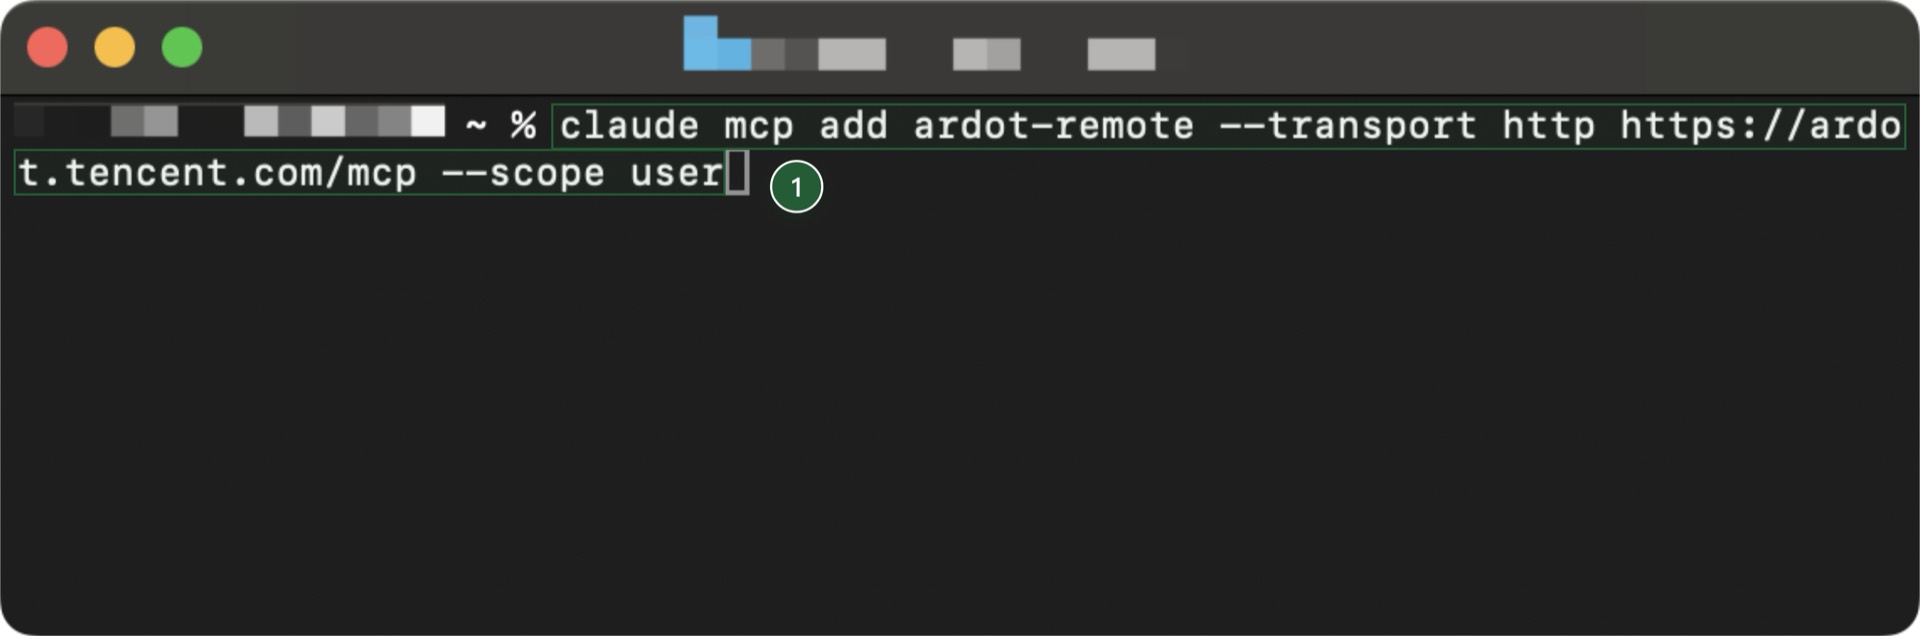
Run
claudeto enter Claude Code, then run/mcp. The newardot-remoteentry appears and shows that authentication is required.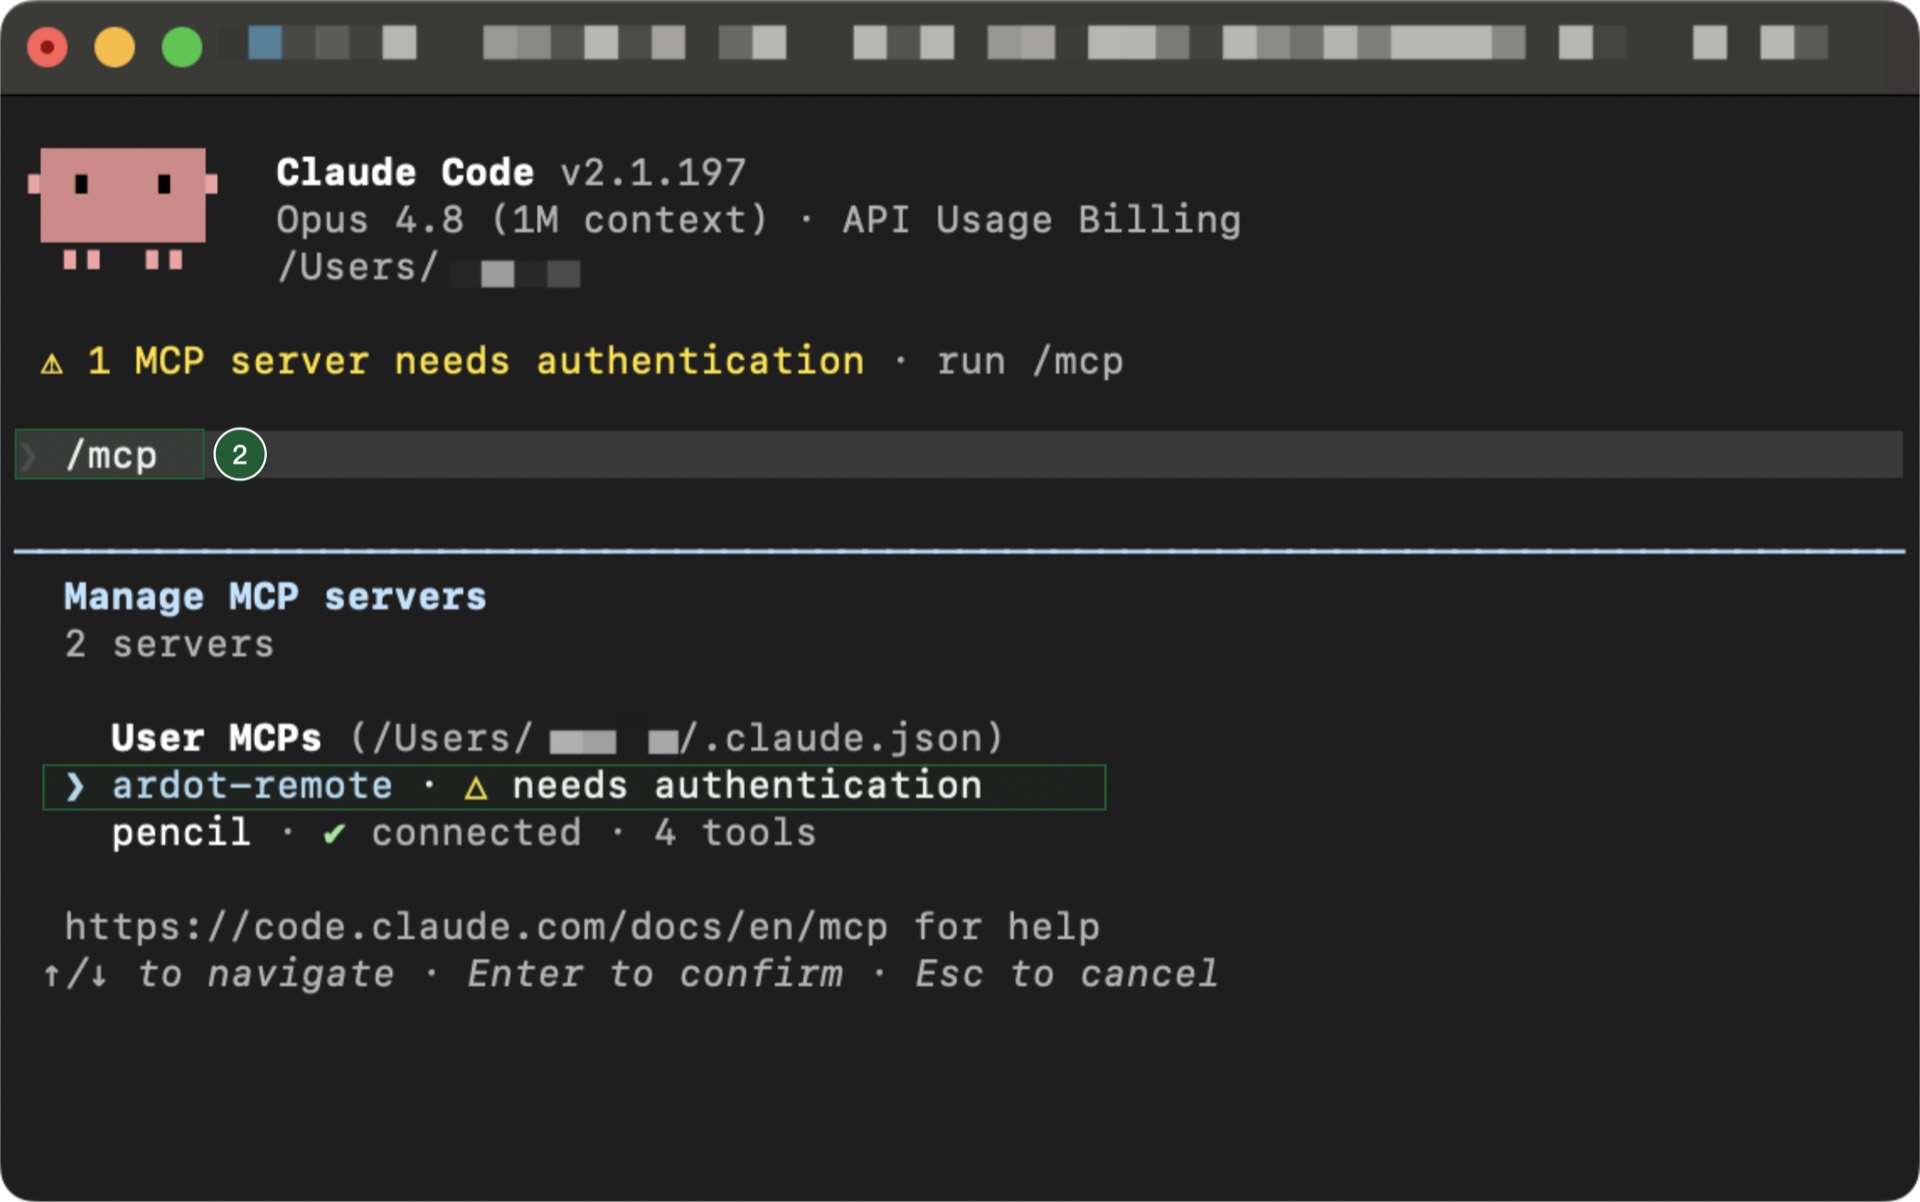
Select the entry and press Enter to open its submenu, choose
Authenticateand press Enter. The authorization page opens in the browser—confirm the account and click Authorize.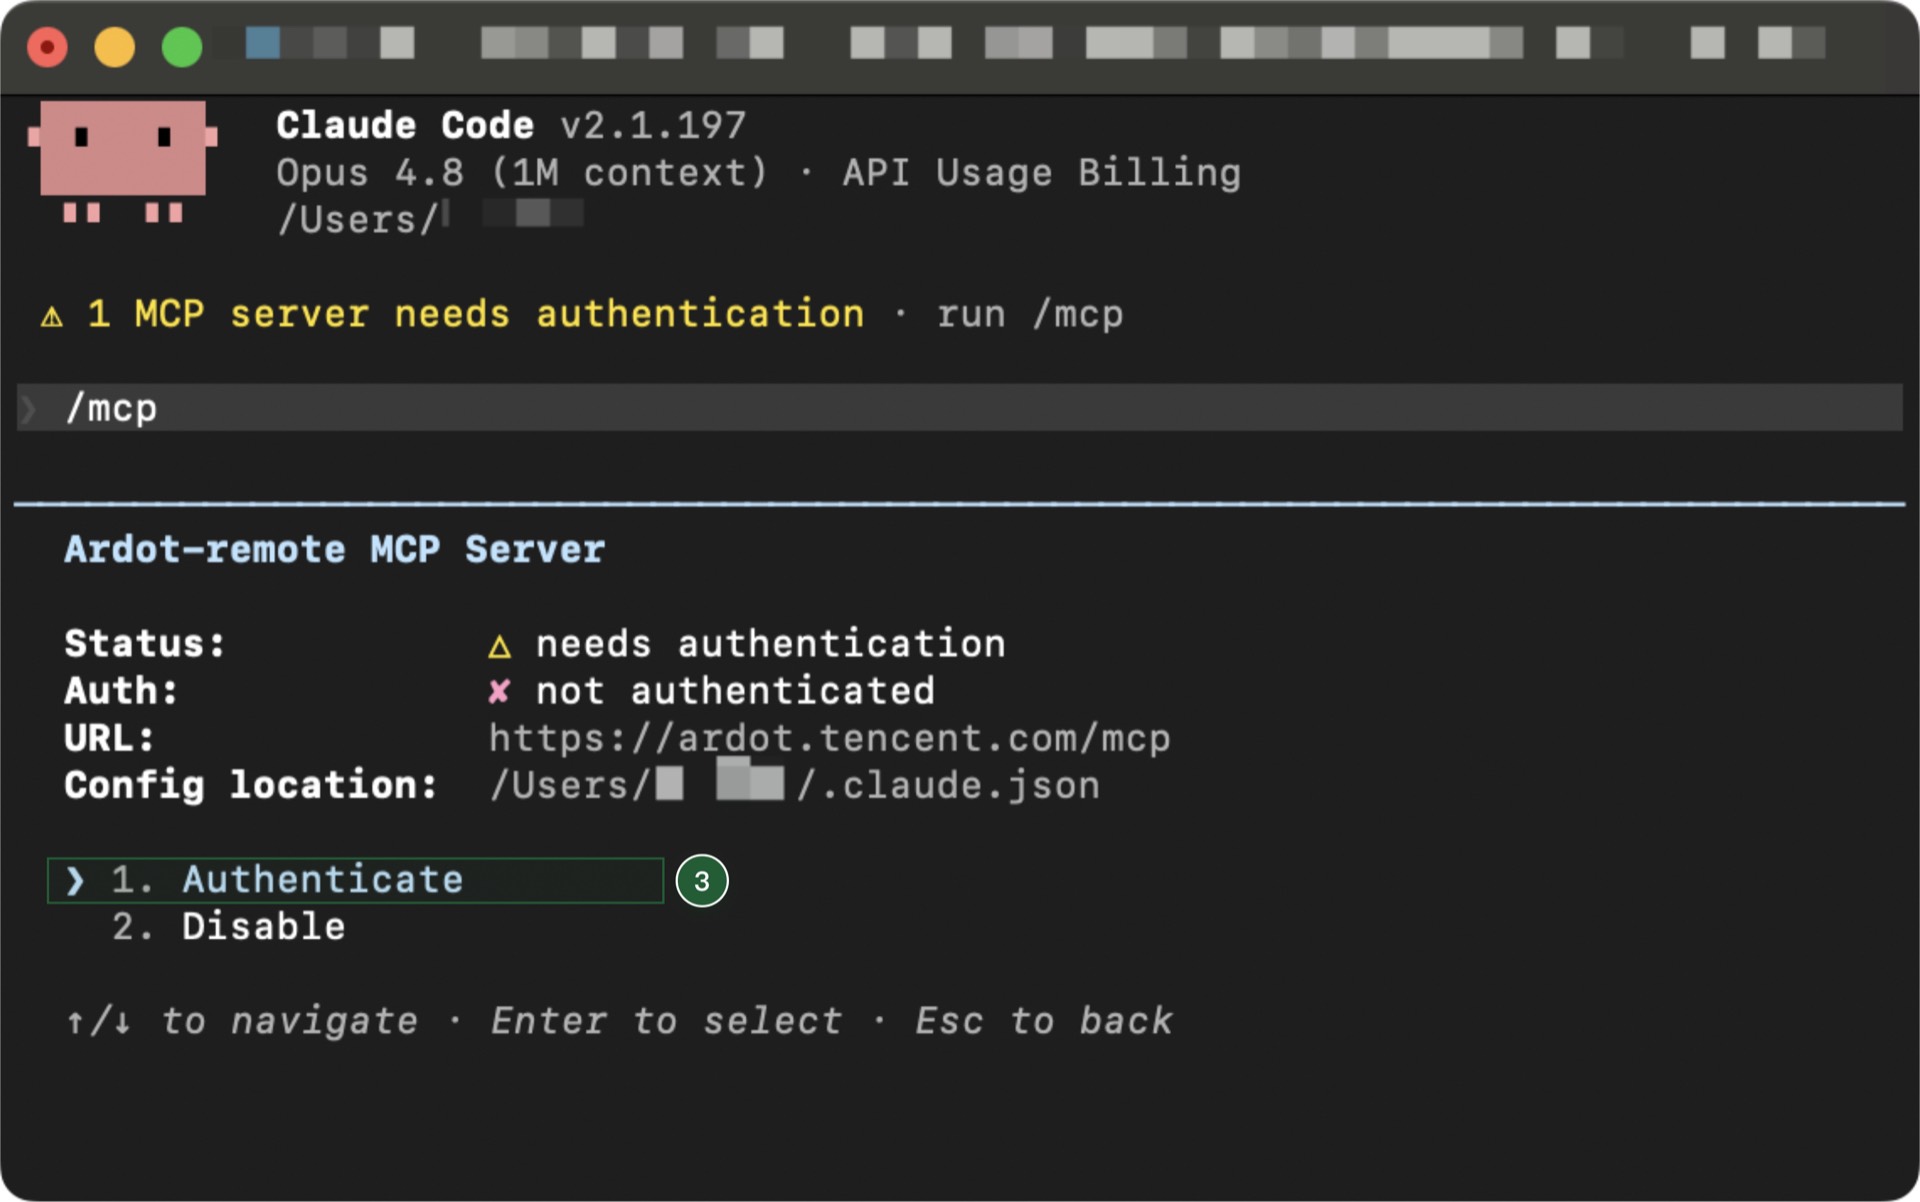
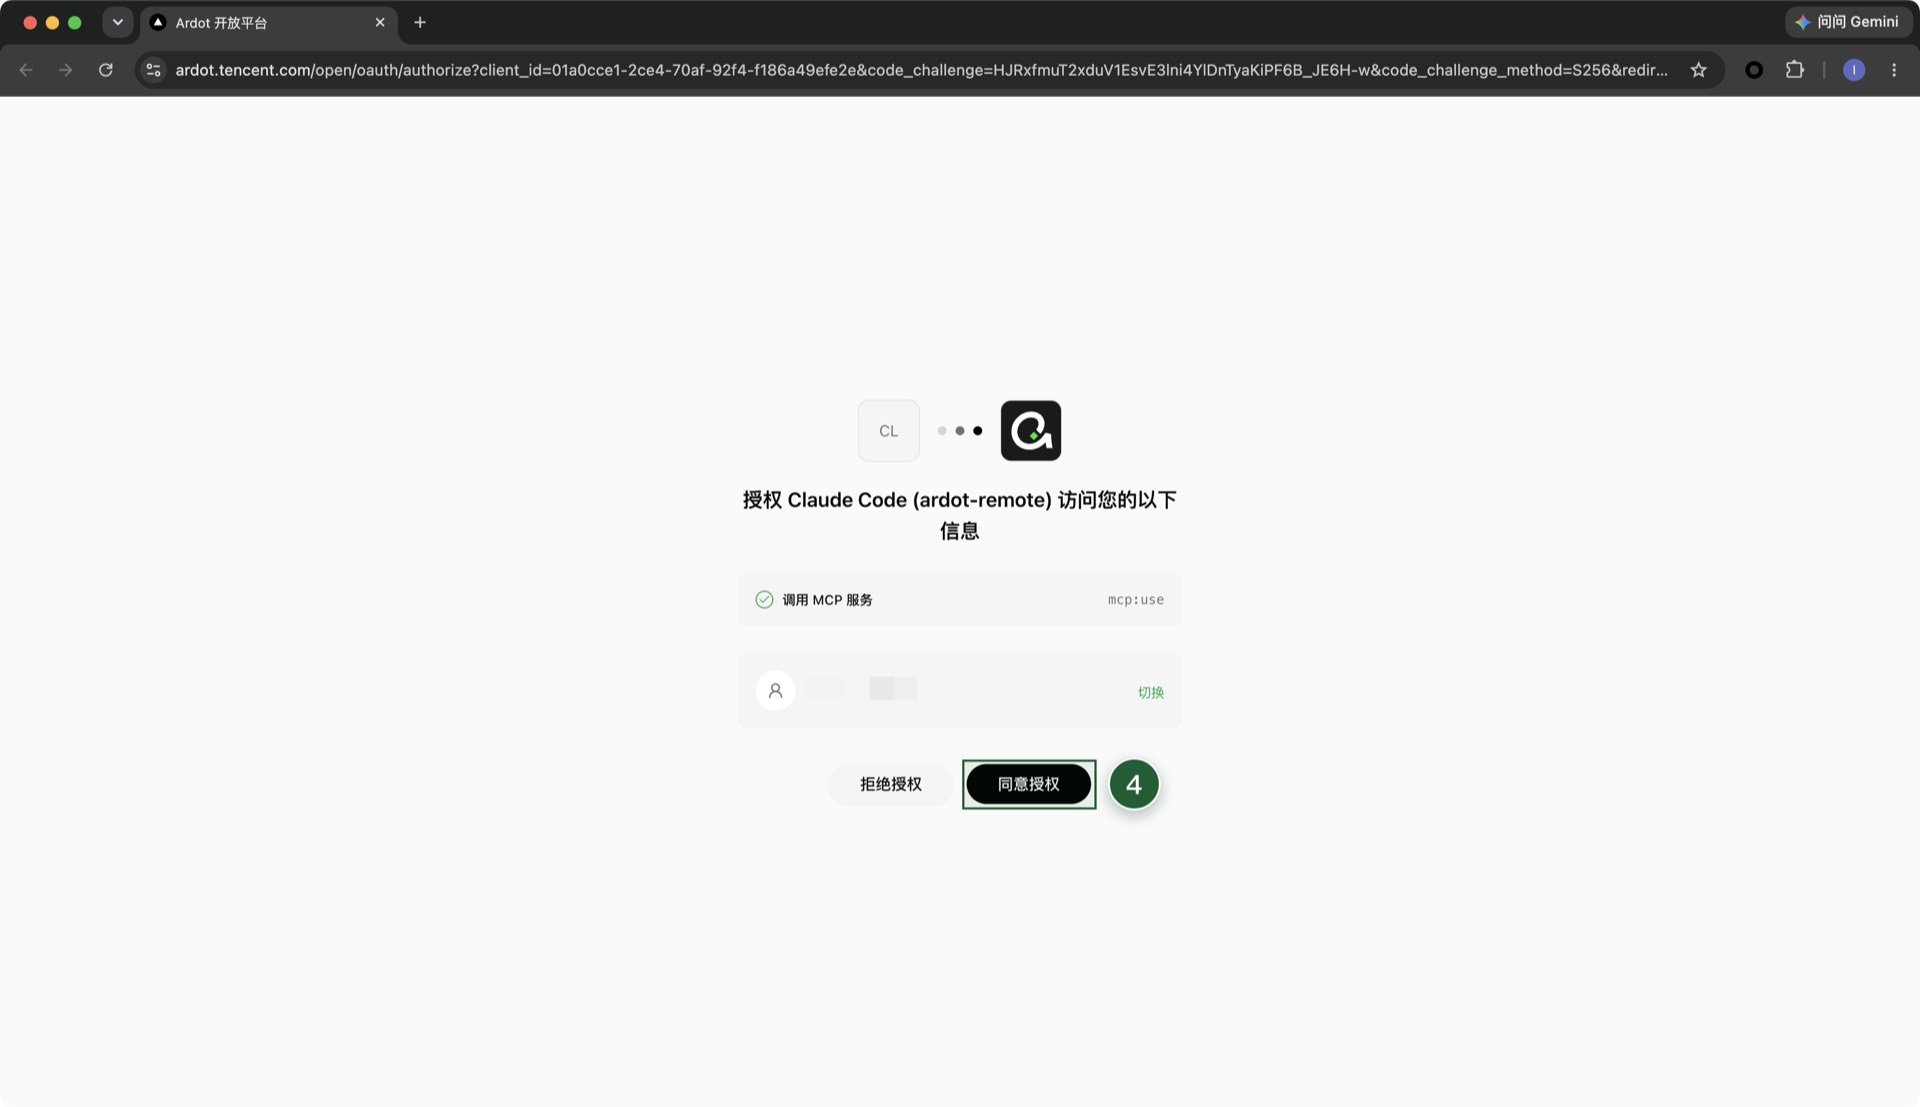
Verify the connection: run
claude mcp listto check that the MCP server is connected.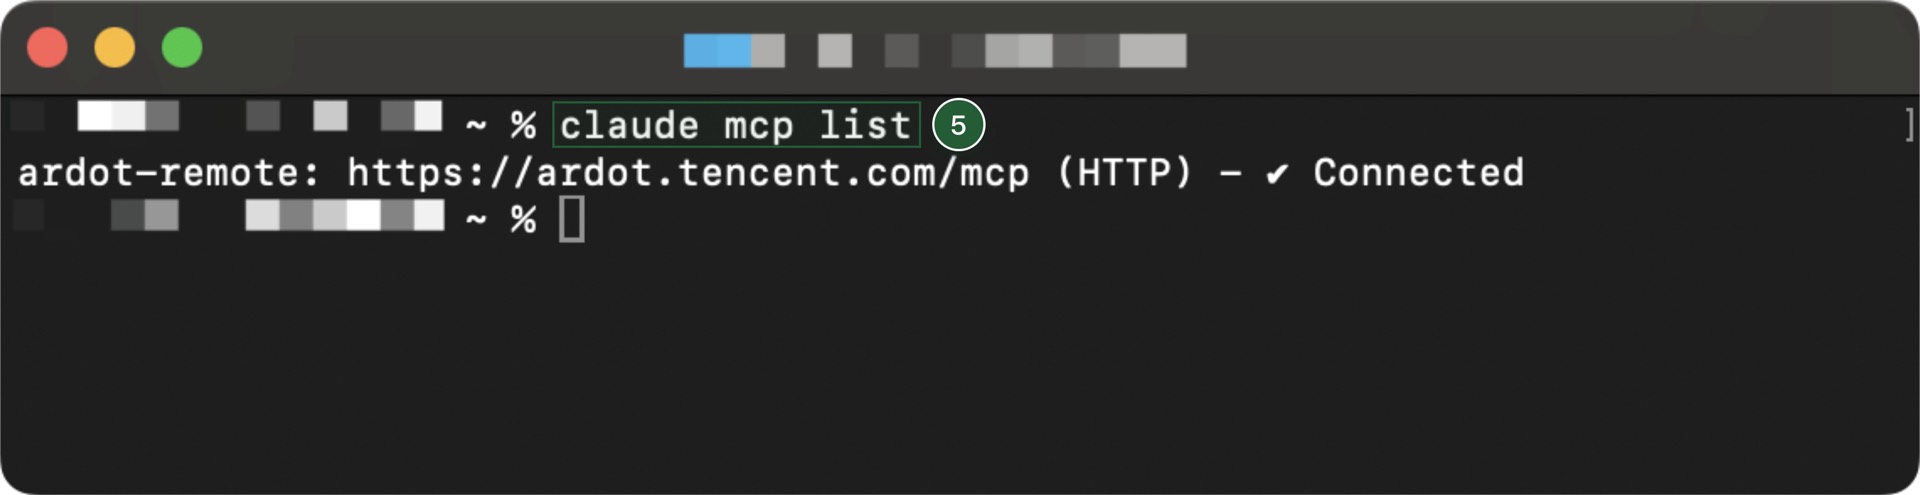
See the Claude Code docs for more configuration details.
Codex CLI
Run the following command in the terminal.
bashcodex mcp add ardot-remote --url https://ardot.tencent.com/mcp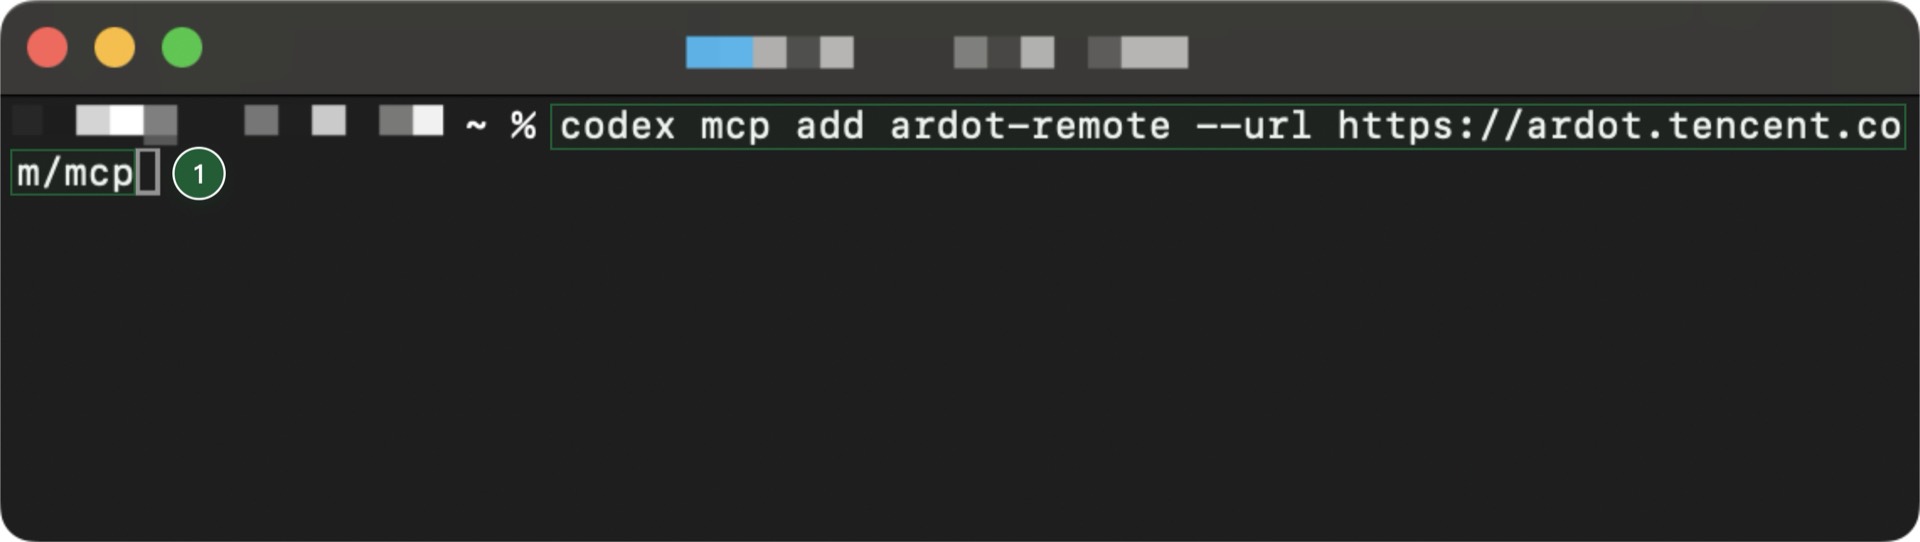
The authorization page opens in the browser. Confirm the account and click Authorize.
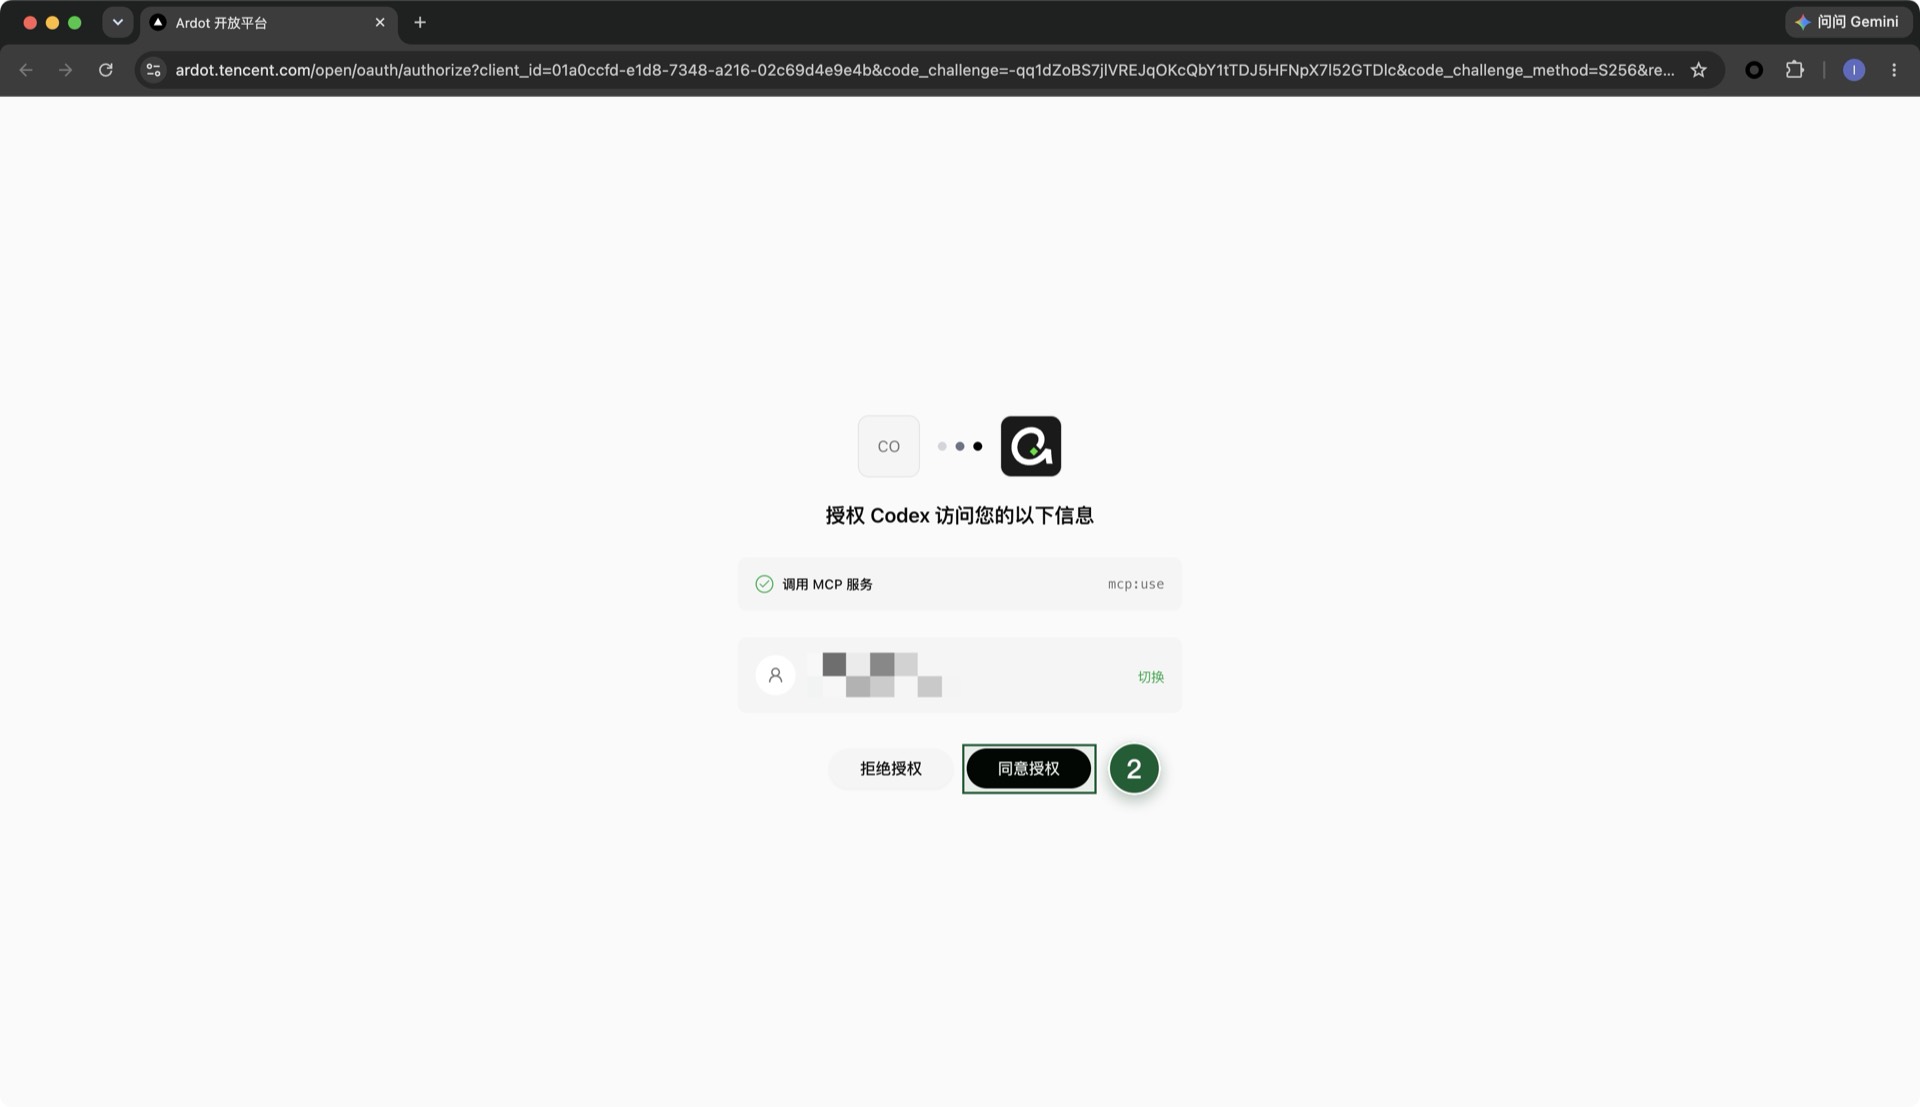
Verify the connection: run
codex mcp list—ardot-remoteshowing as connected means success.
See the Codex CLI docs for more configuration details.
Cursor
Click the Customize menu in the sidebar, select MCPs, then click +New.
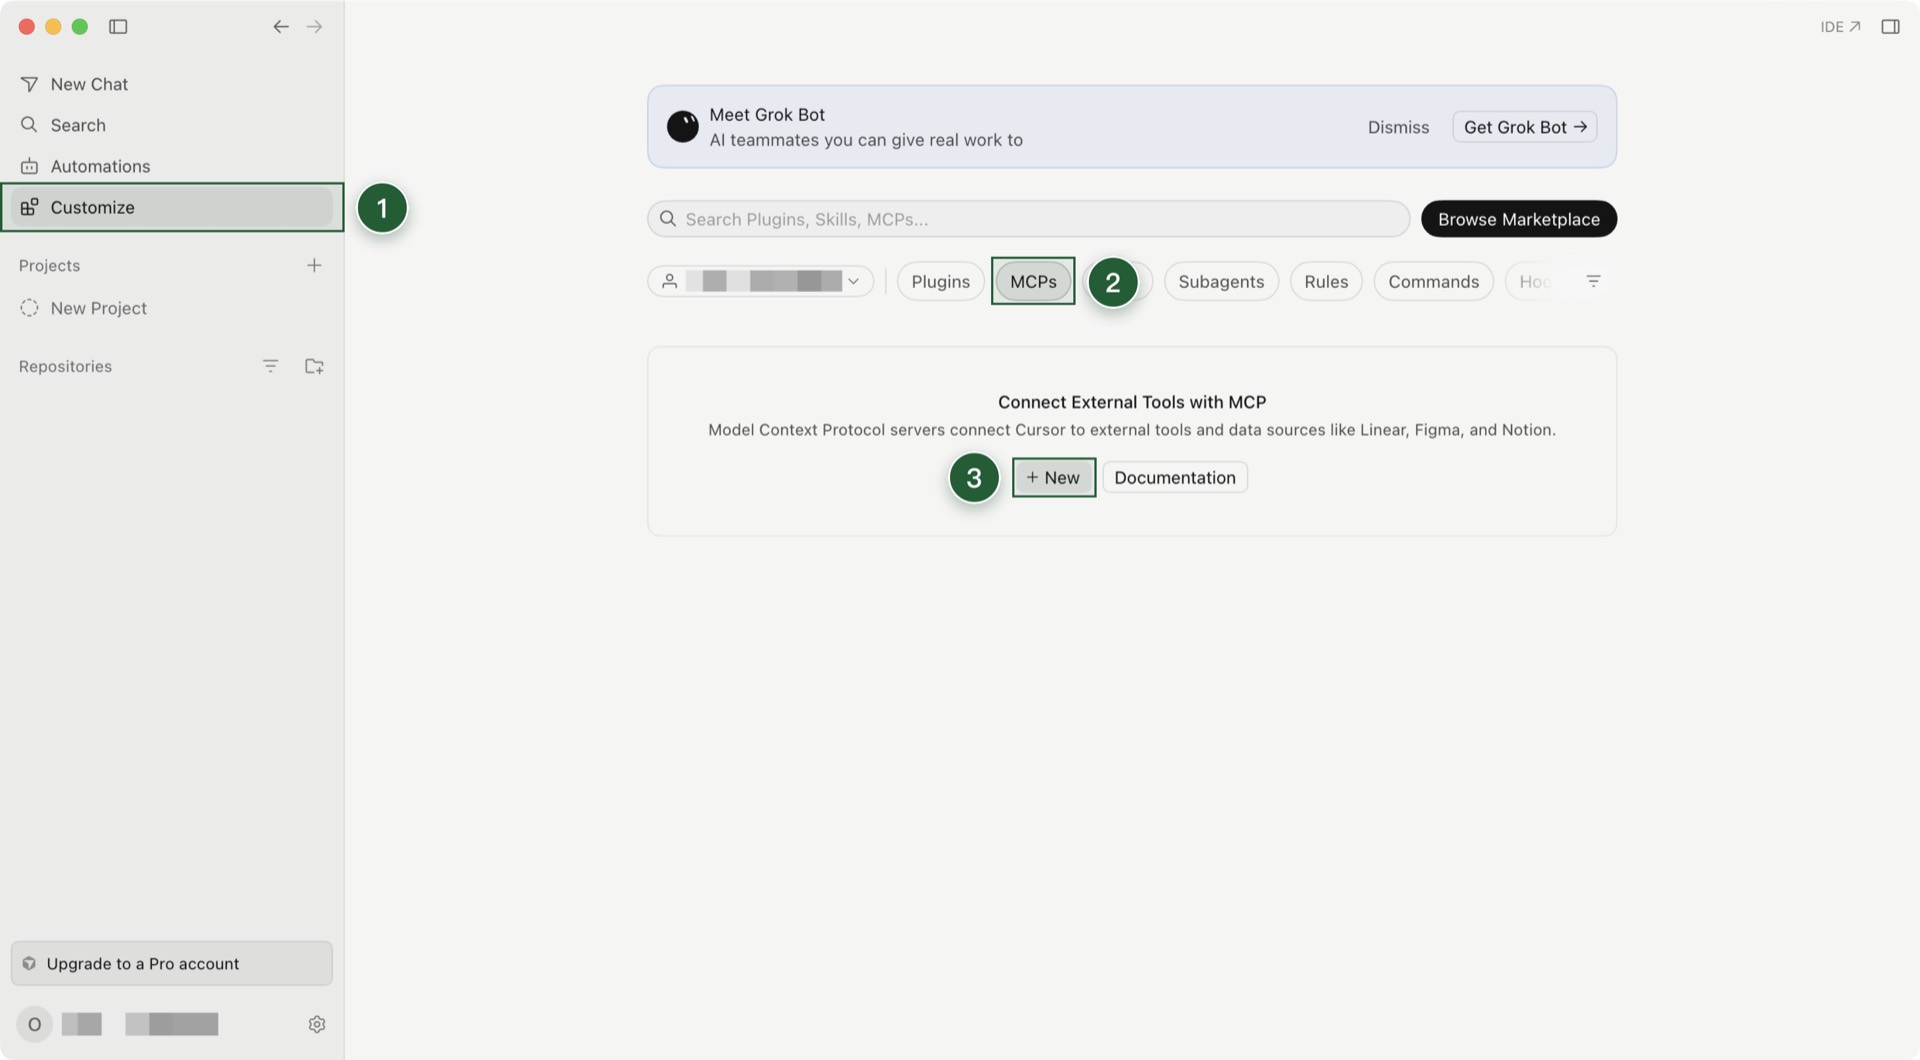
In the
mcp.jsoneditor, add the following insidemcpServers(keep any existing entries), then save.json{ "mcpServers": { "ardot-remote": { "type": "http", "url": "https://ardot.tencent.com/mcp" } } }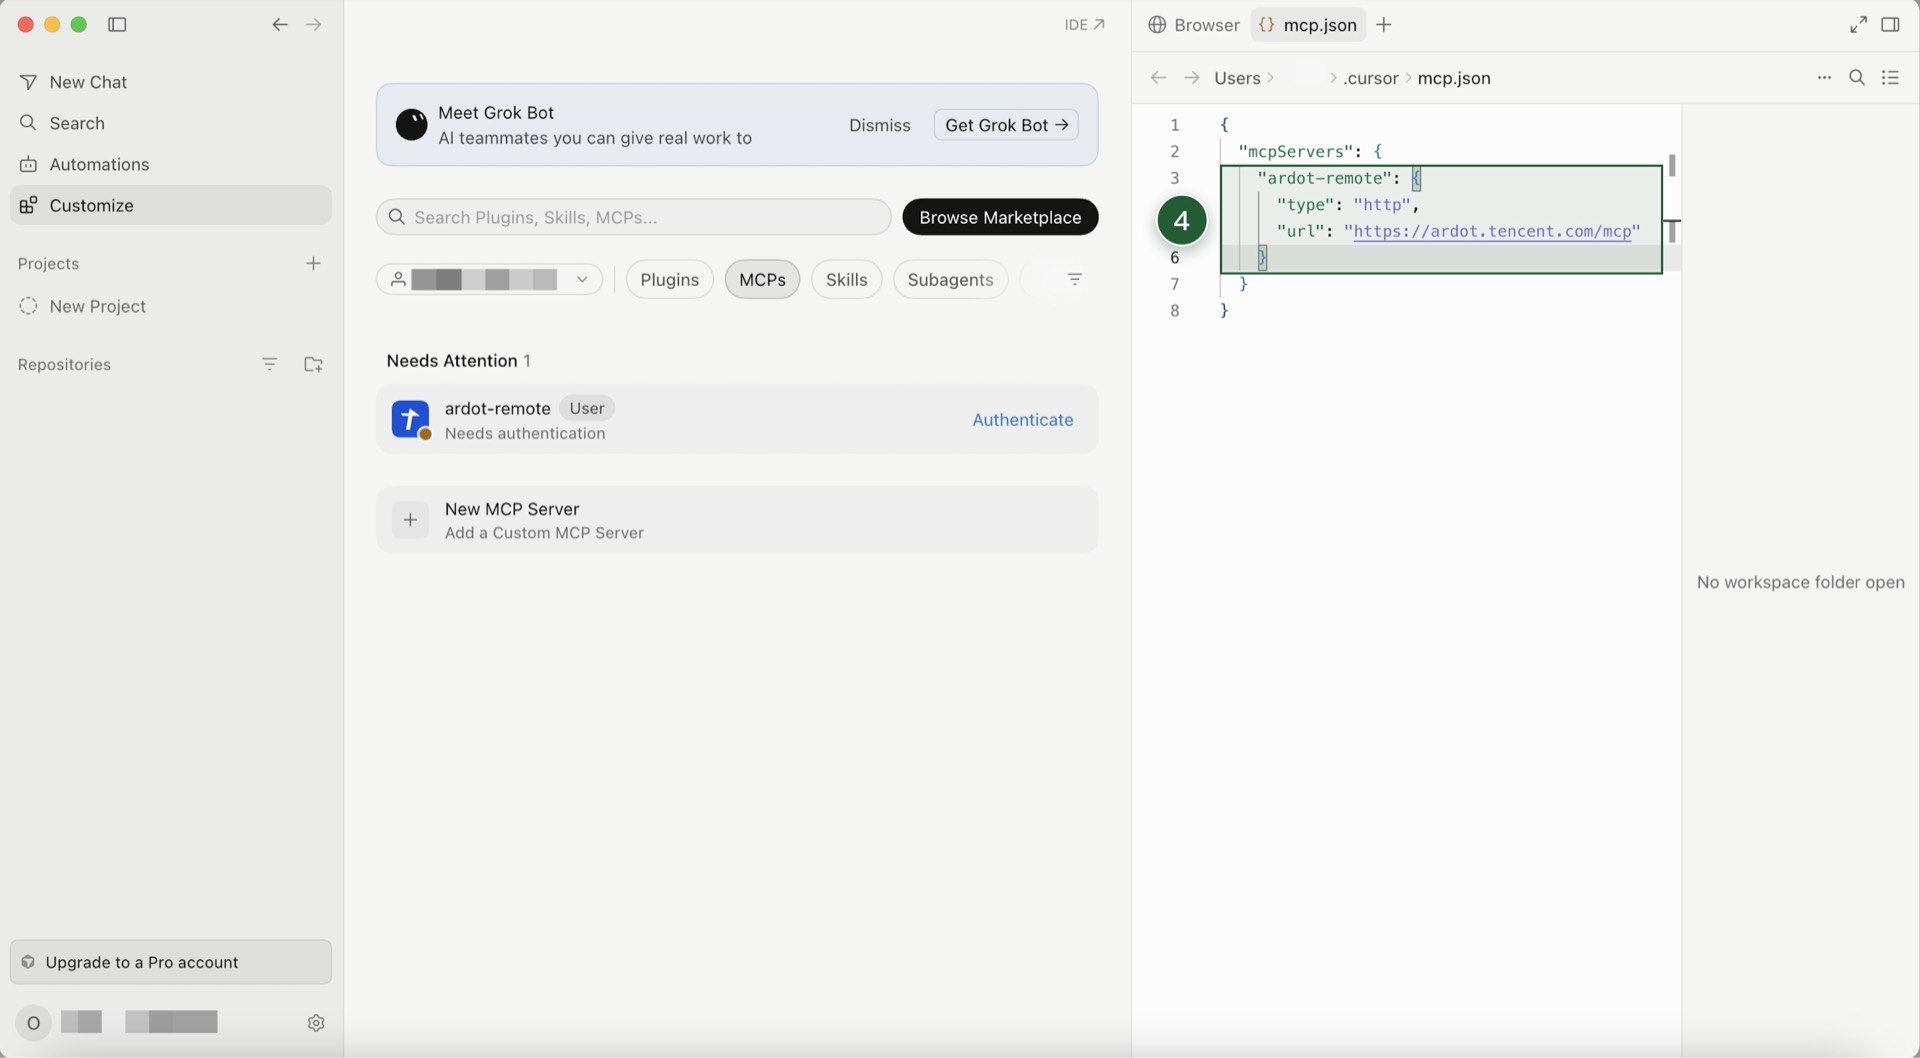
The Ardot authorization page opens in the browser. Confirm the account and click Authorize.
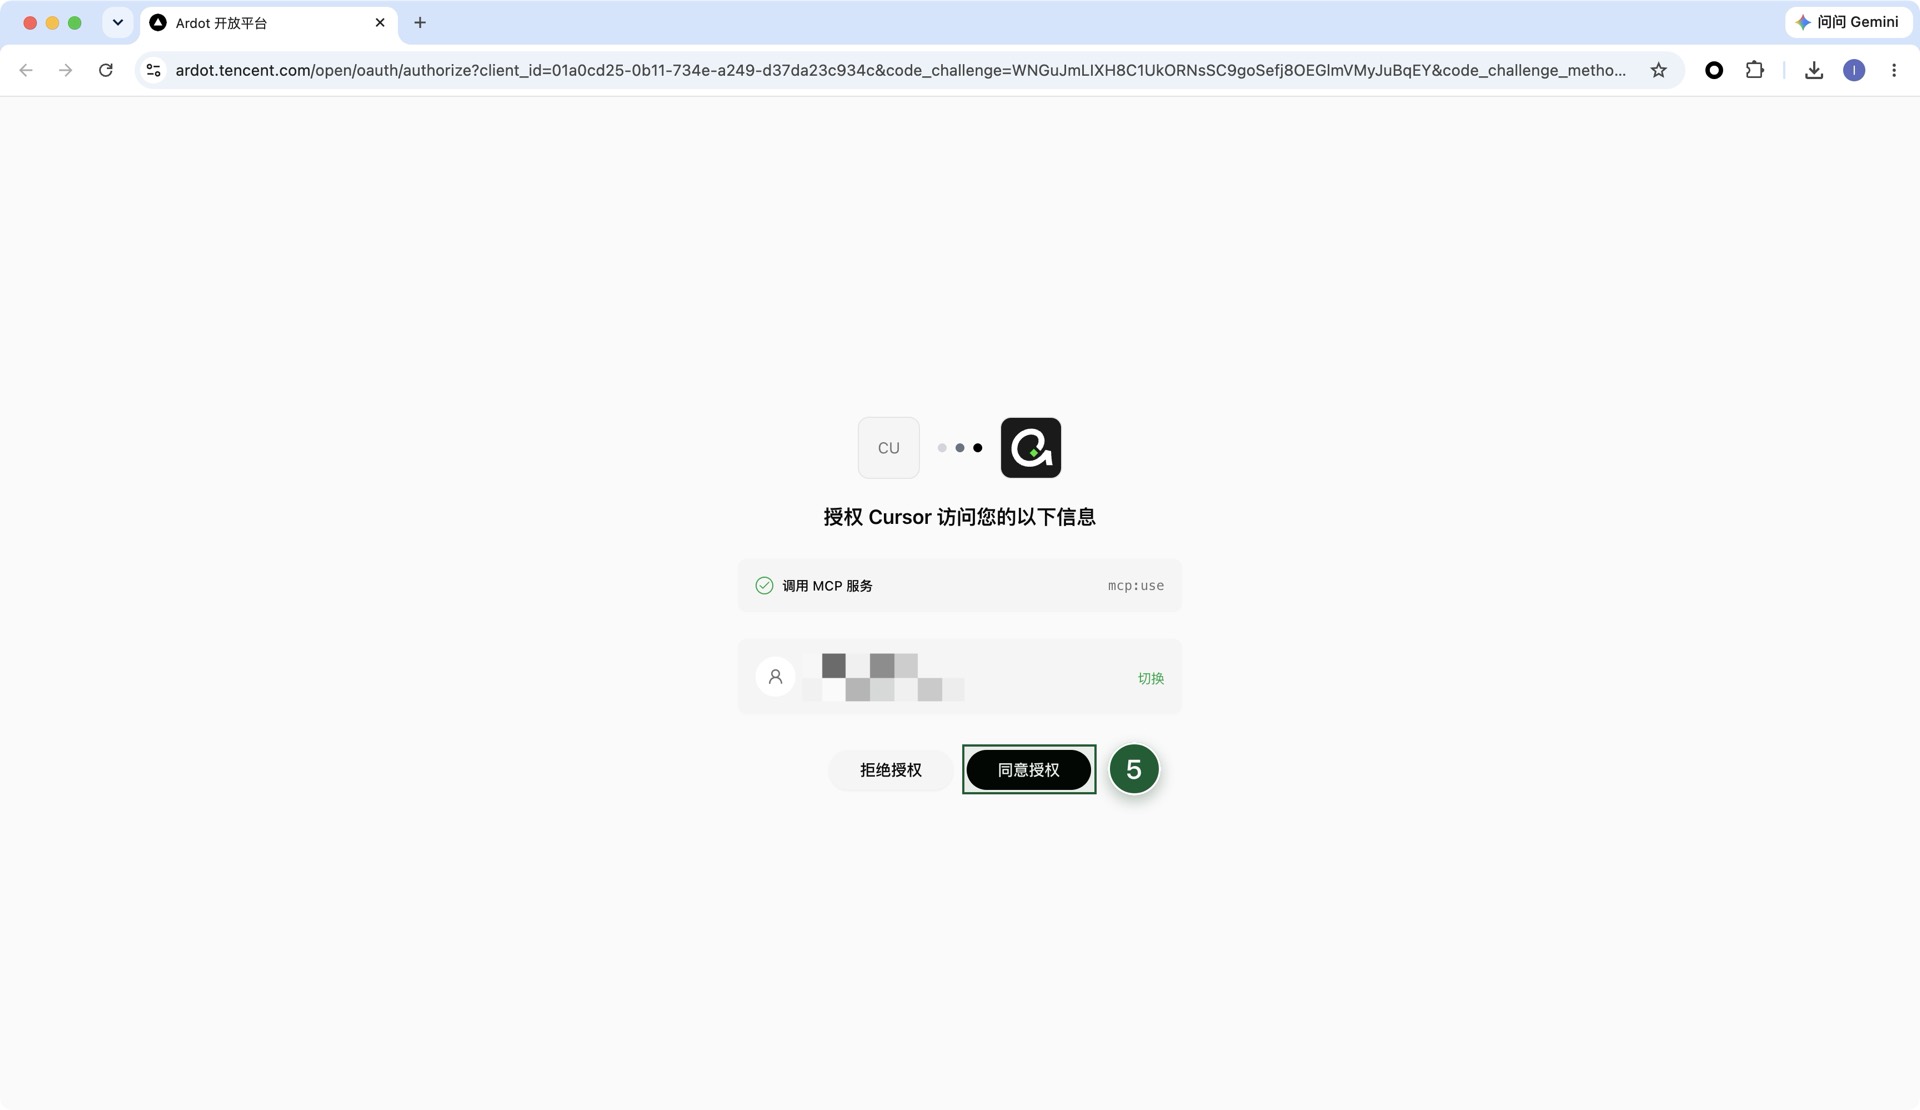
Verify the connection:
ardot-remoteshows as enabled.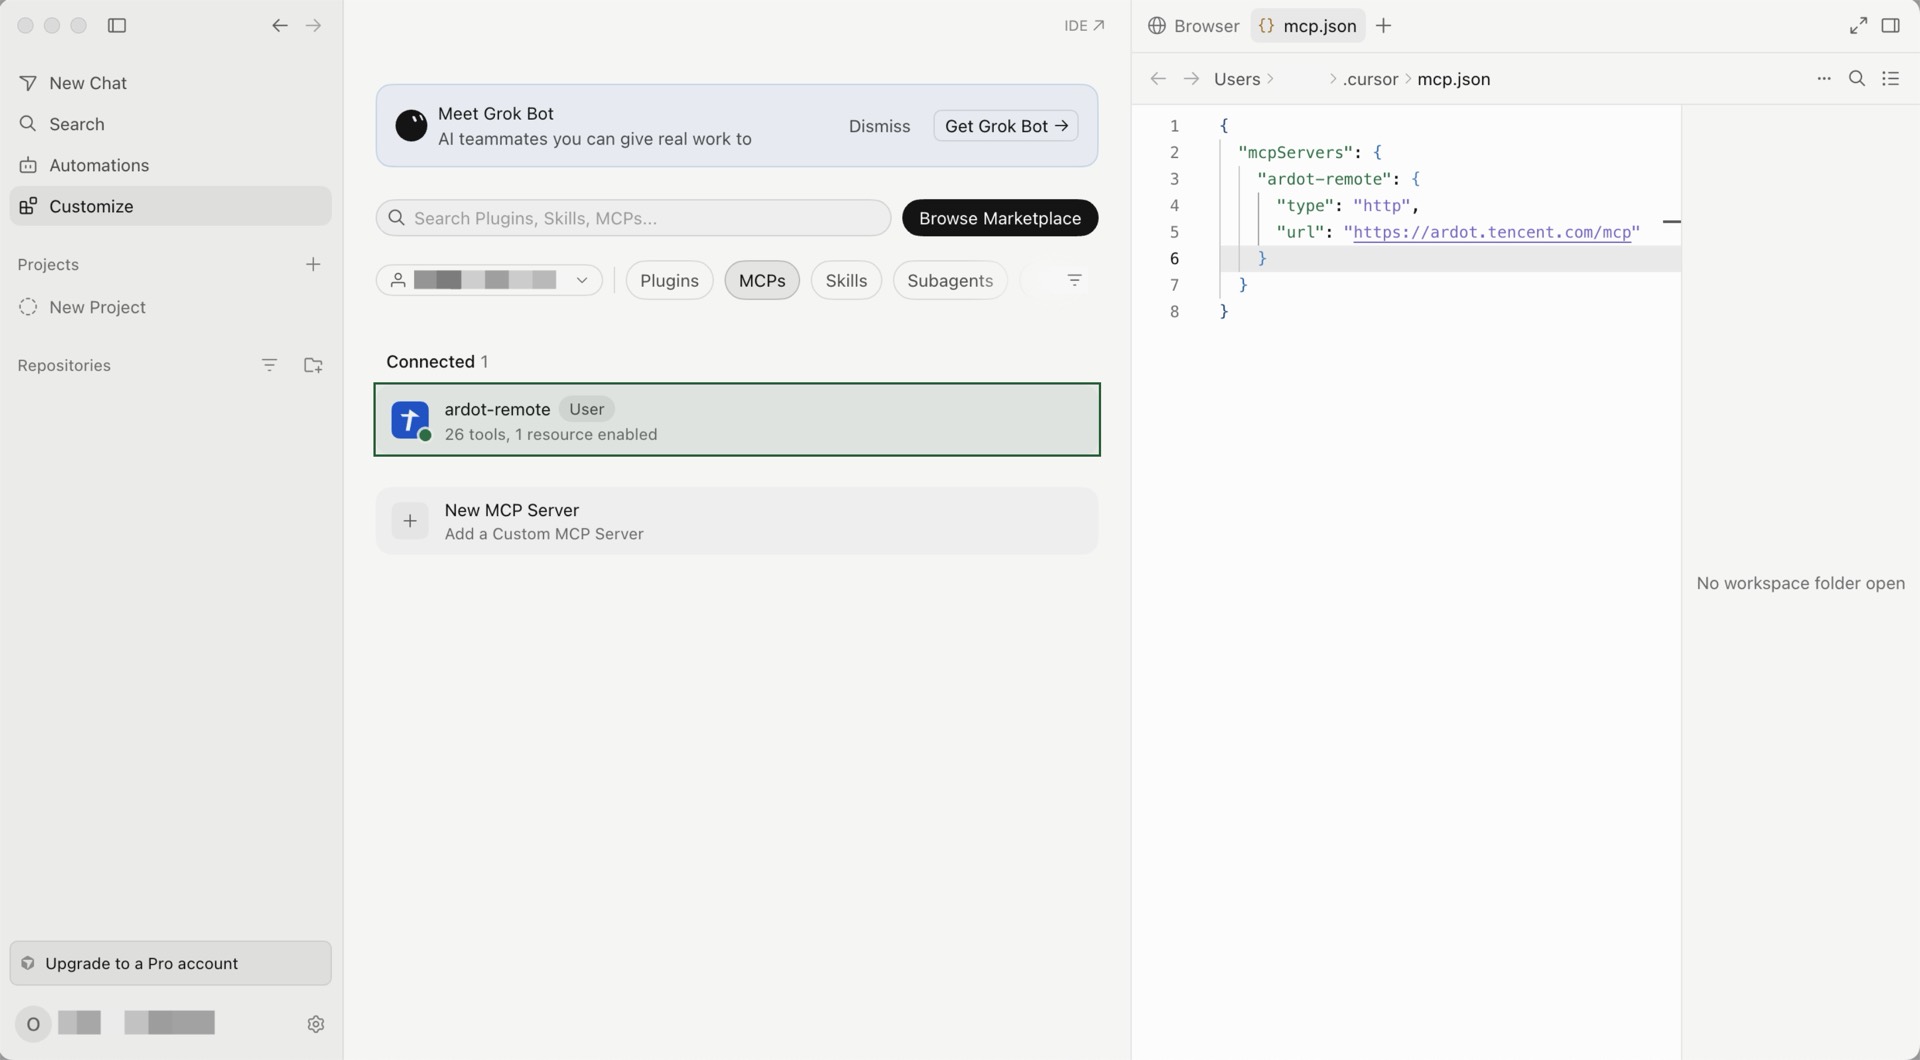
See the Cursor docs for more configuration details.
VS Code
Press Cmd + Shift + P to open the command palette and run
MCP: Add Server.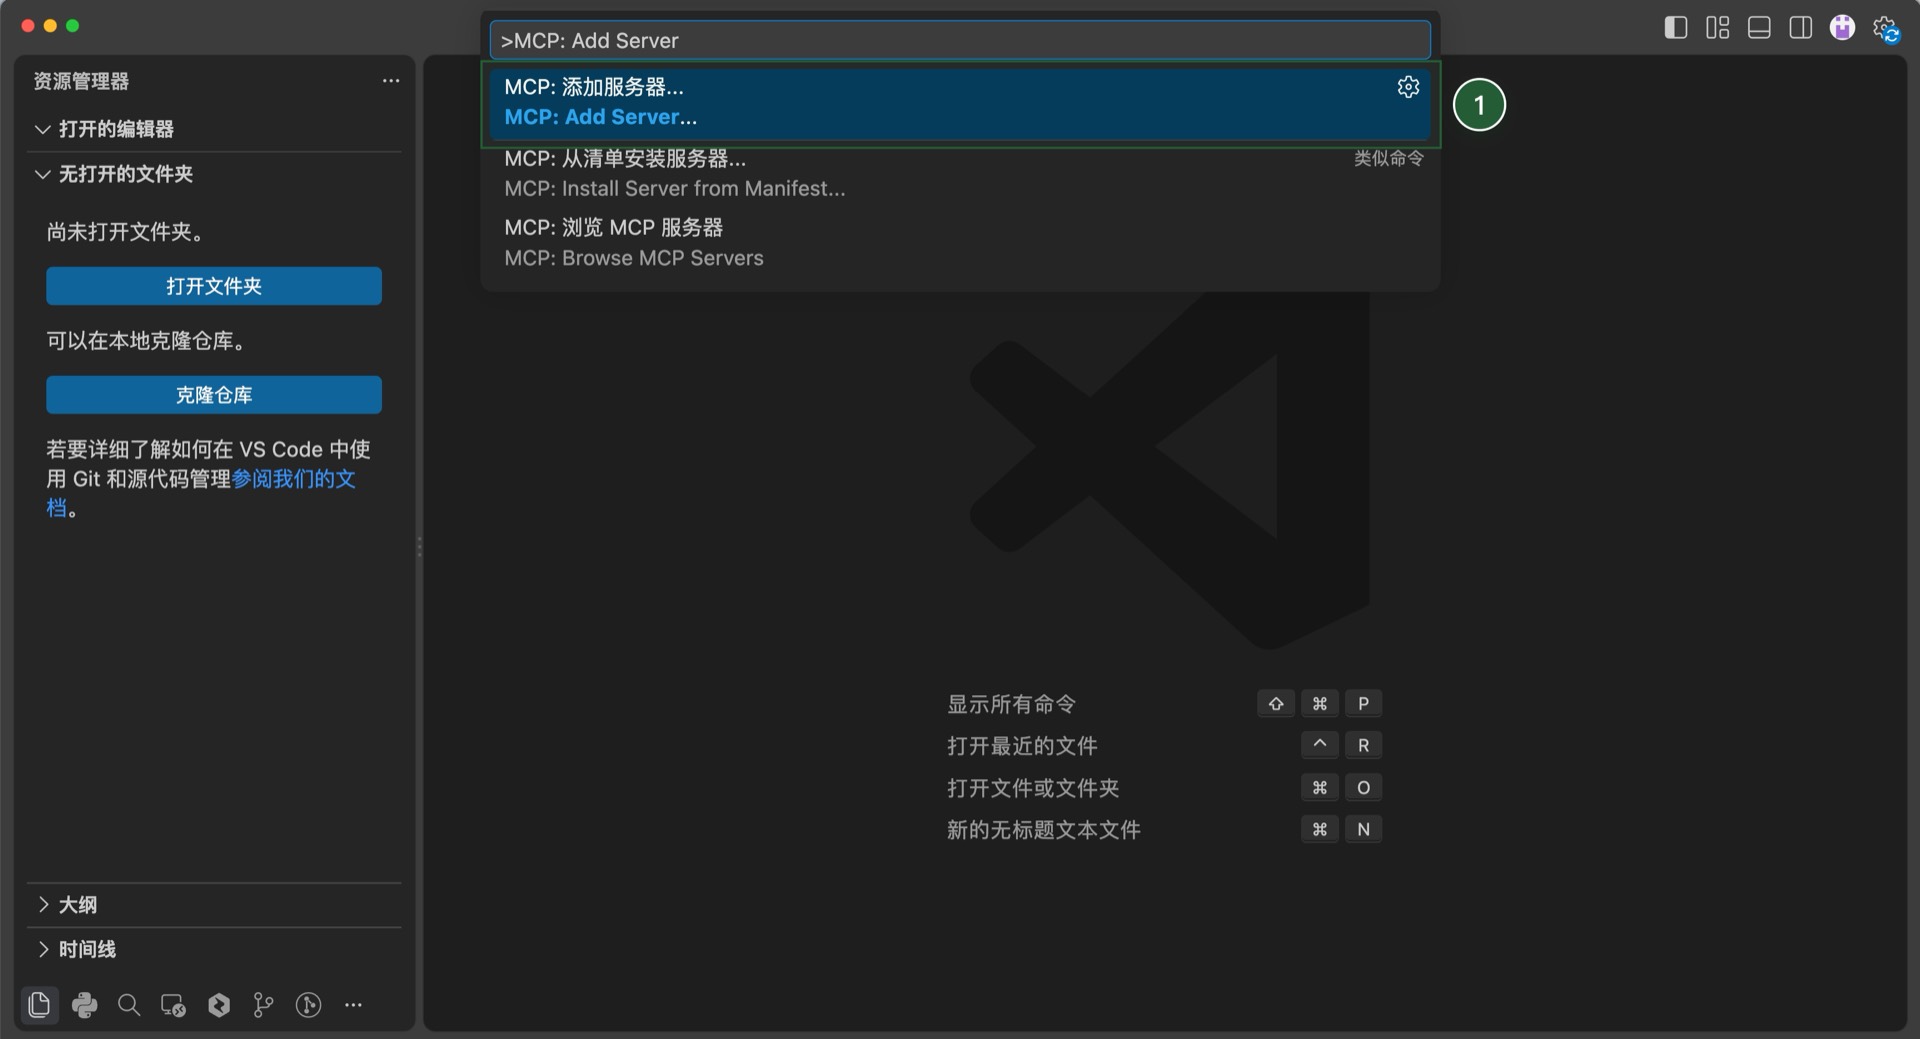
Select HTTP.
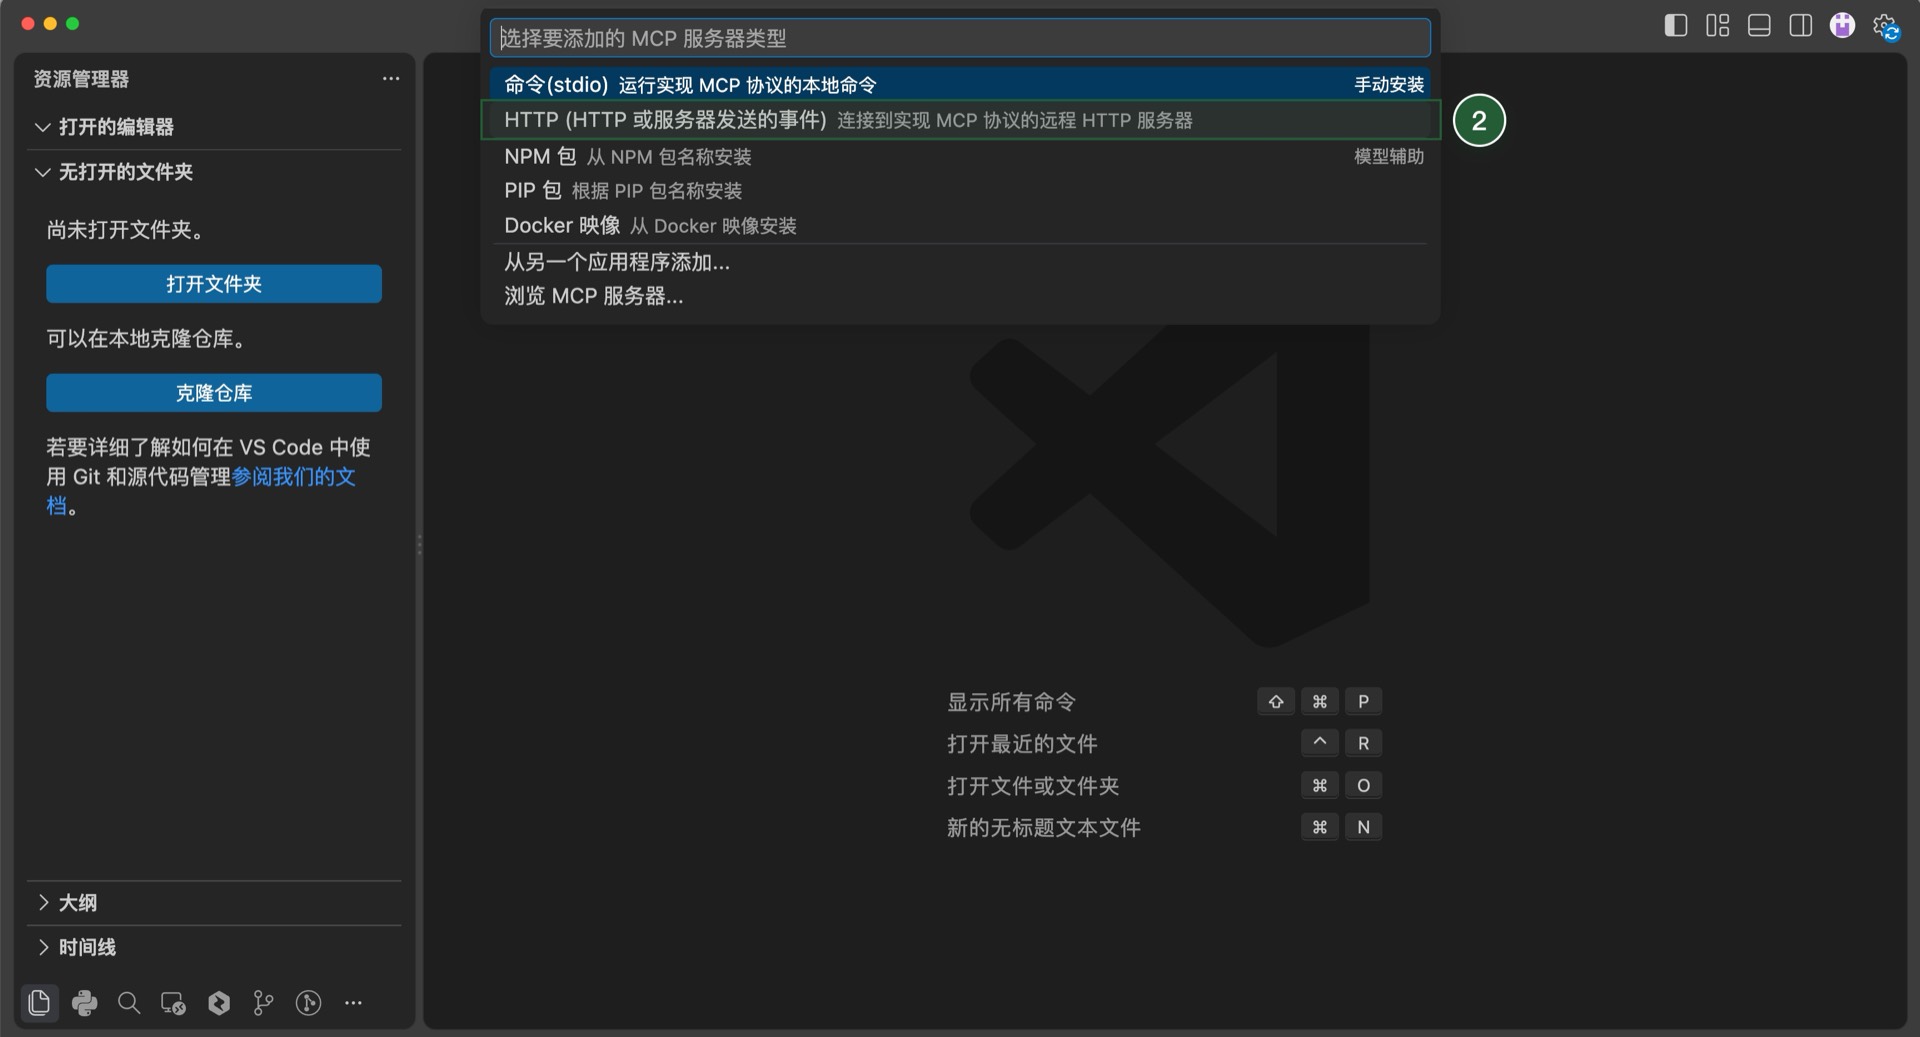
Enter the URL
https://ardot.tencent.com/mcp.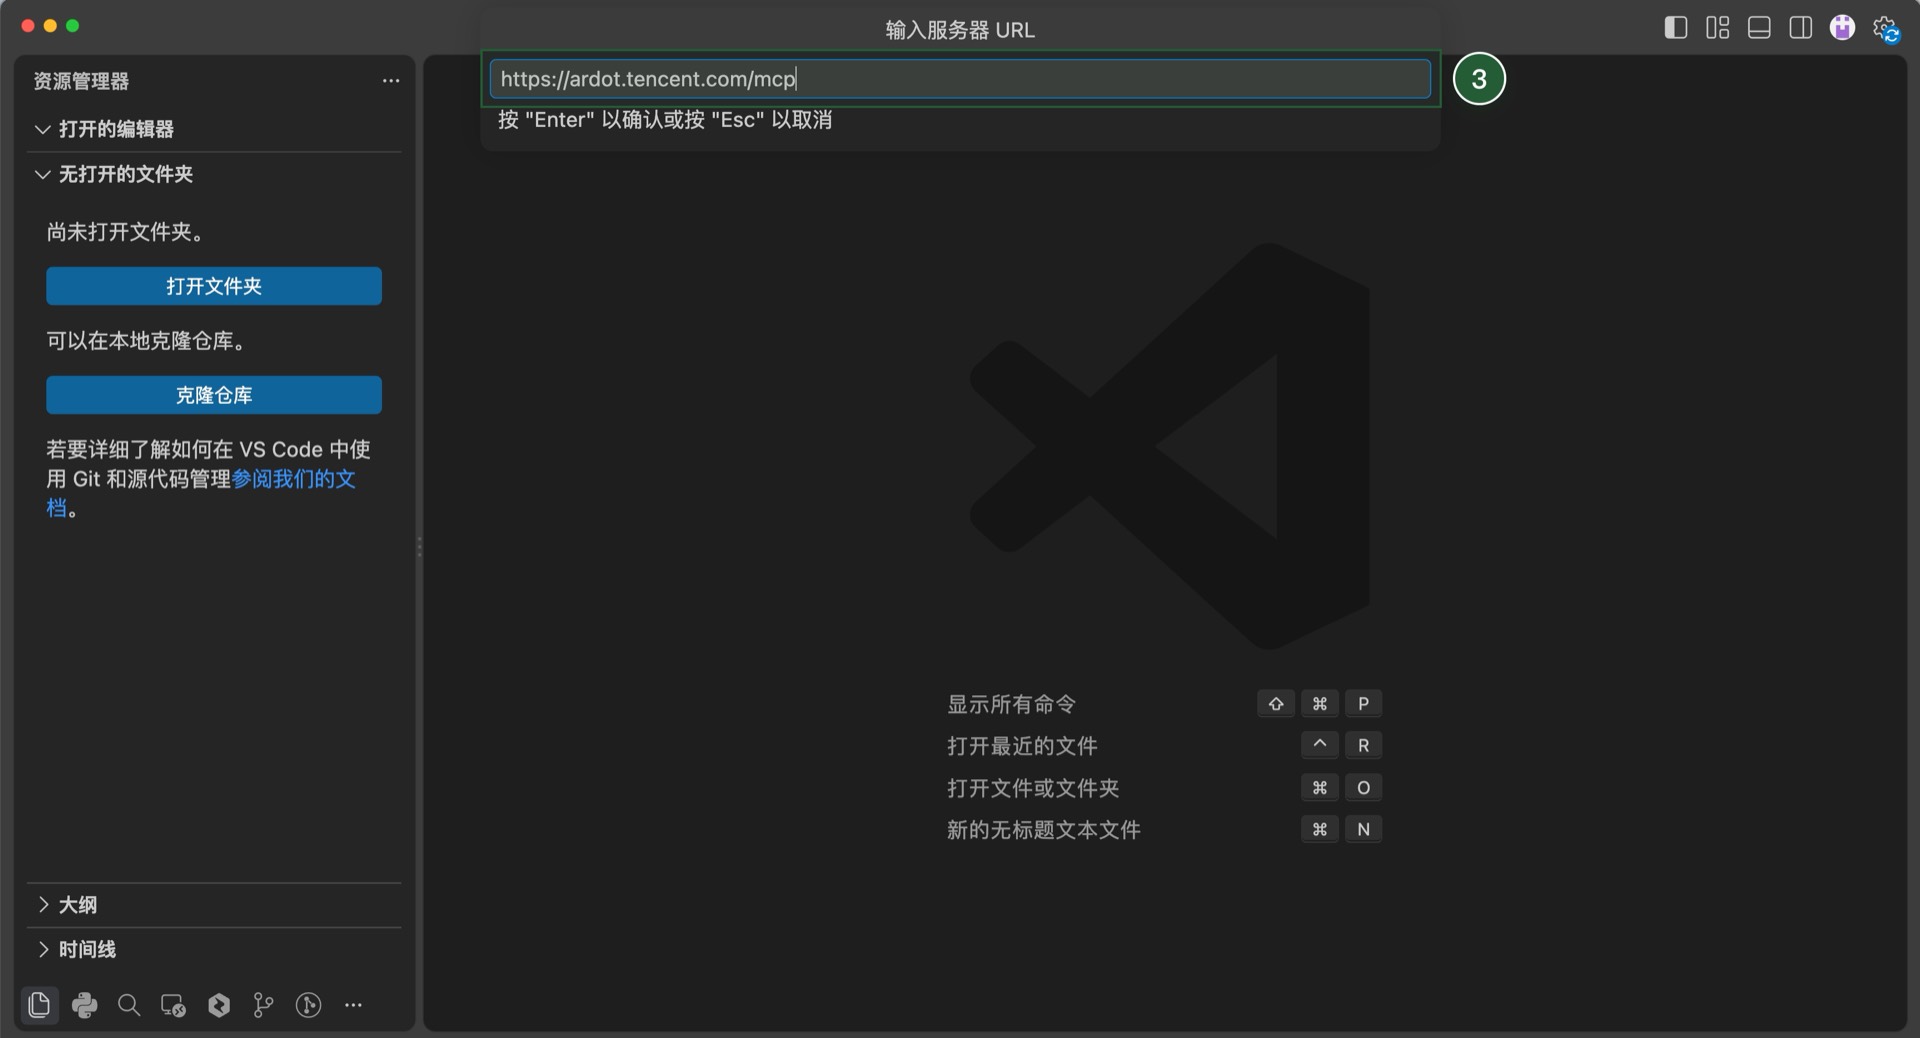
Enter the server name
ardot-remote.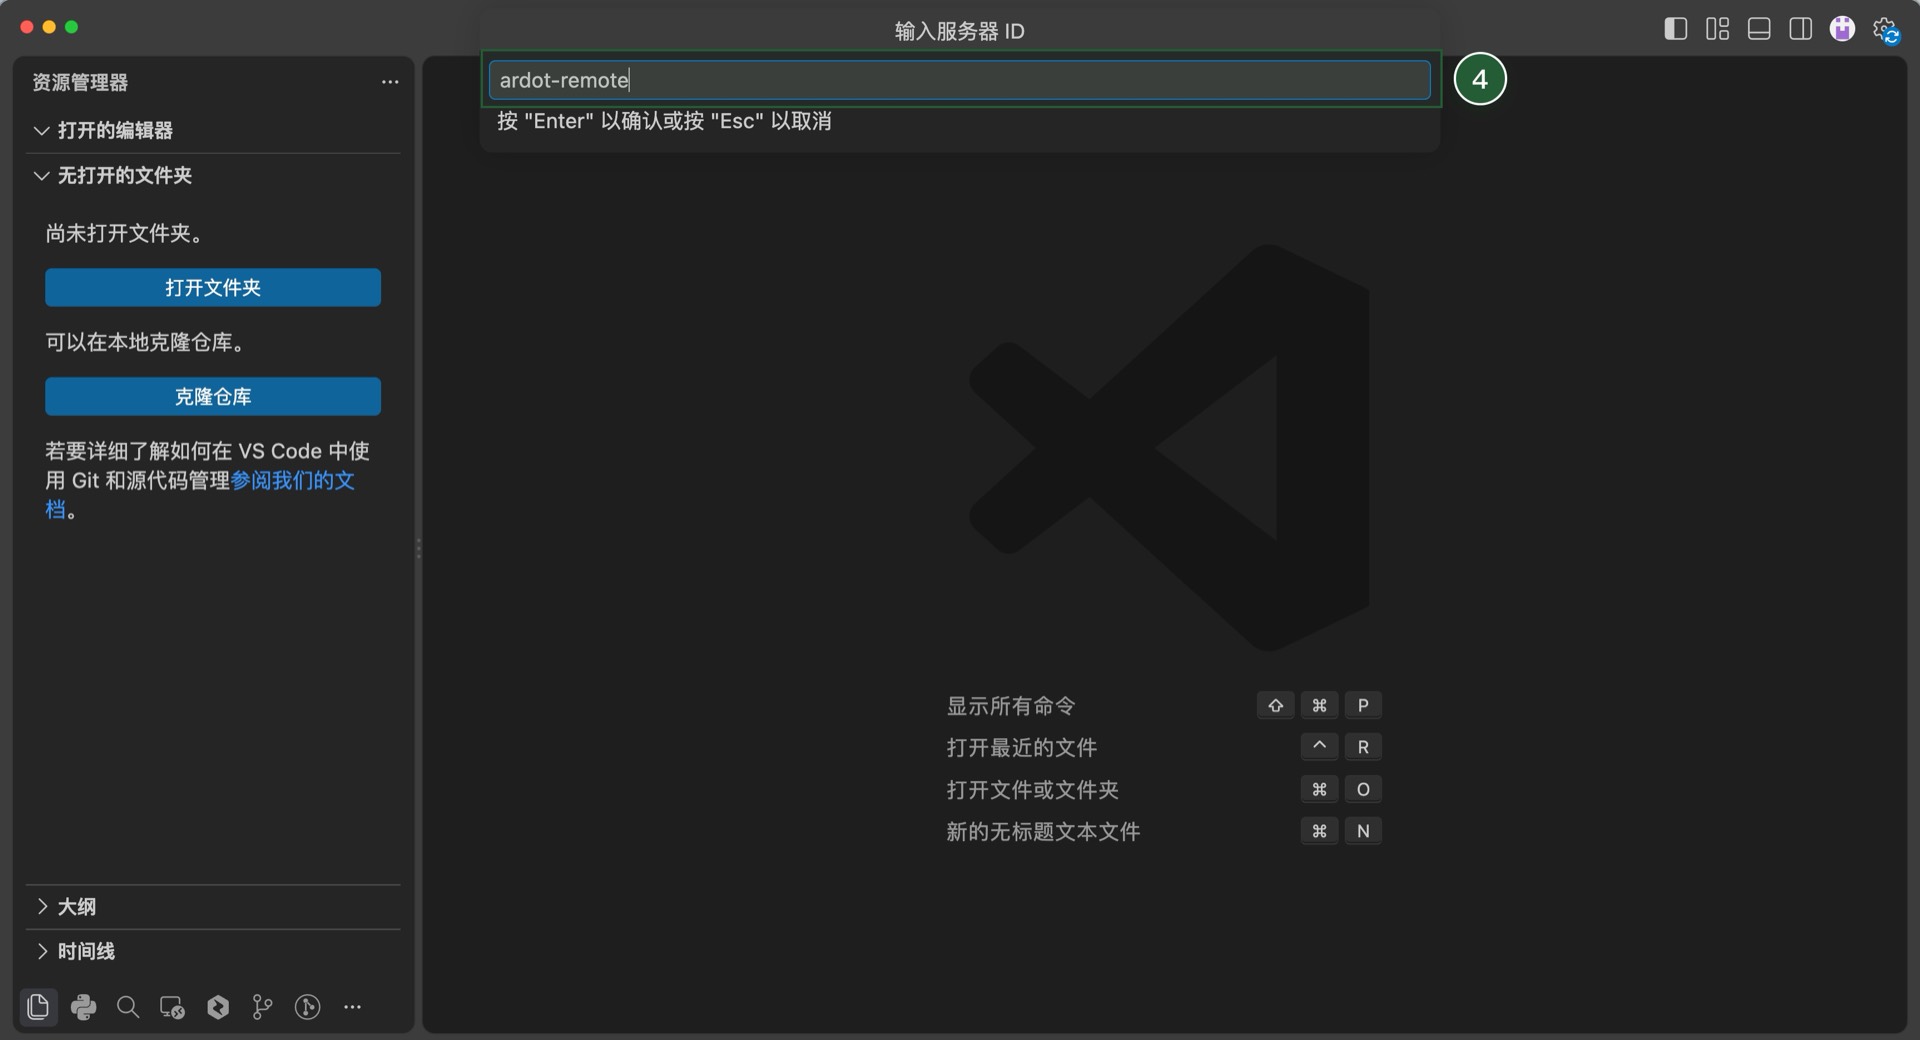
You get the configuration below, and an authorization dialog appears.
json{ "servers": { "ardot-remote": { "type": "http", "url": "https://ardot.tencent.com/mcp" } } }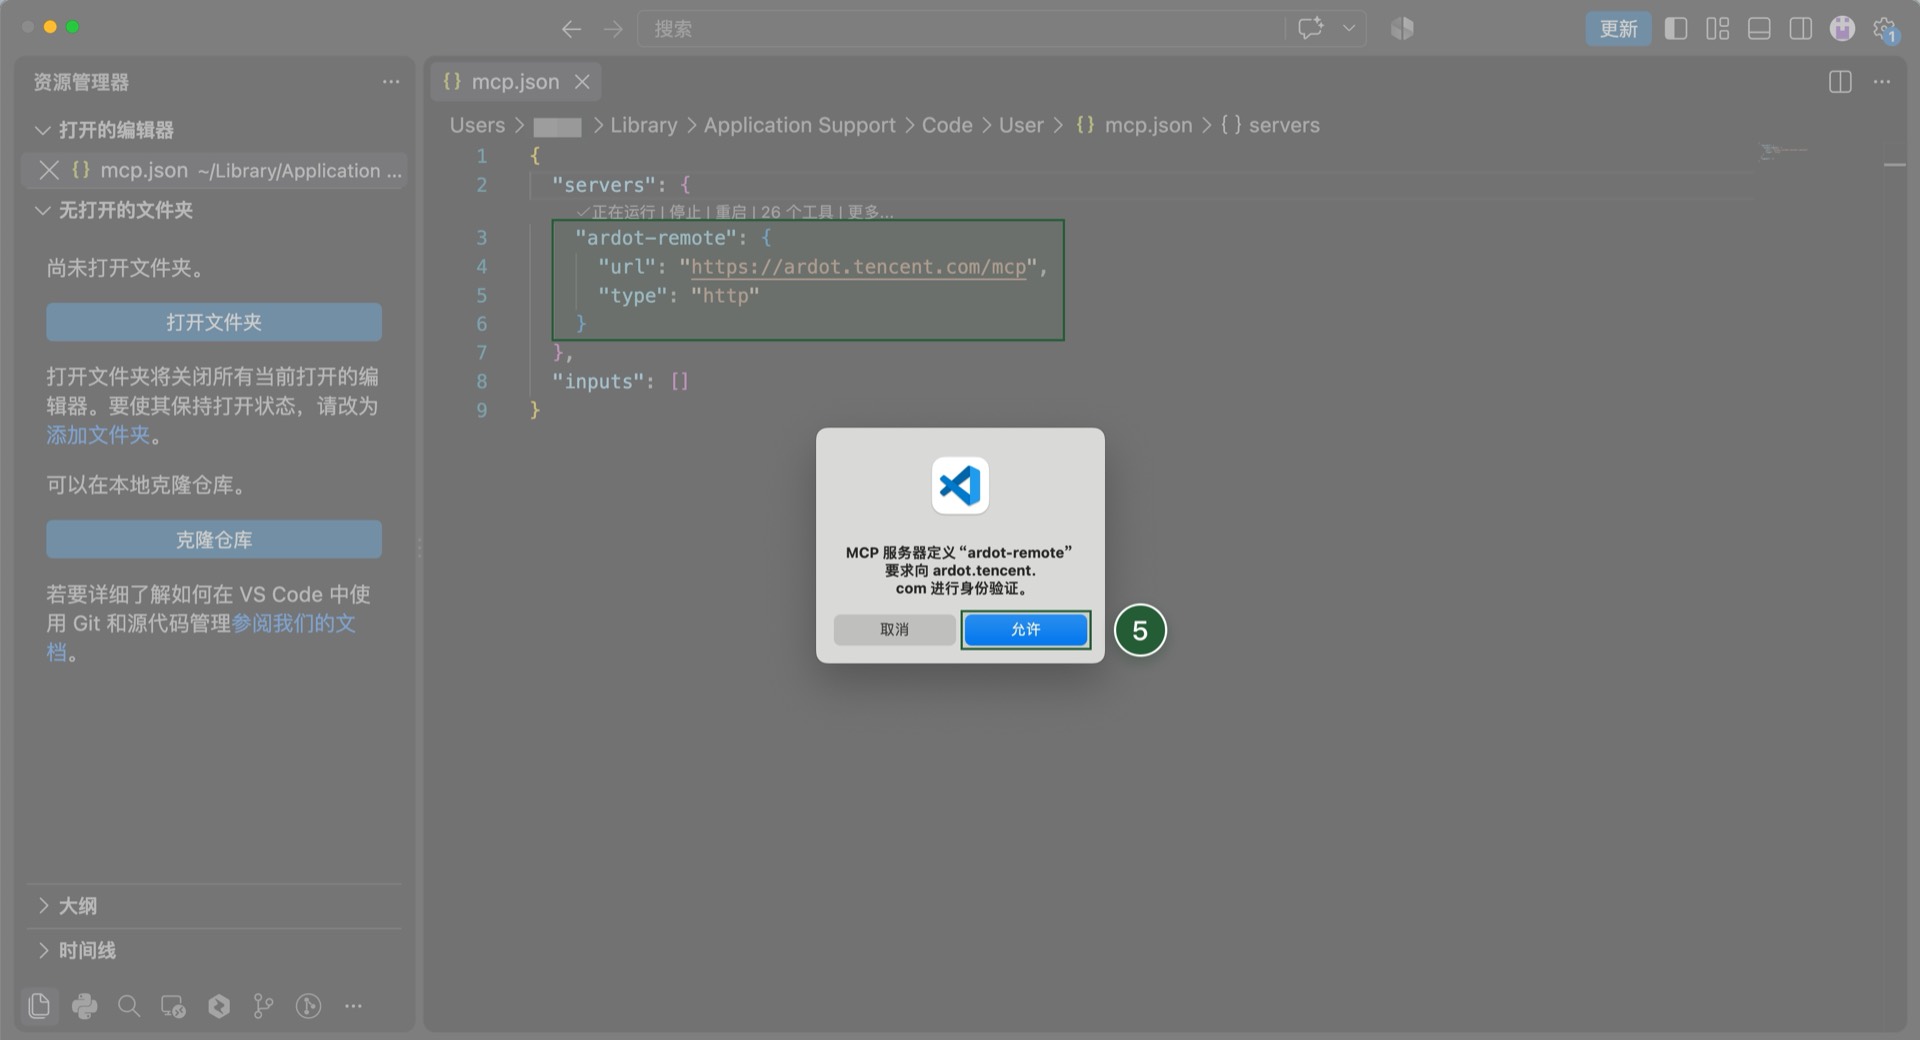
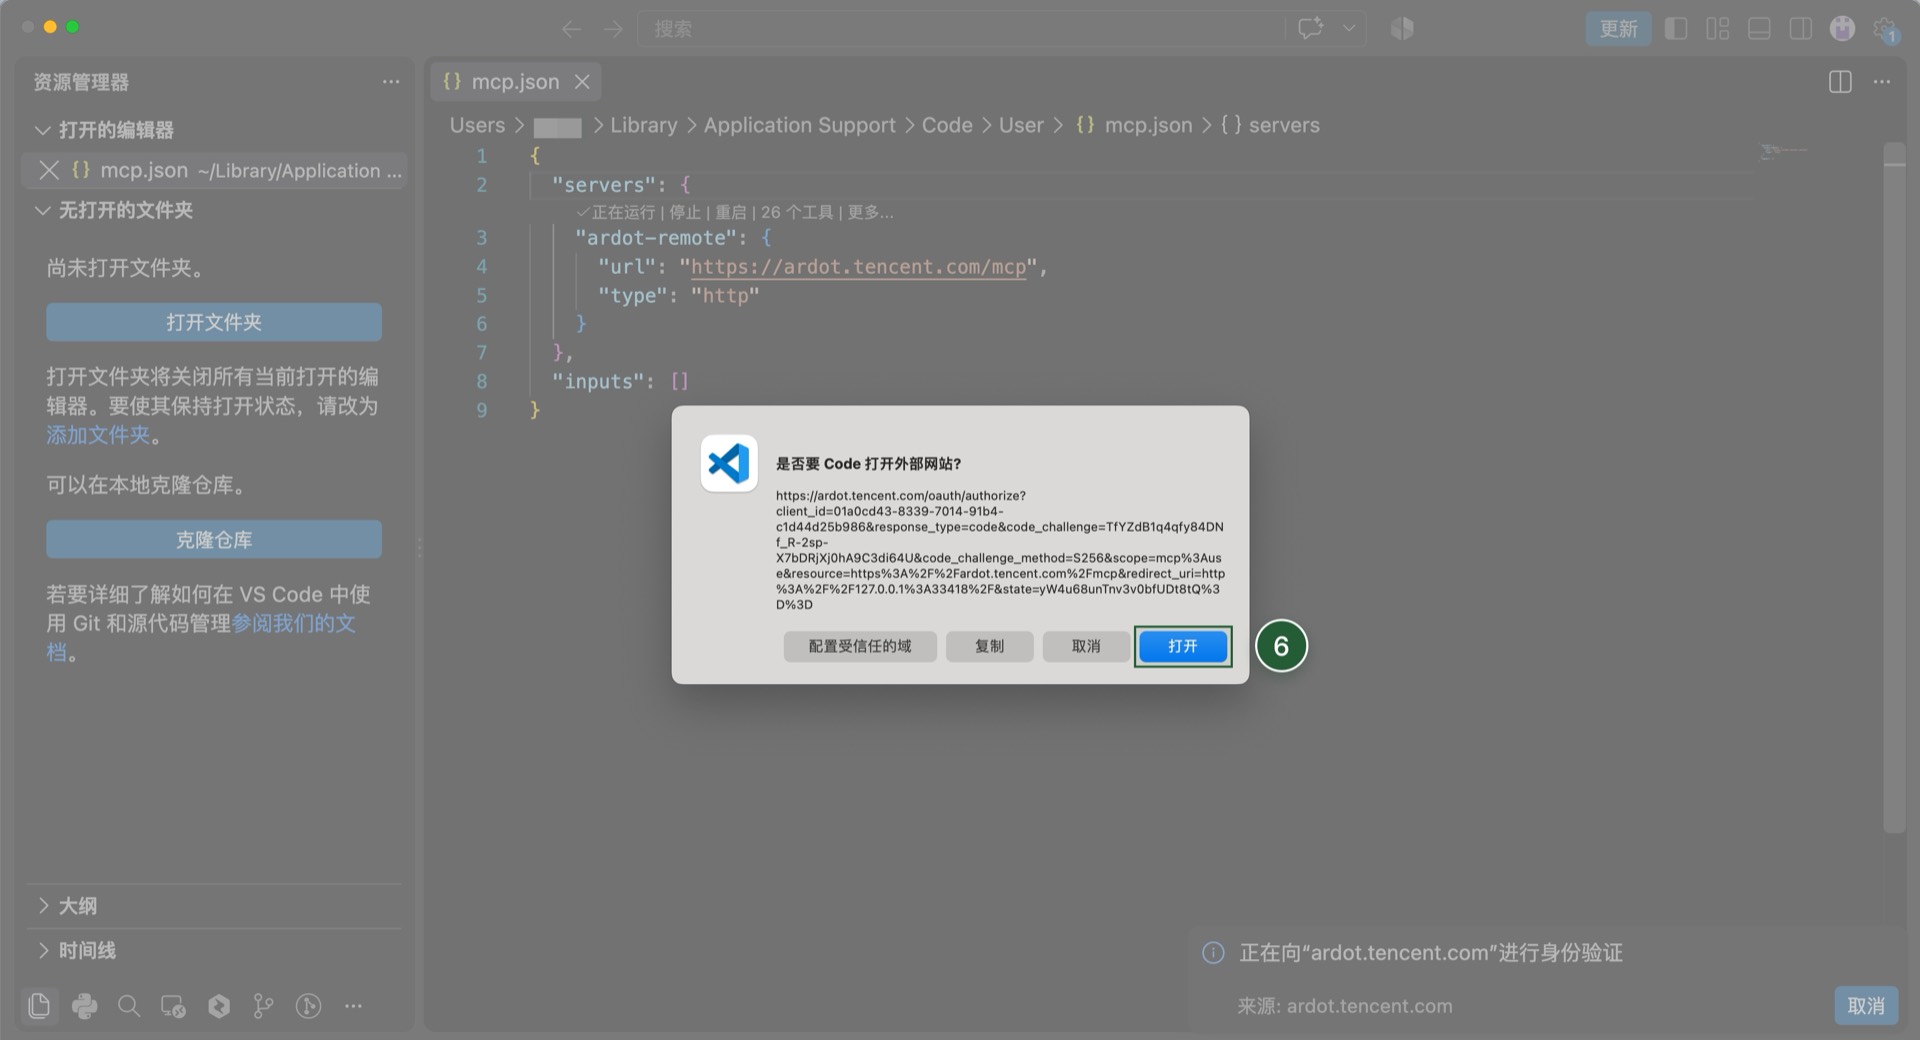
When the "open external website" dialog appears, click Open and complete the authorization in the browser.
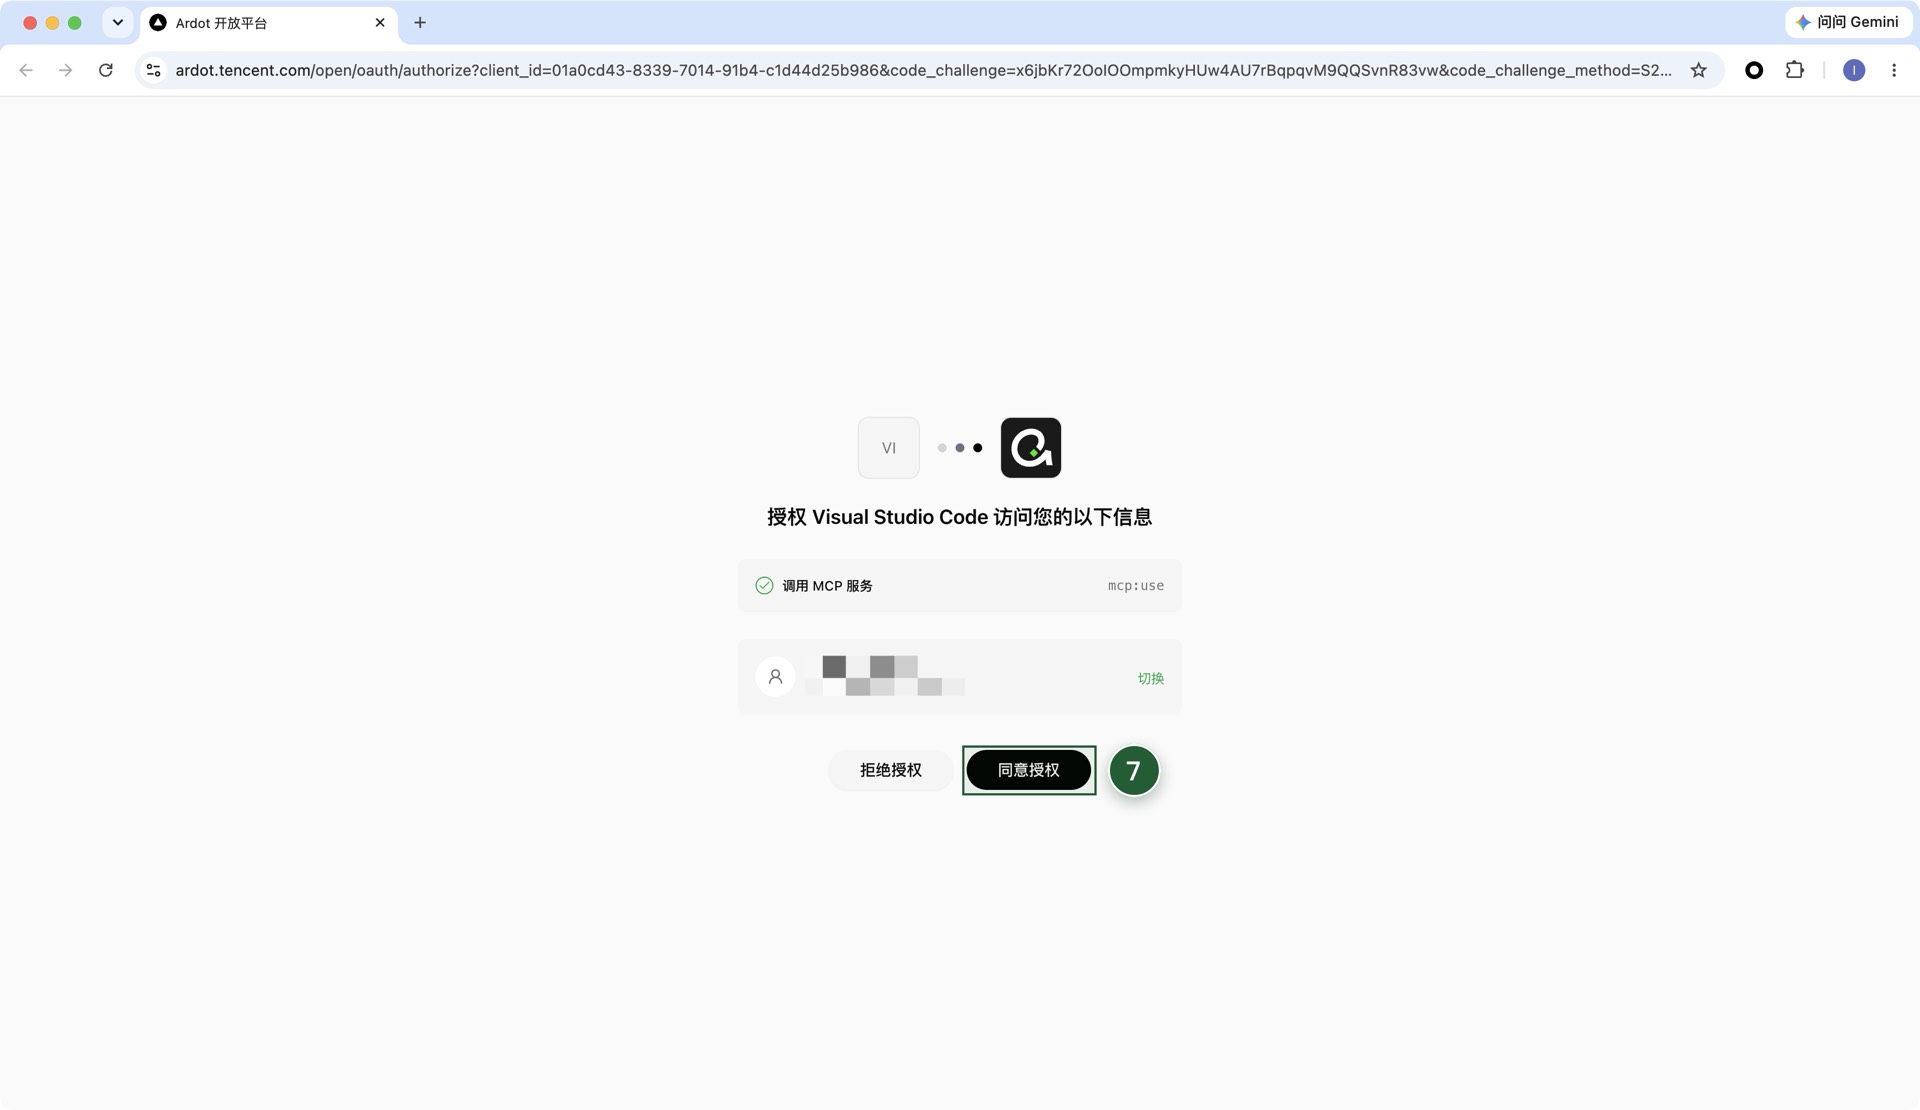
The Ardot authorization page opens in the browser. Confirm the account and click Authorize.
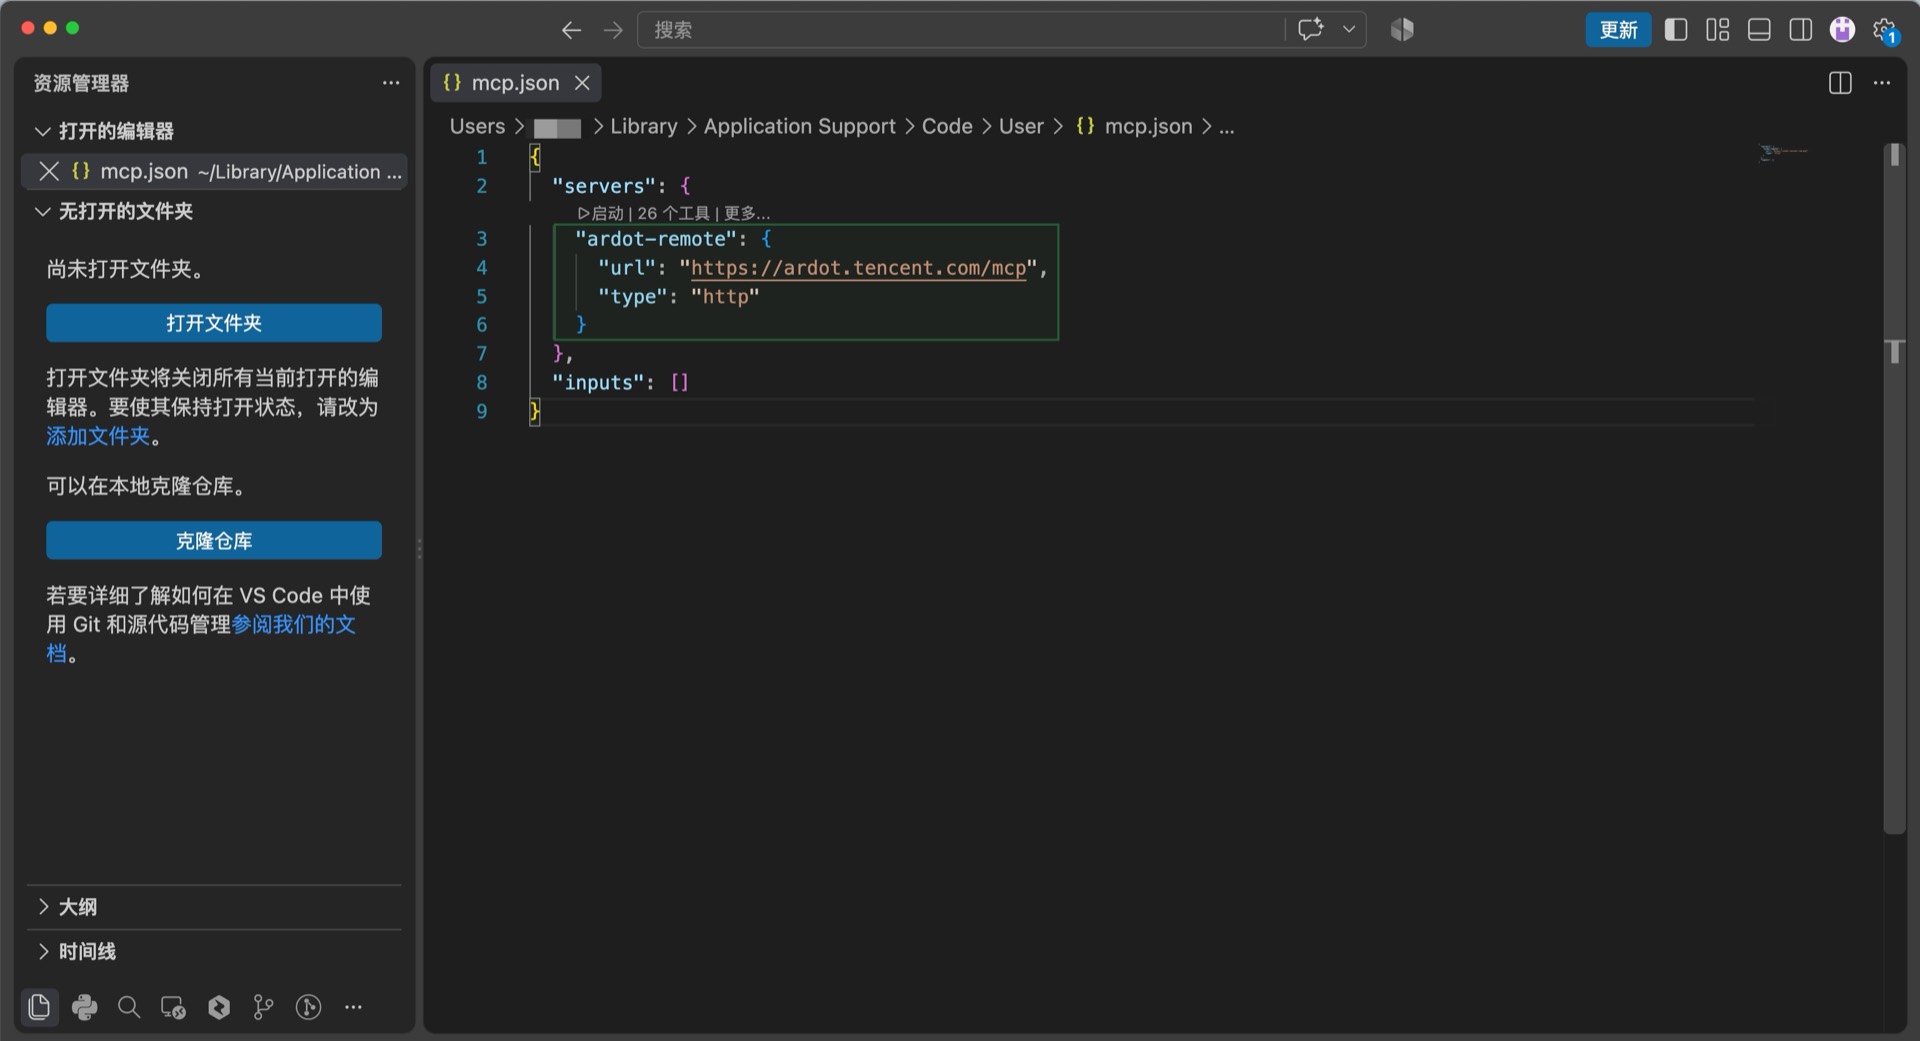
The result looks like this.
See the VS Code docs for more configuration details.
Other MCP-capable AI agents
AI agents not listed here can be configured in their own MCP settings as long as they support MCP over HTTP. Remote and Desktop differ only in the server name and URL:
Requires OAuth:
{
  "mcpServers": {
    "ardot-remote": {
      "type": "http",
      "url": "https://ardot.tencent.com/mcp"
    }
  }
}Note
Field names (such as mcpServers and type) follow your AI agent's own documentation; what matters is the server name (ardot-remote for Remote, ardot-local for Desktop) and the matching URL. For Remote, the first connection usually requires trust confirmation and OAuth authorization.
If you run into connection issues, see Troubleshooting.