

Remote MCP
Remote MCP connects via URL and does not require installing the Ardot client locally. It suits most day-to-day collaboration scenarios.
MCP server URL: https://ardot.tencent.com/mcp.
Auto-configure with an AI agent
Paste the following prompt into your AI agent chat so the agent can write the MCP configuration for you:
Help me configure Ardot Remote MCP: server name ardot-remote, type http, URL https://ardot.tencent.com/mcp. After configuration, if trust or OAuth authorization is required, prompt me to complete it using the flow for my AI agent.WorkBuddy
Open Connectors
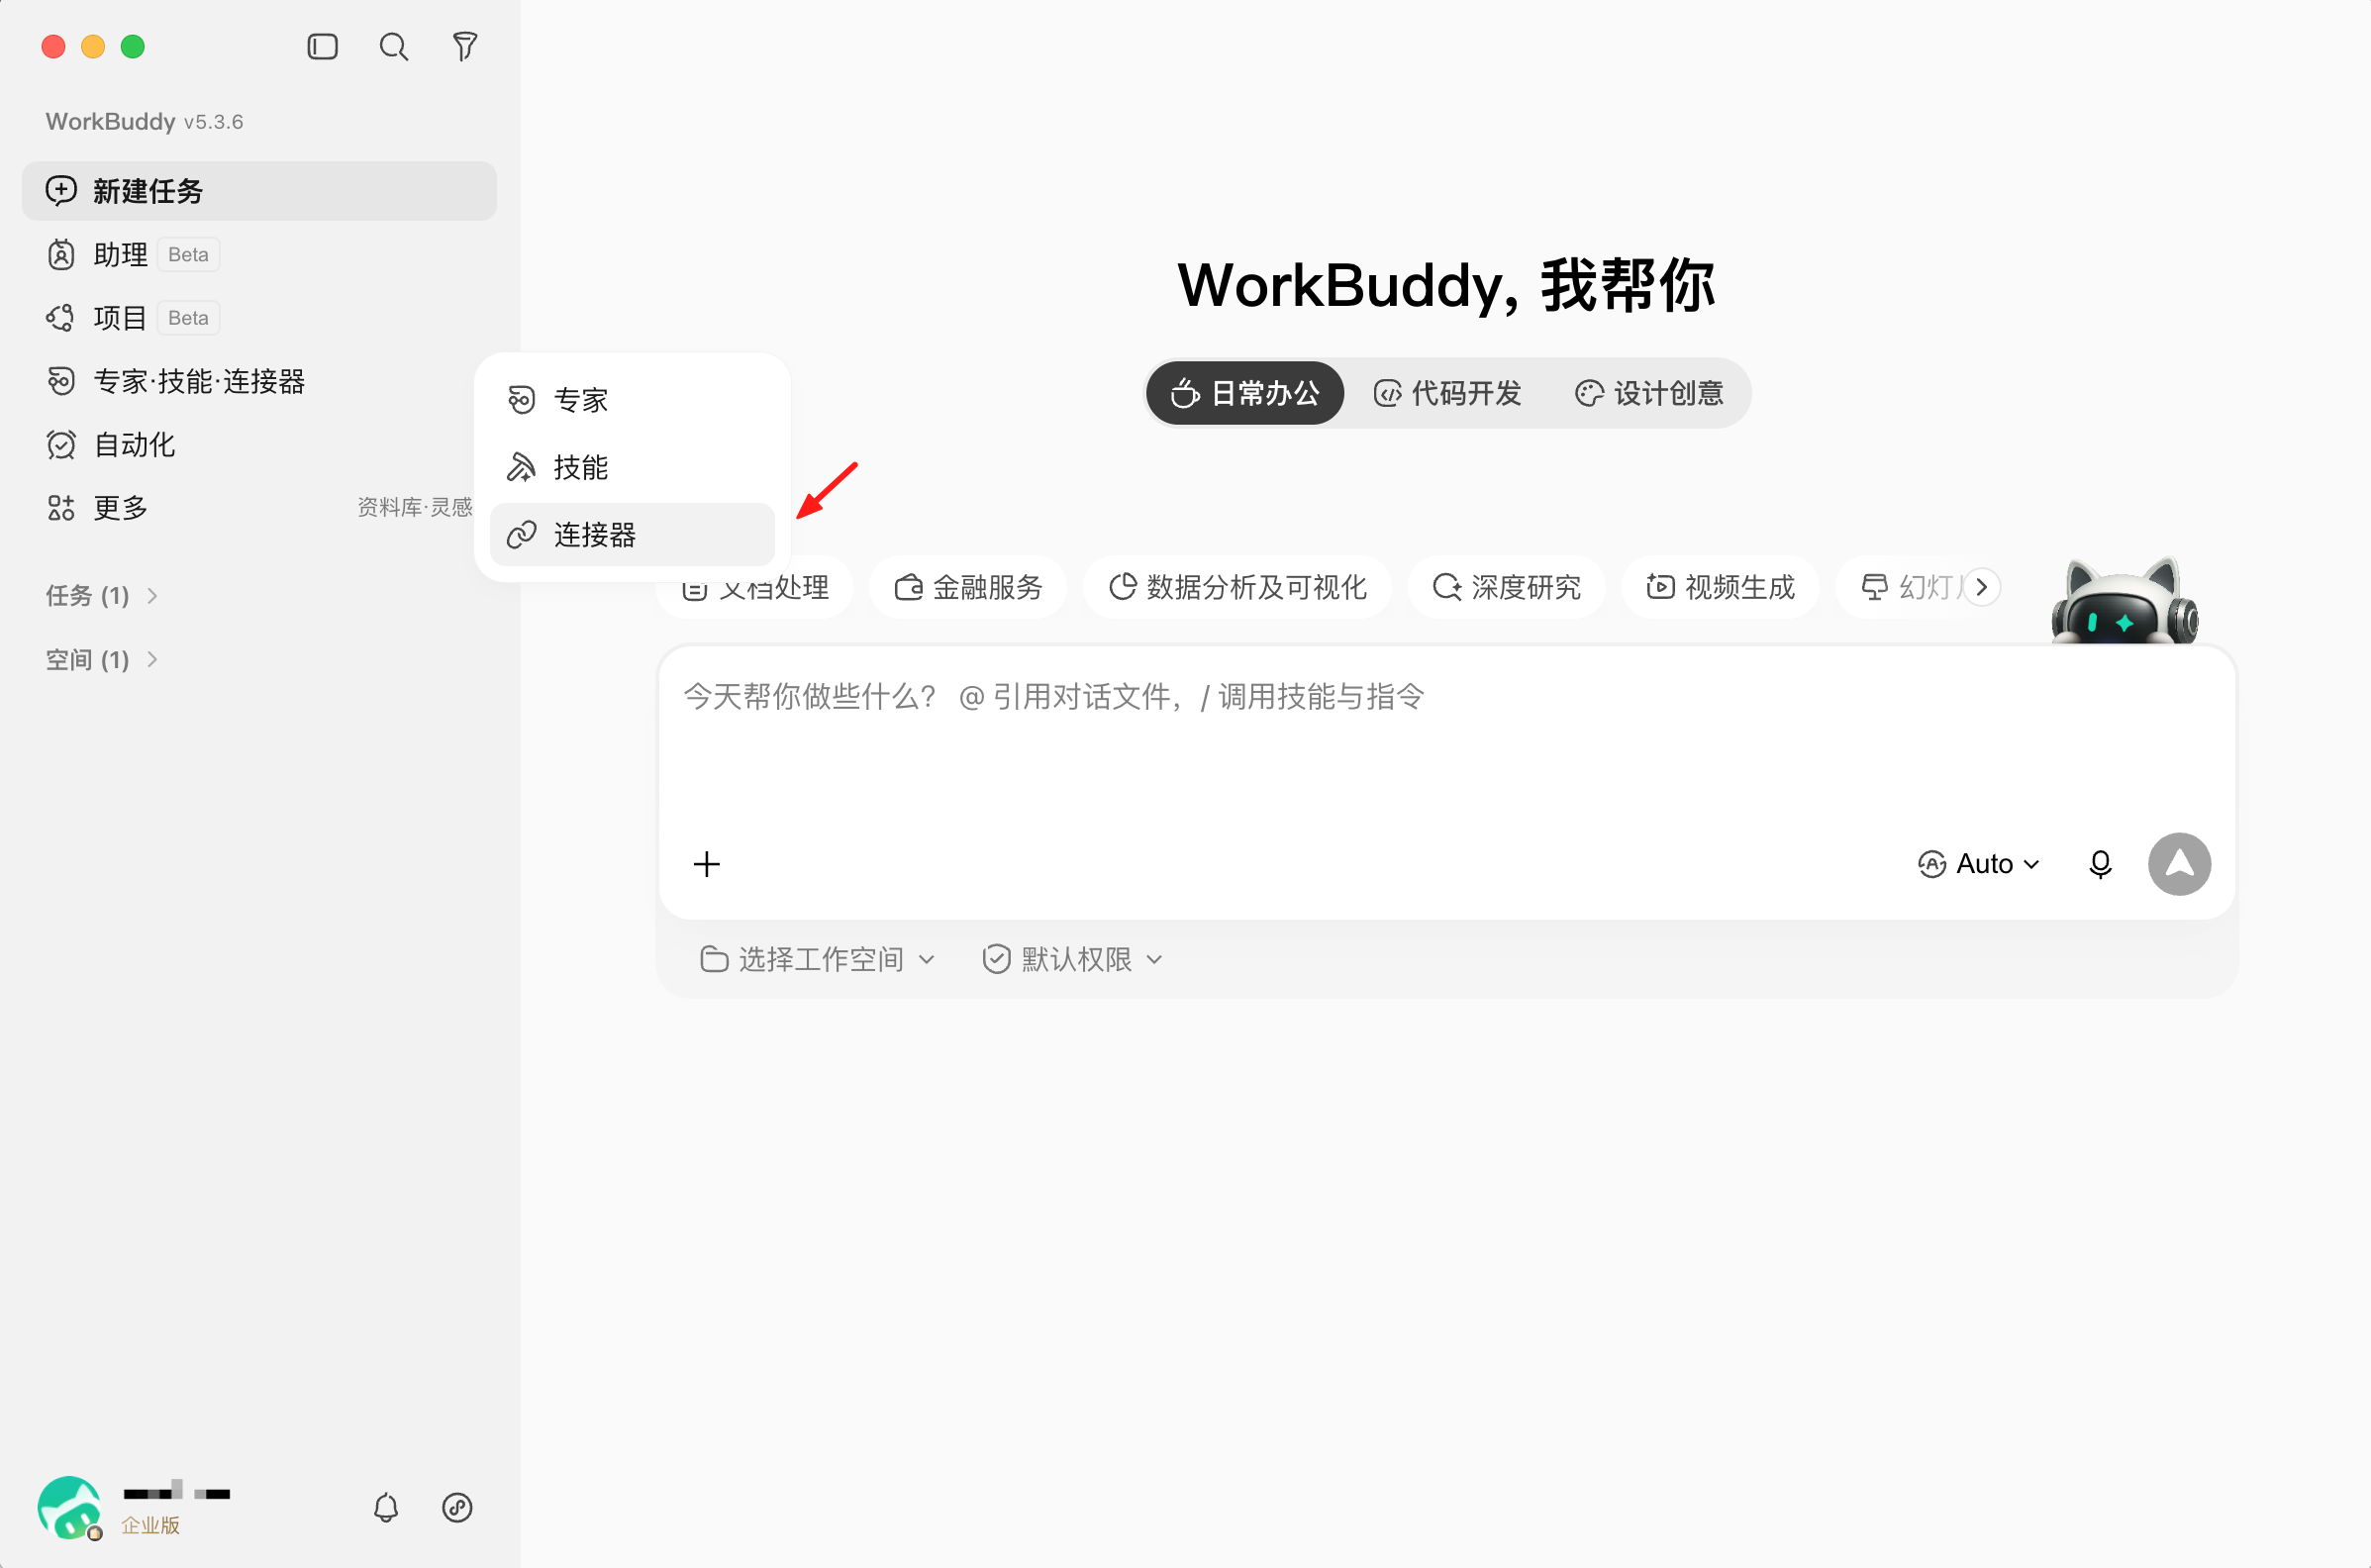
Open WorkBuddy. In the left sidebar, click Experts · Skills · Connectors, then select Connectors.
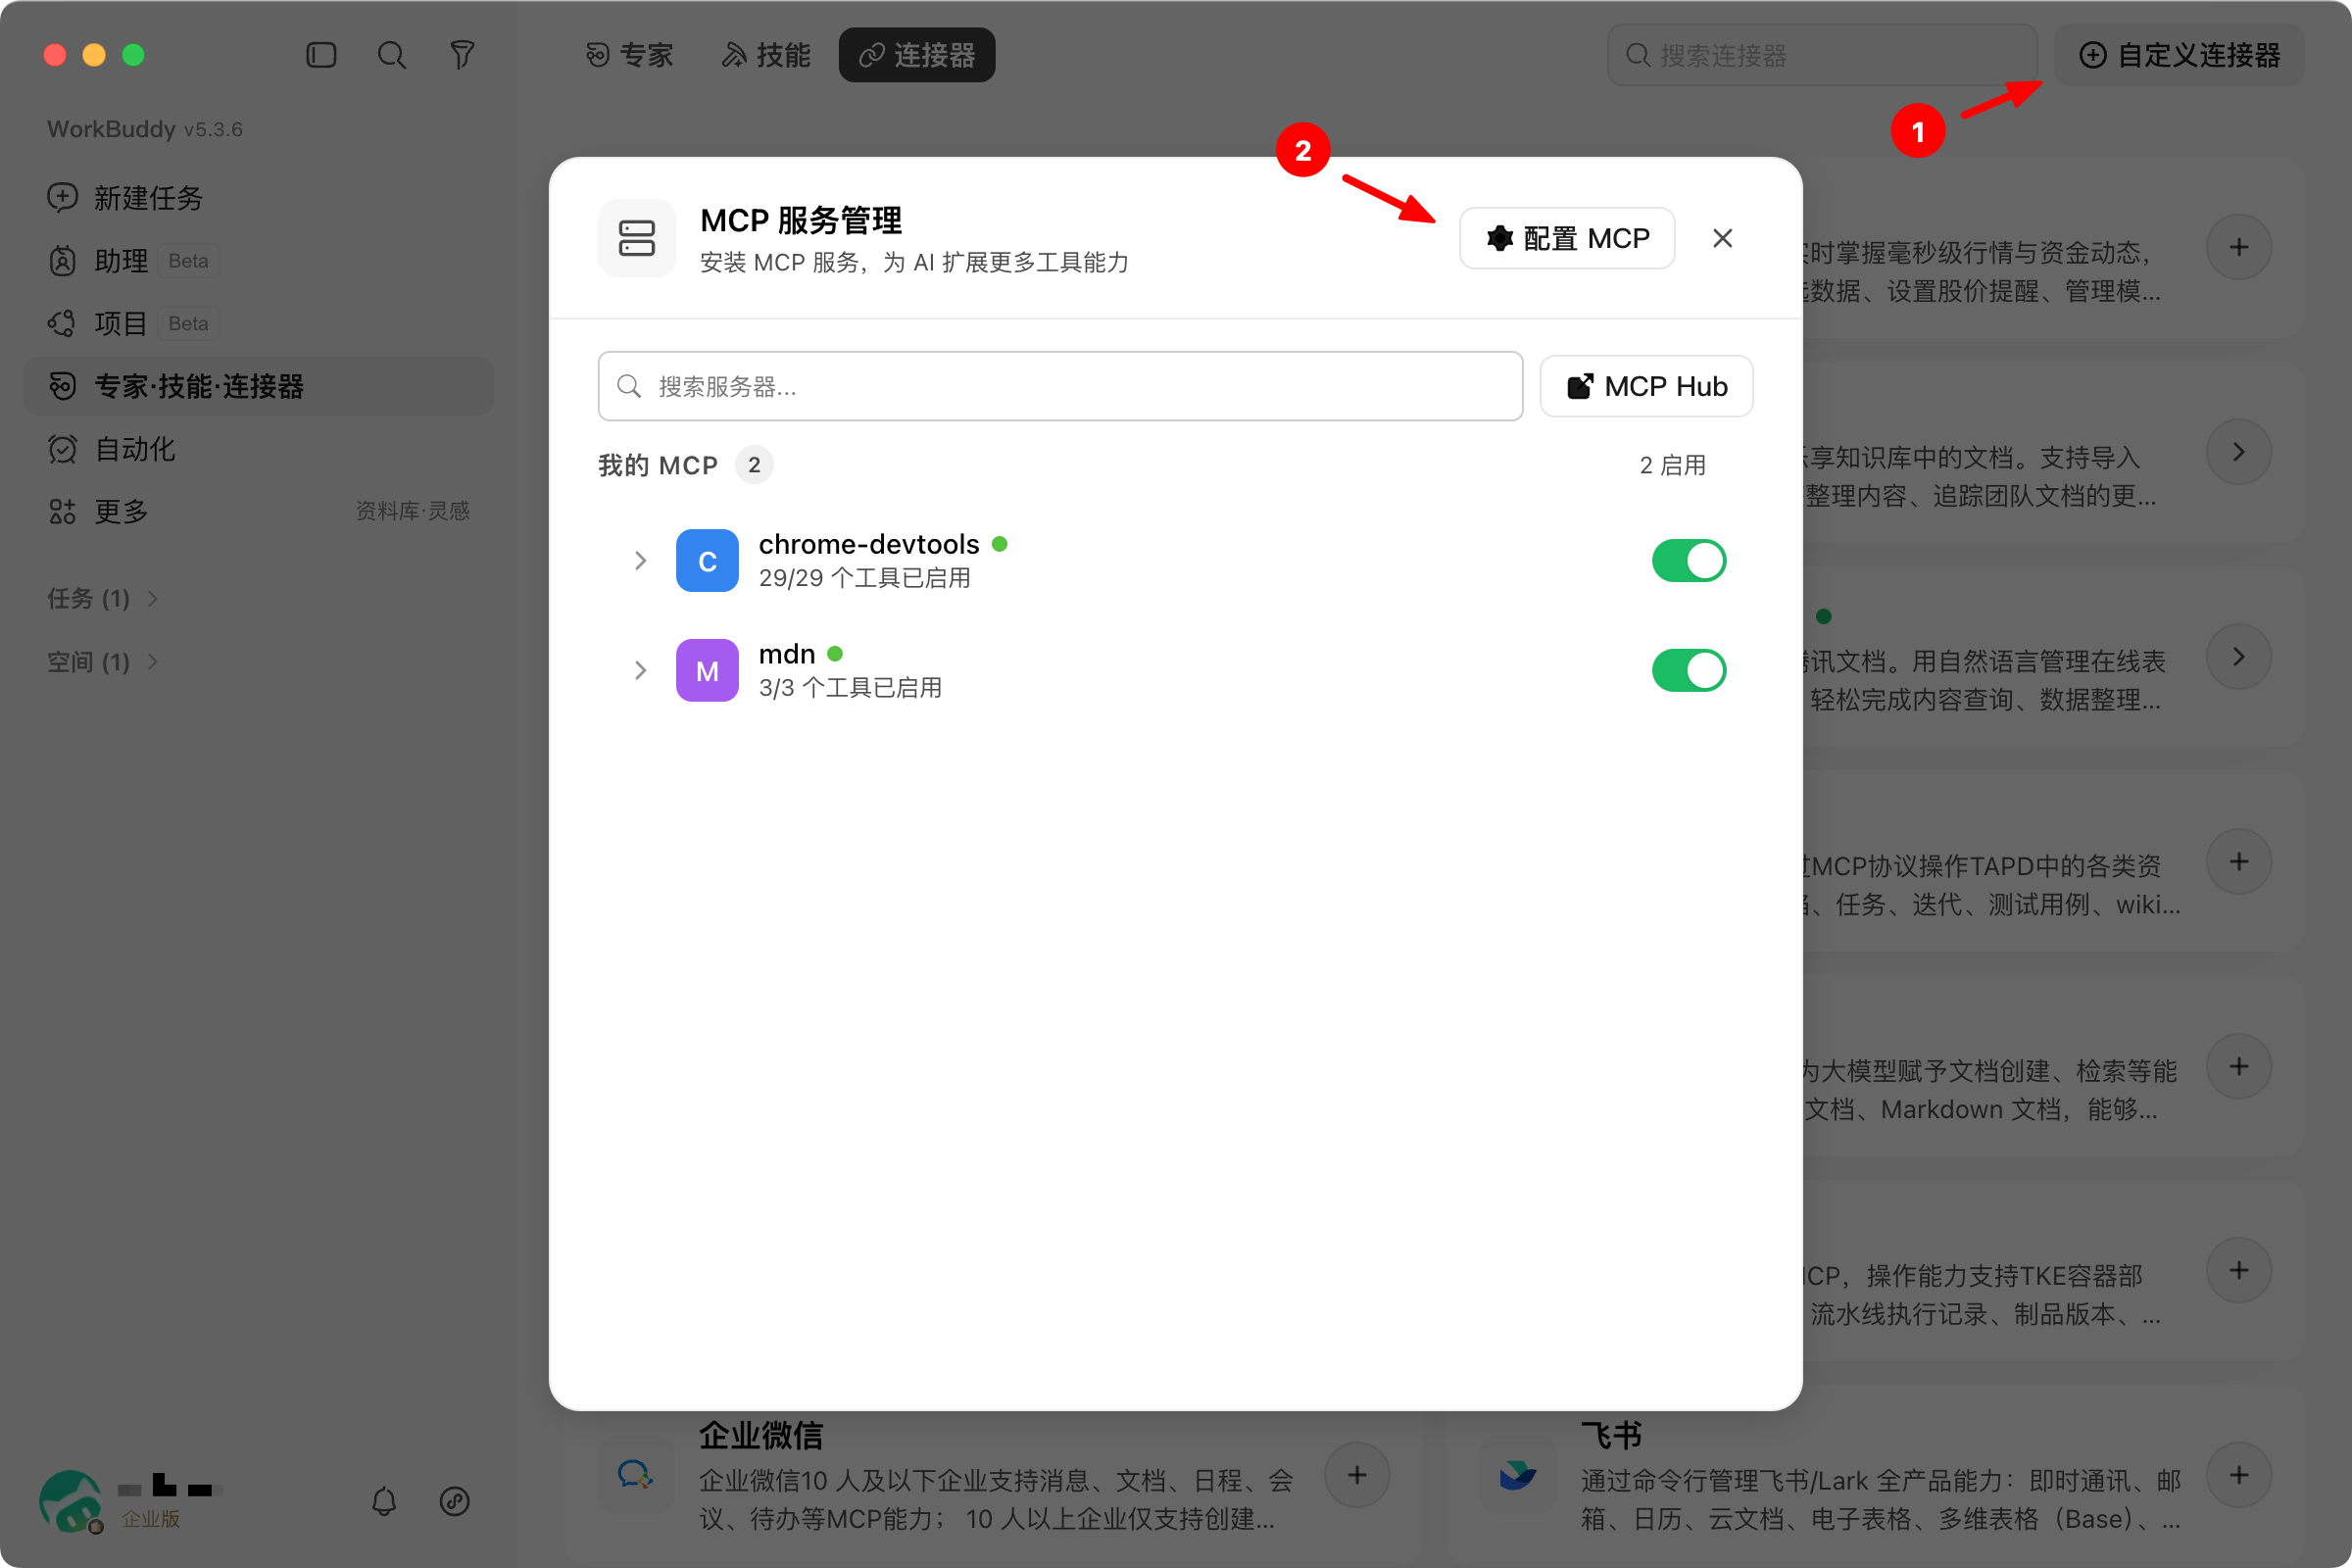
In the top-right of the page, click Custom connector to open MCP service management, then click Configure MCP.
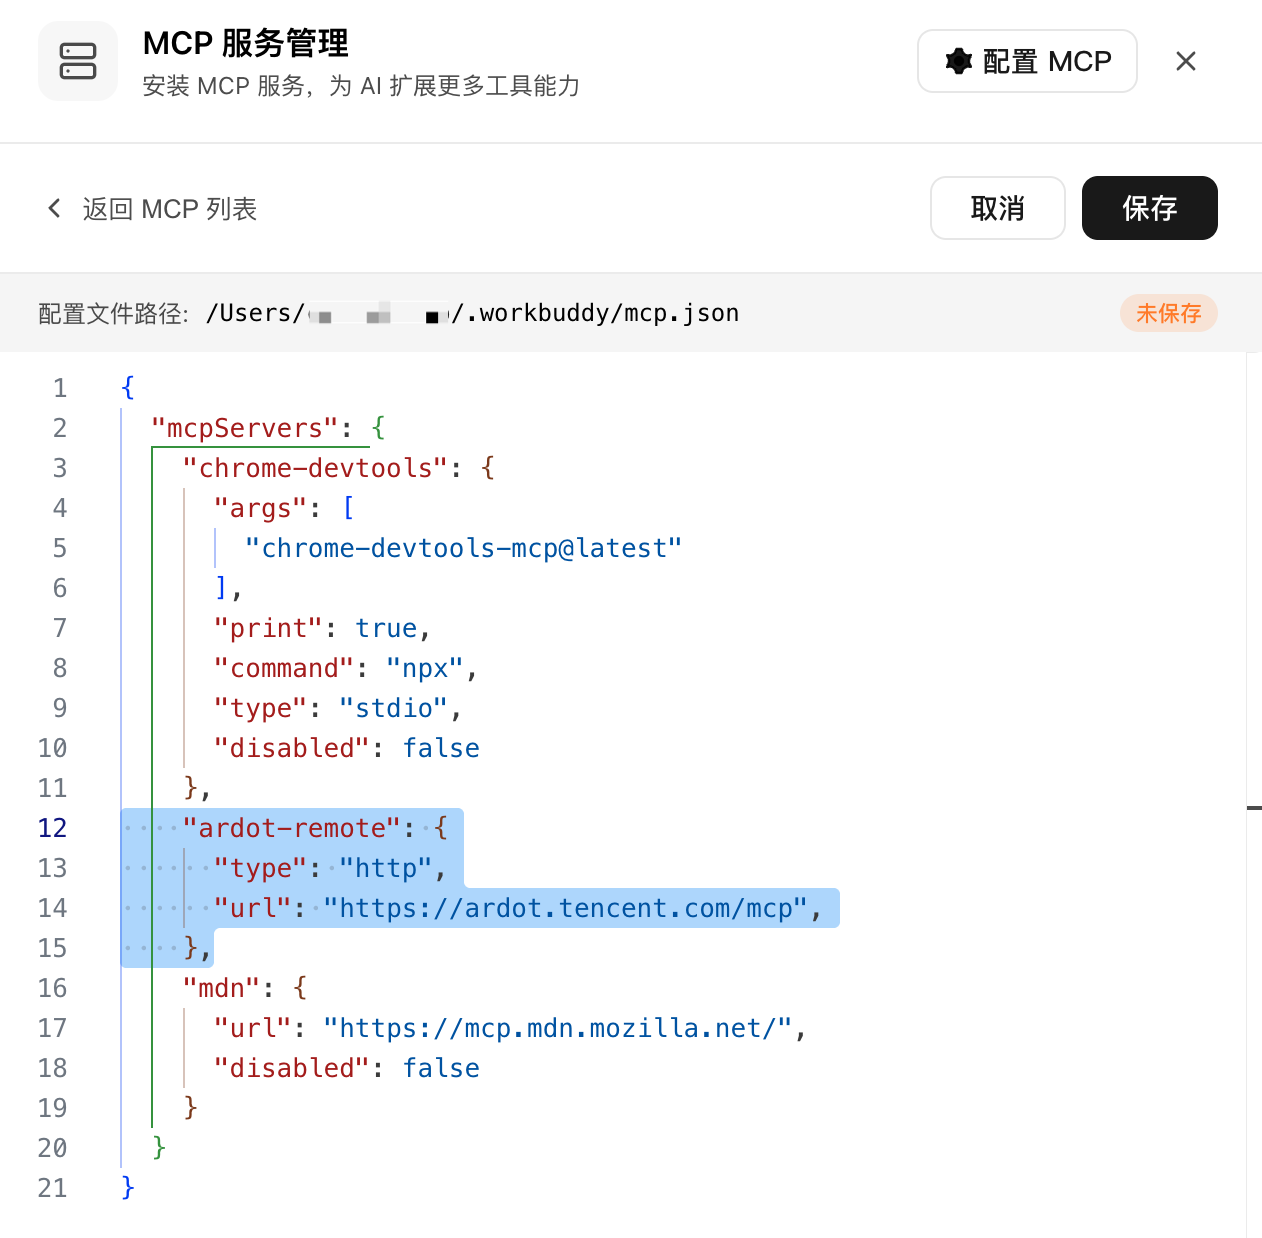
Add the ardot-remote entry
In the mcp.json editor, add the following under mcpServers (keep any existing entries), then click Save:
{
  "mcpServers": {
    "ardot-remote": {
      "type": "http",
      "url": "https://ardot.tencent.com/mcp"
    }
  }
}
After adding, it should look like this:
Trust and complete OAuth
After the first add, WorkBuddy prompts you to trust this MCP. Click Trust.
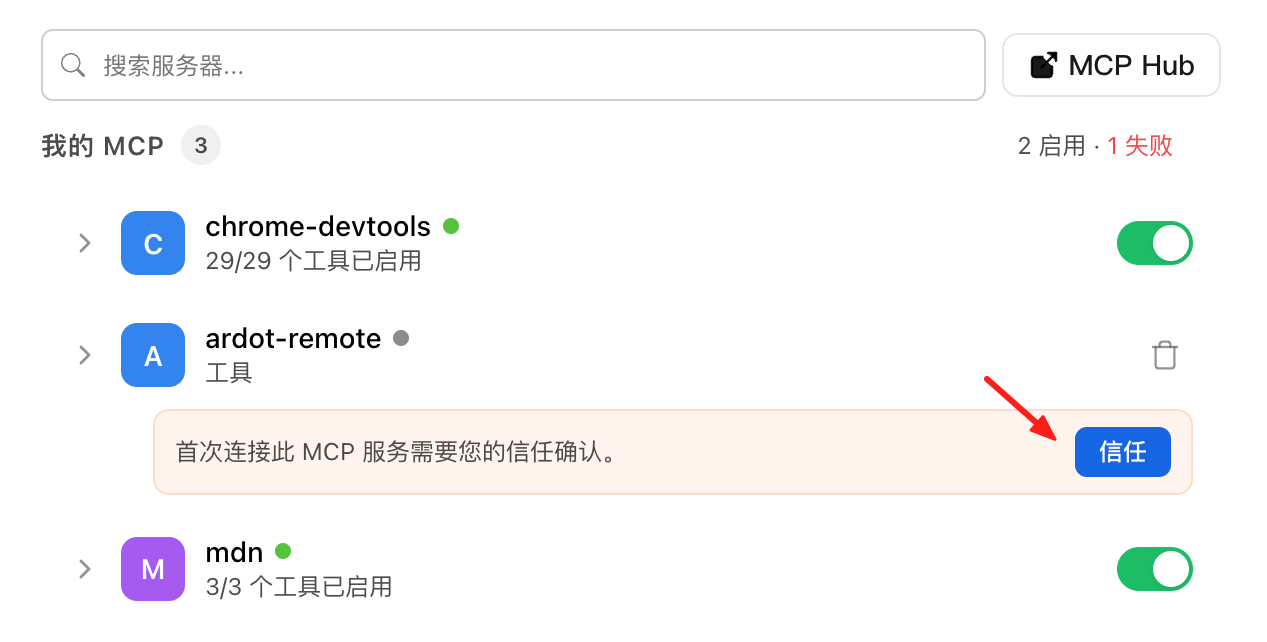
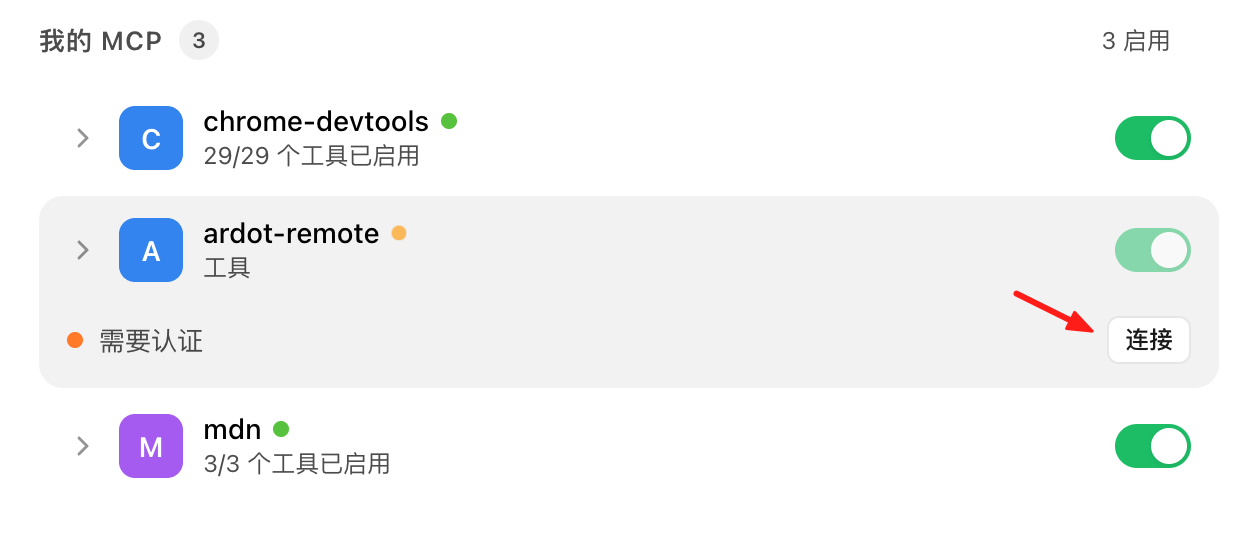
When the status becomes Authentication required, click Connect.
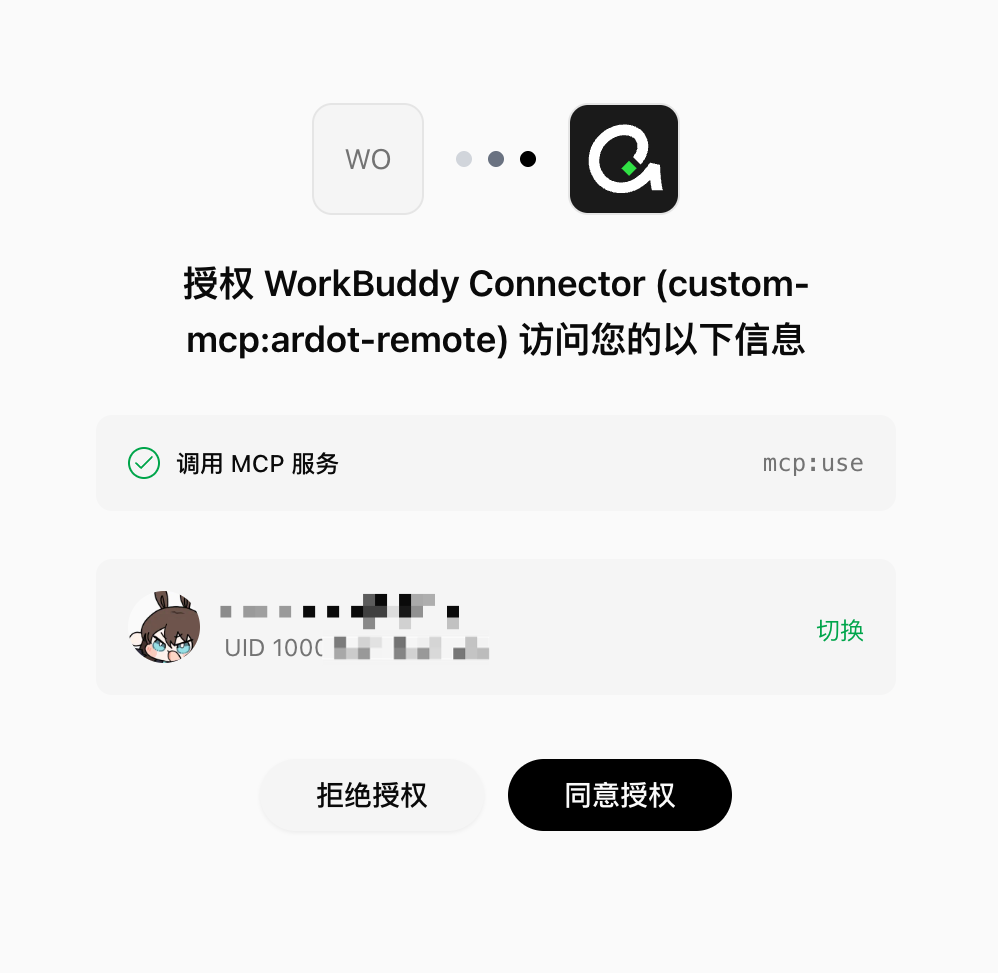
The browser opens the Ardot authorization page. Confirm the account is correct, then click Approve.
Confirm connection
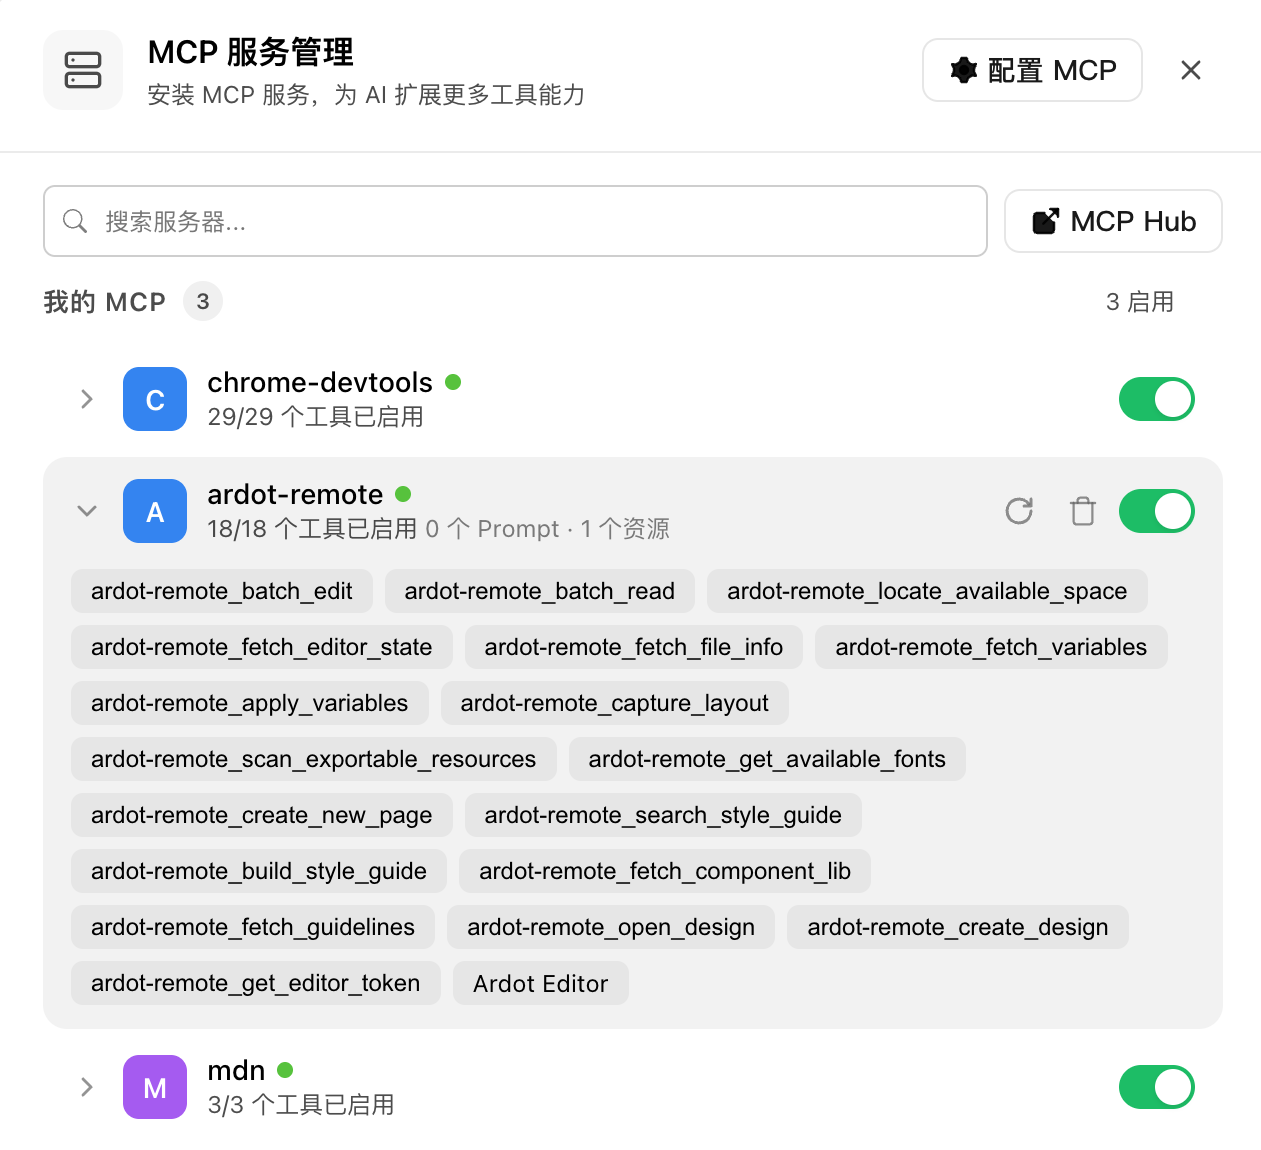
Back in MCP service management, ardot-remote should show as enabled and list available tools (tools are updated over time; check what is actually available).
CodeBuddy Code
Run the following command in a terminal:
bashcodebuddy mcp add ardot-remote --transport http https://ardot.tencent.com/mcp --scope userIn CodeBuddy Code,
/mcpshows the newly addedardot-remoteMCP. You will see that OAuth authorization is required.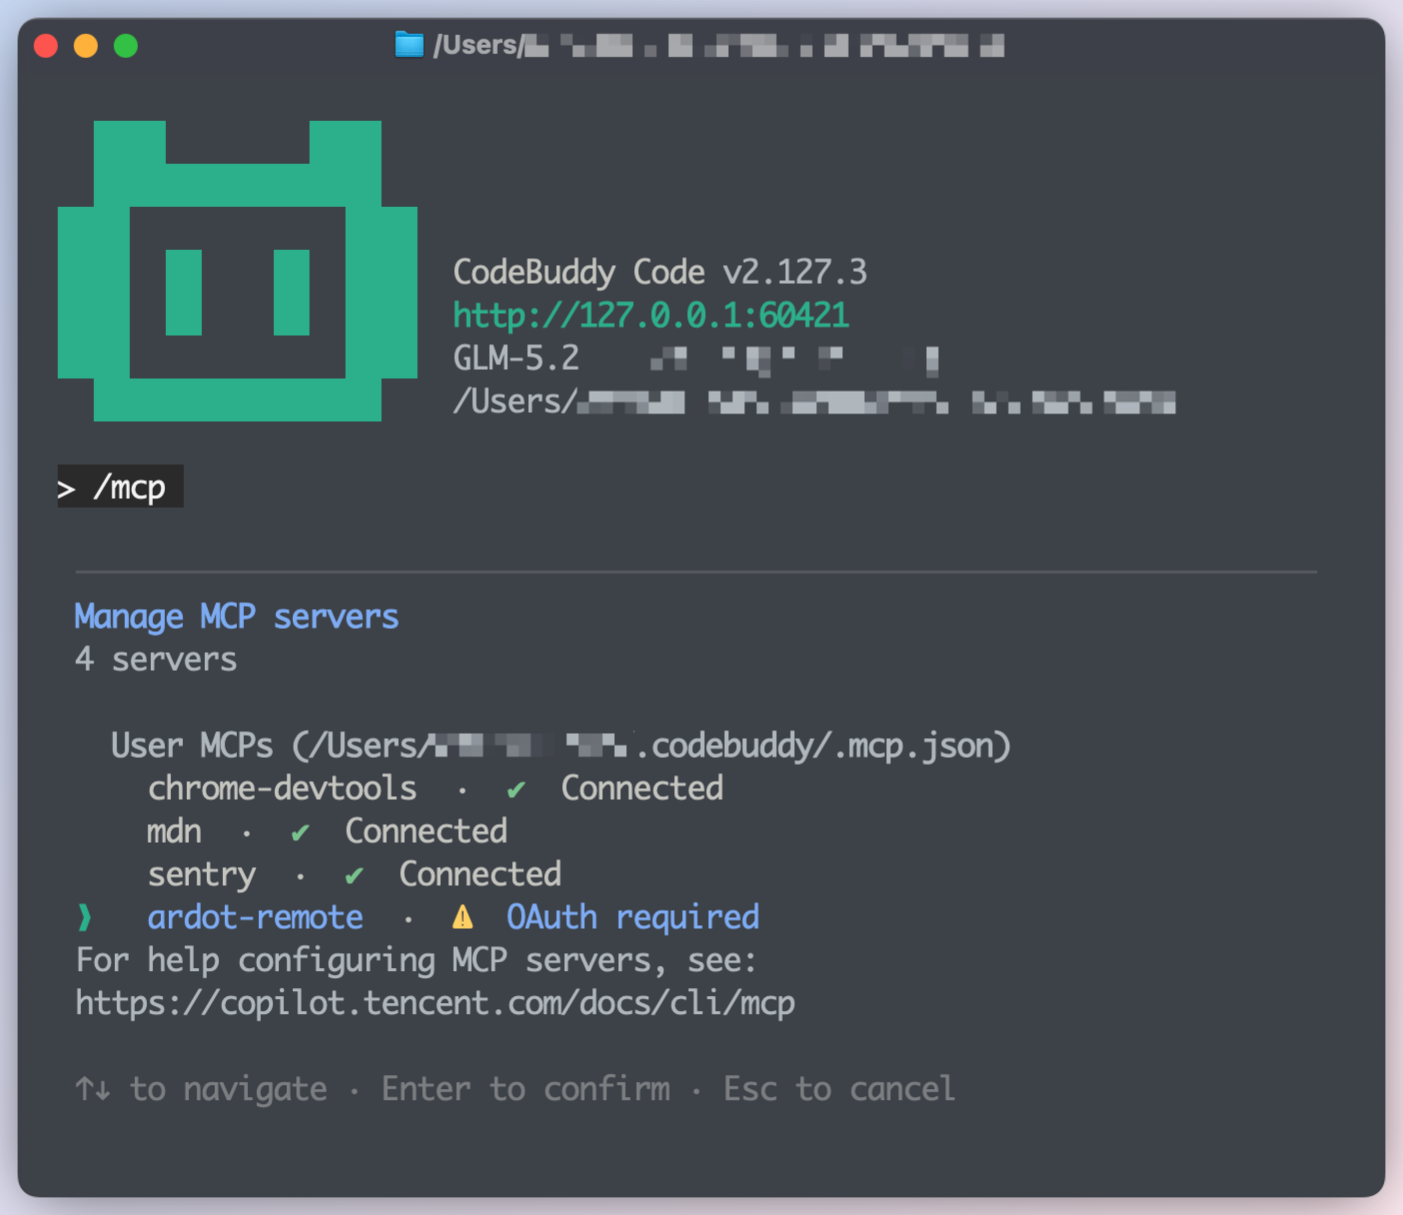
Select it and press Enter to open the submenu. Choose
Authenticateand press Enter. The browser opens the authorization page; confirm the account is correct, then click Approve.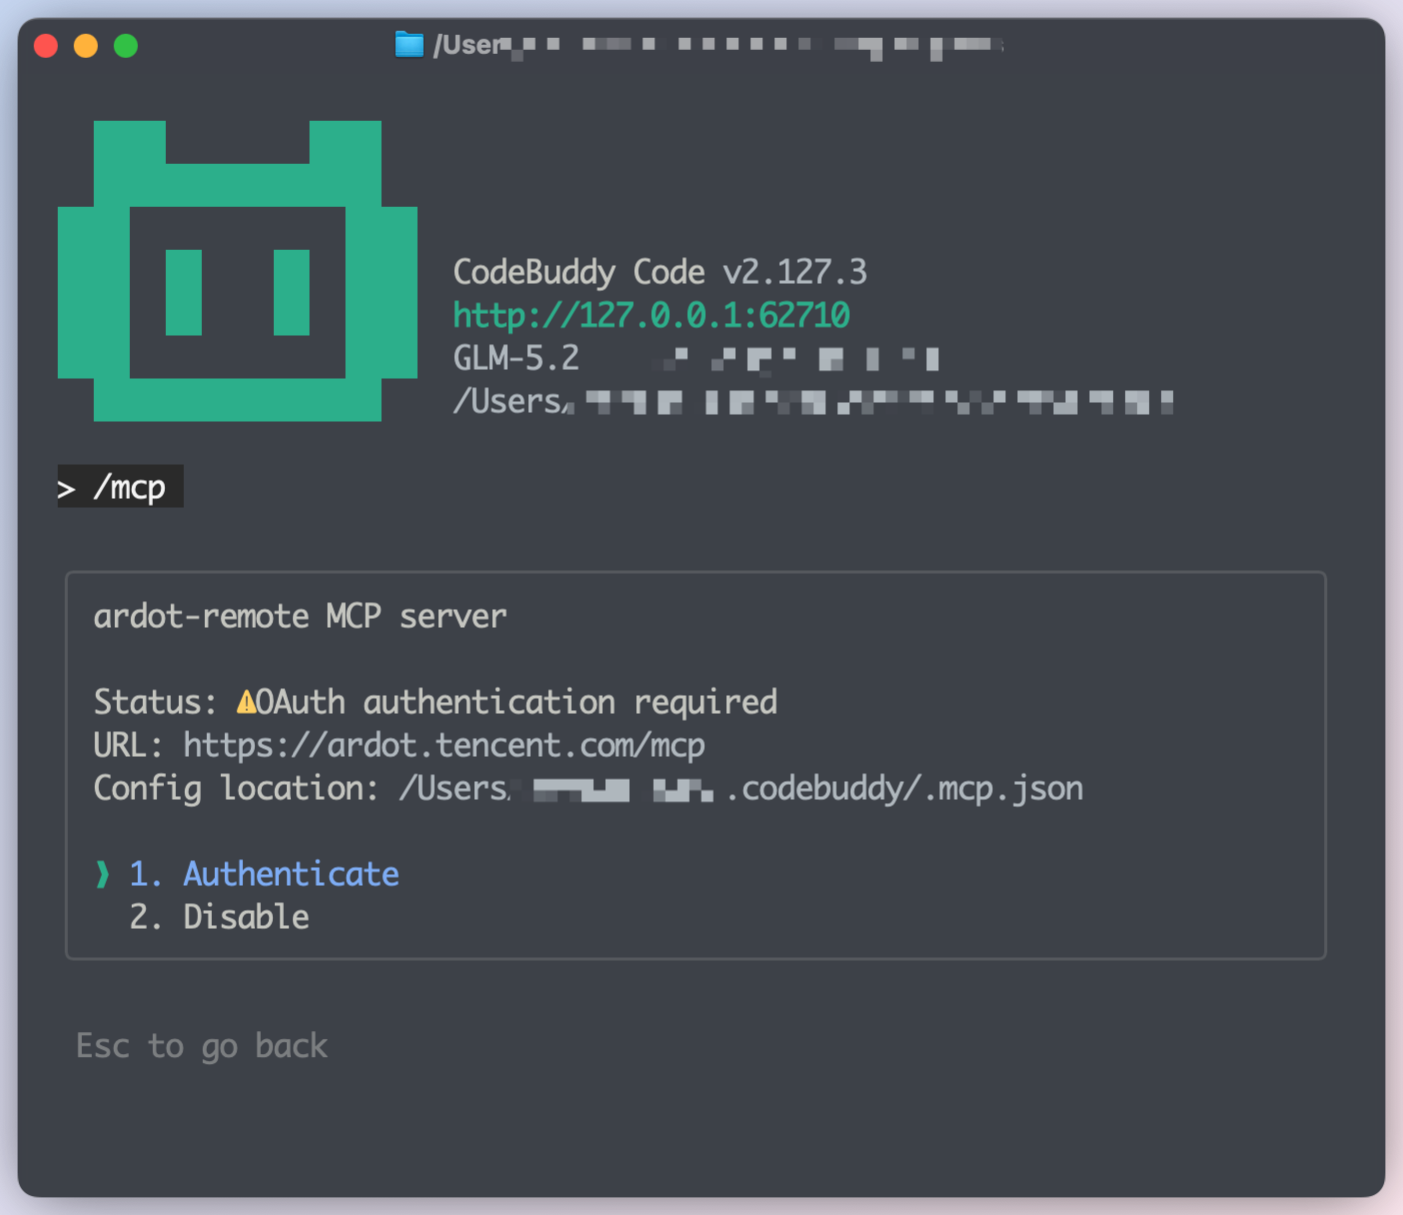
You can also copy the authorization URL and open it in a browser to complete authorization.
For more configuration details, see the CodeBuddy Code docs.
Claude Code
Run the following command in a terminal:
claude mcp add ardot-remote --transport http https://ardot.tencent.com/mcp --scope userFor more configuration details, see the Claude Code docs.
Codex CLI
Run the following command in a terminal:
codex mcp add ardot-remote --url https://ardot.tencent.com/mcpFor more configuration details, see the Codex CLI docs.
Cursor
- Open Cursor Settings. Use the menu Cursor → Settings → Cursor Settings, or press Cmd + Shift + P to open the command palette and run
Cursor: Open Settings. - Click
New MCP Server. - Add the following configuration.json
{
  "mcpServers": {
    "ardot-remote": {
      "type": "http",
      "url": "https://ardot.tencent.com/mcp"
    }
  }
}
For more configuration details, see the Cursor docs.
VS Code
- Press Cmd + Shift + P to open the command palette and run
MCP: Add Server. - Select
HTTP. - Enter the URL
https://ardot.tencent.com/mcp. - Enter the server name
ardot-remote. - Choose the configuration scope. The default Global scope is fine.
- You get a configuration like the following, and an authorization dialog appears—open the browser to complete authorization.json
{
  "servers": {
    "ardot-remote": {
      "type": "http",
      "url": "https://ardot.tencent.com/mcp"
    }
  }
}
For more configuration details, see the VS Code docs.
Other AI agents
For AI agents not listed separately here, as long as they support MCP HTTP servers, add the following in their MCP settings:
{
  "mcpServers": {
    "ardot-remote": {
      "type": "http",
      "url": "https://ardot.tencent.com/mcp"
    }
  }
}
Field names (such as mcpServers and type) follow your AI agent's docs. What matters is the server name ardot-remote and the URL https://ardot.tencent.com/mcp. First-time connections usually require a trust confirmation and OAuth authorization.
After configuration, you can verify in chat—for example: “Using the ardot-remote MCP, create a design file.” If you cannot connect, see Troubleshooting.