

Variables Advanced: Modes and Scoping
After learning the basics of variables, Modes and Scoping are the two key capabilities for using variables at a deeper level. The former solves "the same variable needing different values in different scenarios," and the latter solves "too many variables making it easy to pick the wrong one."
Modes
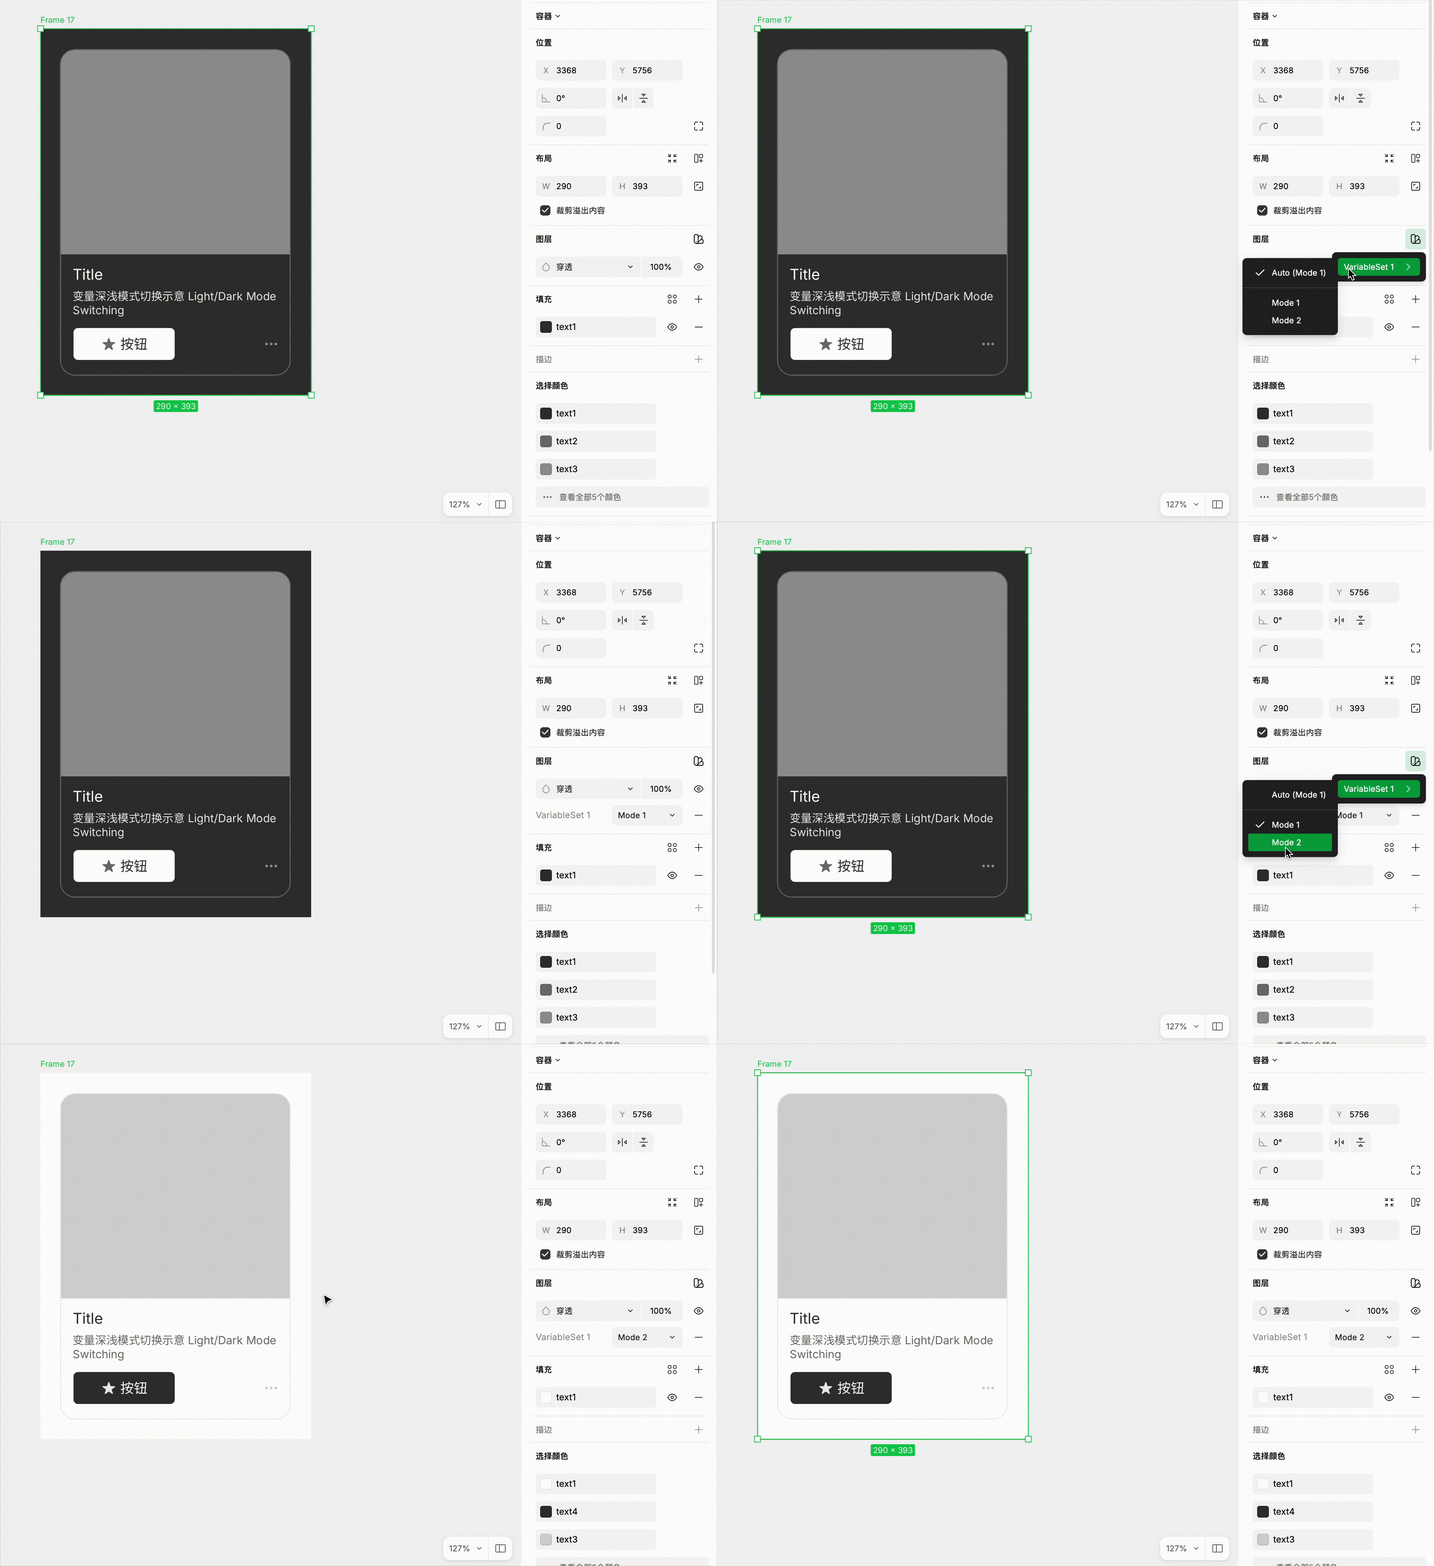
What Modes Can Do
Modes are multiple sets of values for a variable. The same variable name can have different values in different modes.
The most classic use case: Light/Dark themes.
Example — you define a color variable called "Body Text Color":
| Variable Name | Light Mode | Dark Mode |
|---|---|---|
| Body Text Color | #000000 | #FFFFFF |
Designers bind all body text fills to this variable. When switching themes, just switch the mode and all text colors across the entire design invert — no need to change layers individually.
Beyond light/dark themes, modes can also be used for:
- Multi-device adaptation: The same spacing variable is
24on desktop and16on mobile - Multilingual: The same text variable is "确定" in Chinese and "OK" in English
- Multi-brand: The same primary color variable is blue for Brand A and green for Brand B
Creating a New Mode
After opening the Variable Manager, each variable collection shows one column of "values" — this is the default mode (named "Mode 1" by default).
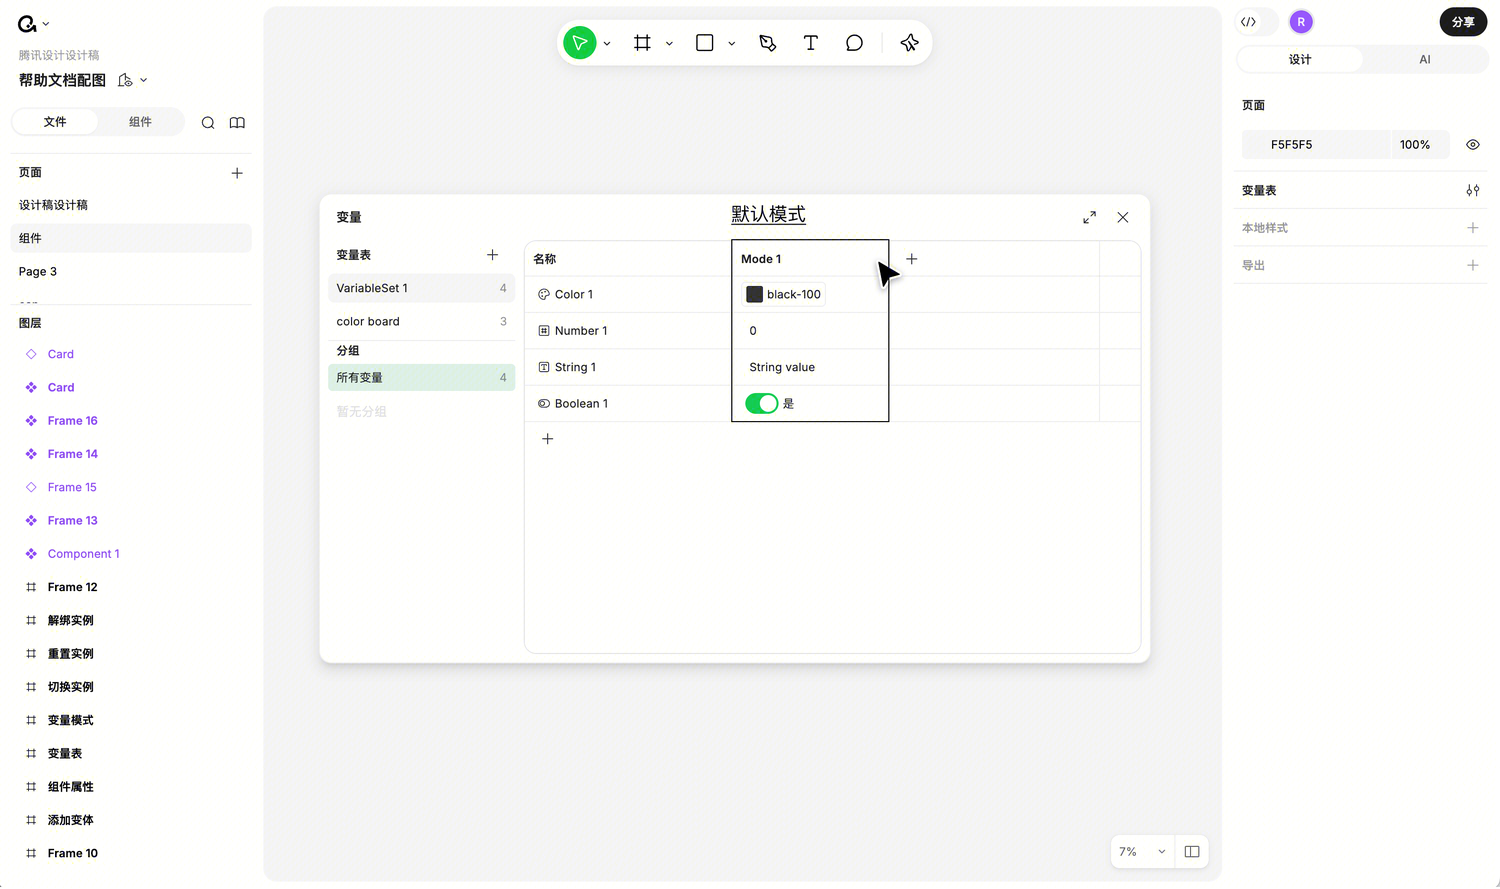
Creating a Mode
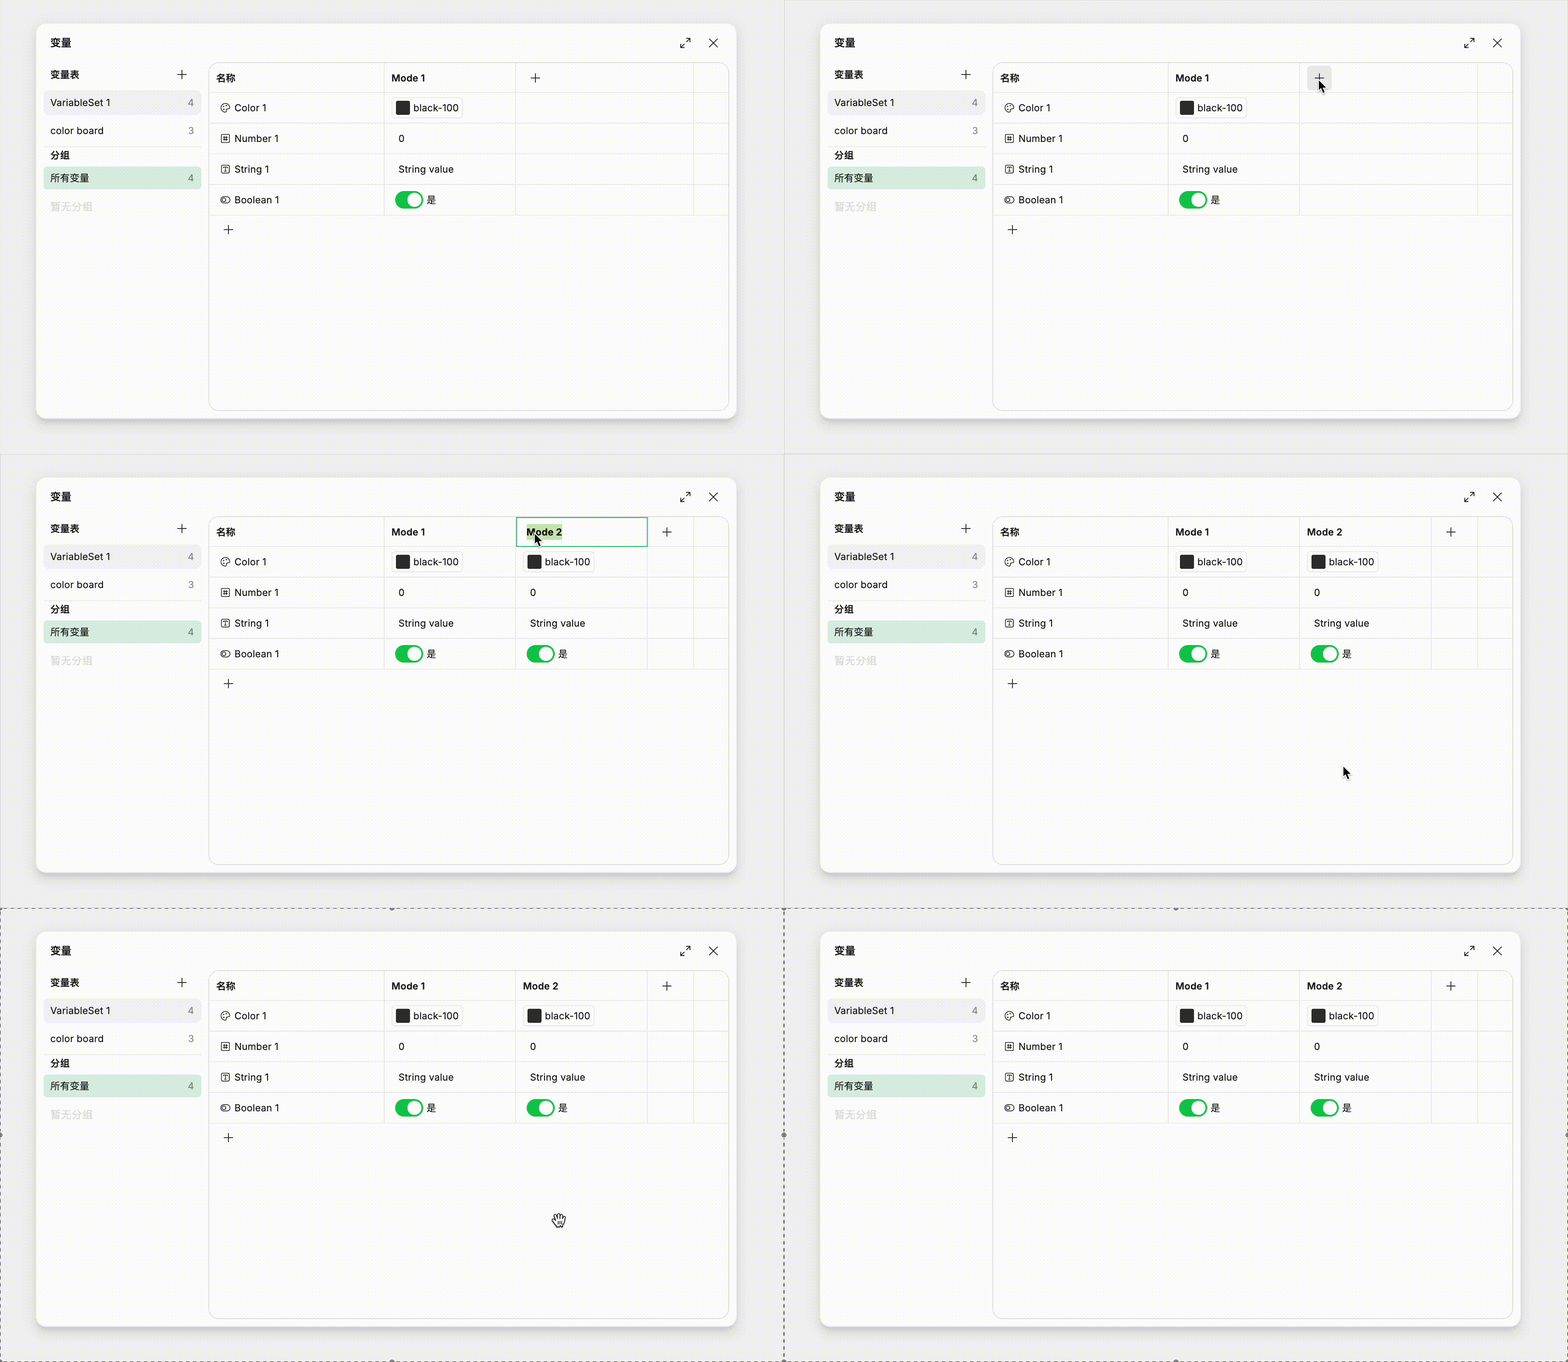
Click the "+" to the right of the mode title, and a new column will be added. The new column's values will default to the values from the previous column.
Renaming Modes
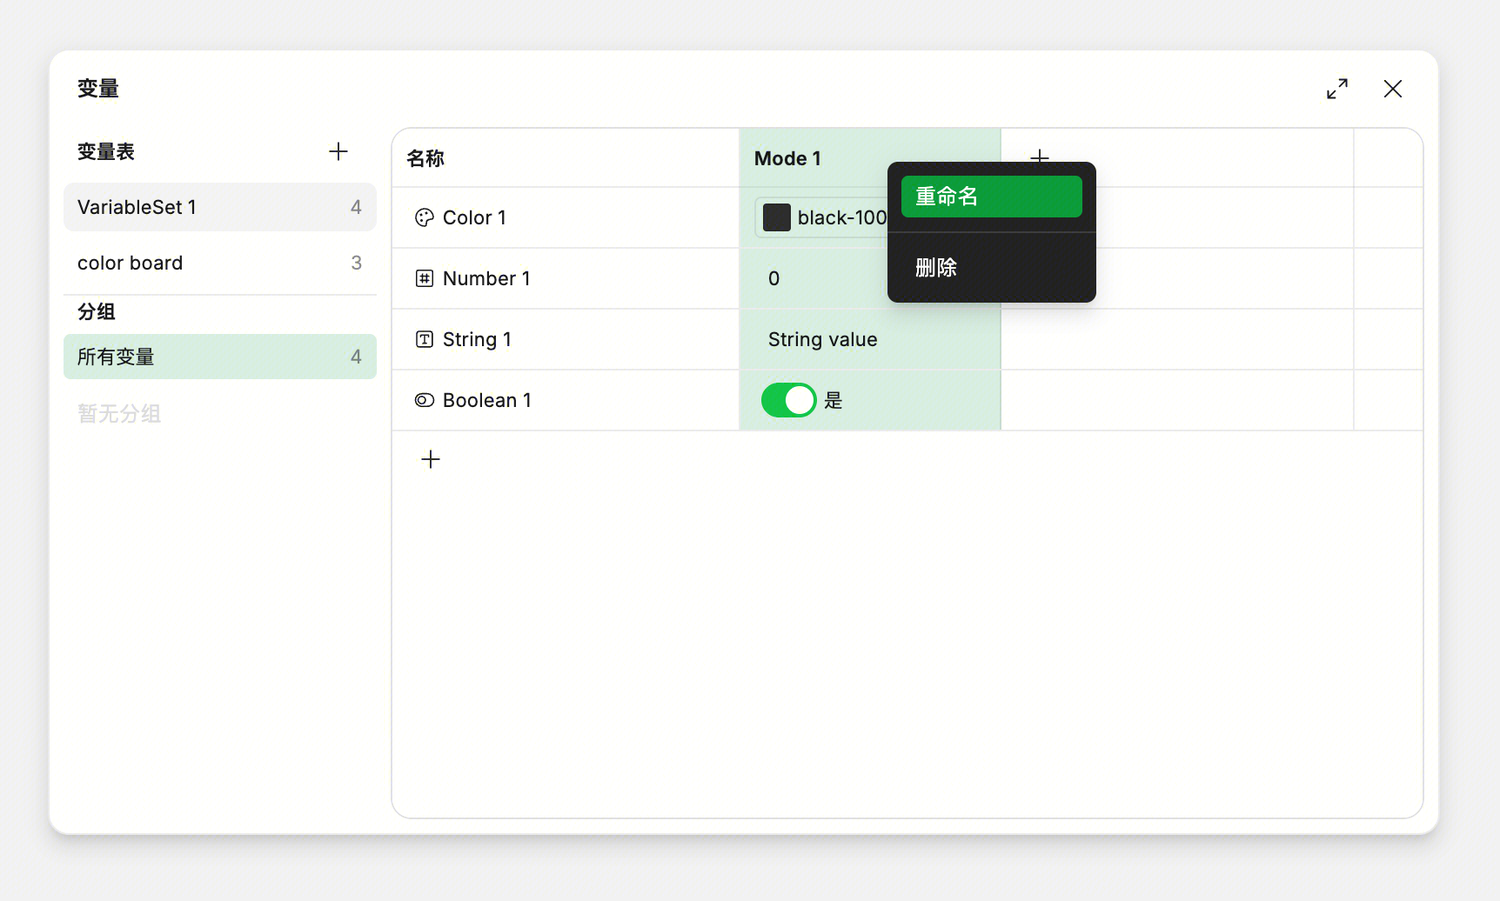
Double-click the mode title, or right-click → "Rename."
Tip: Give modes meaningful names like "Light" / "Dark," "Desktop" / "Mobile" — this helps team members understand the purpose.
Default Mode
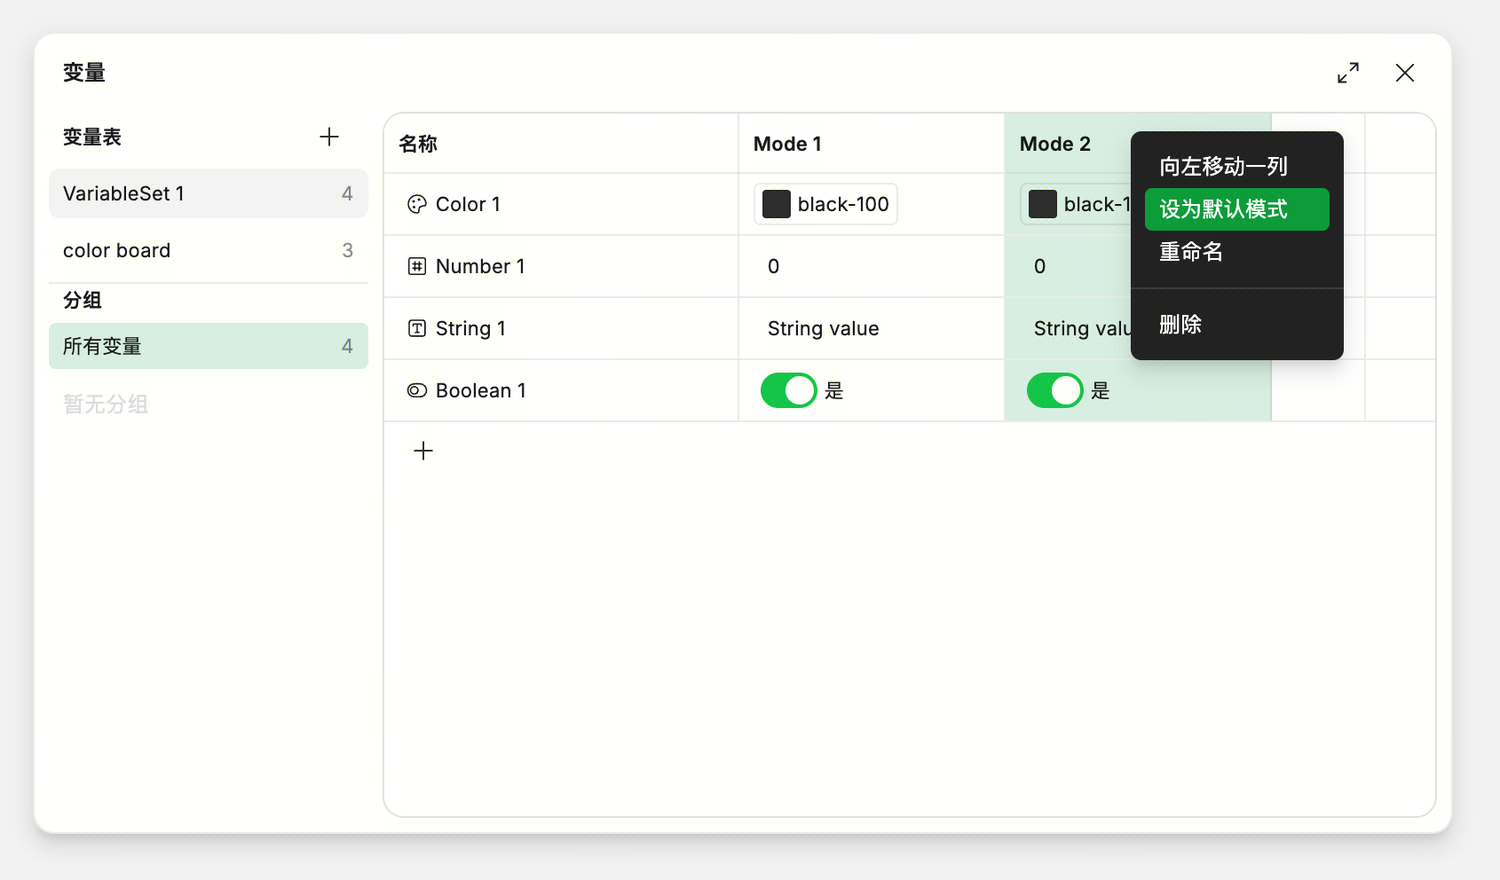
The first column is the default mode. When a layer has a variable applied but no specific mode specified, it uses the default mode's value.
Setting default mode: Right-click on a column's mode title → "Set as Default Mode." That mode will be moved to the first column.
Reordering Modes
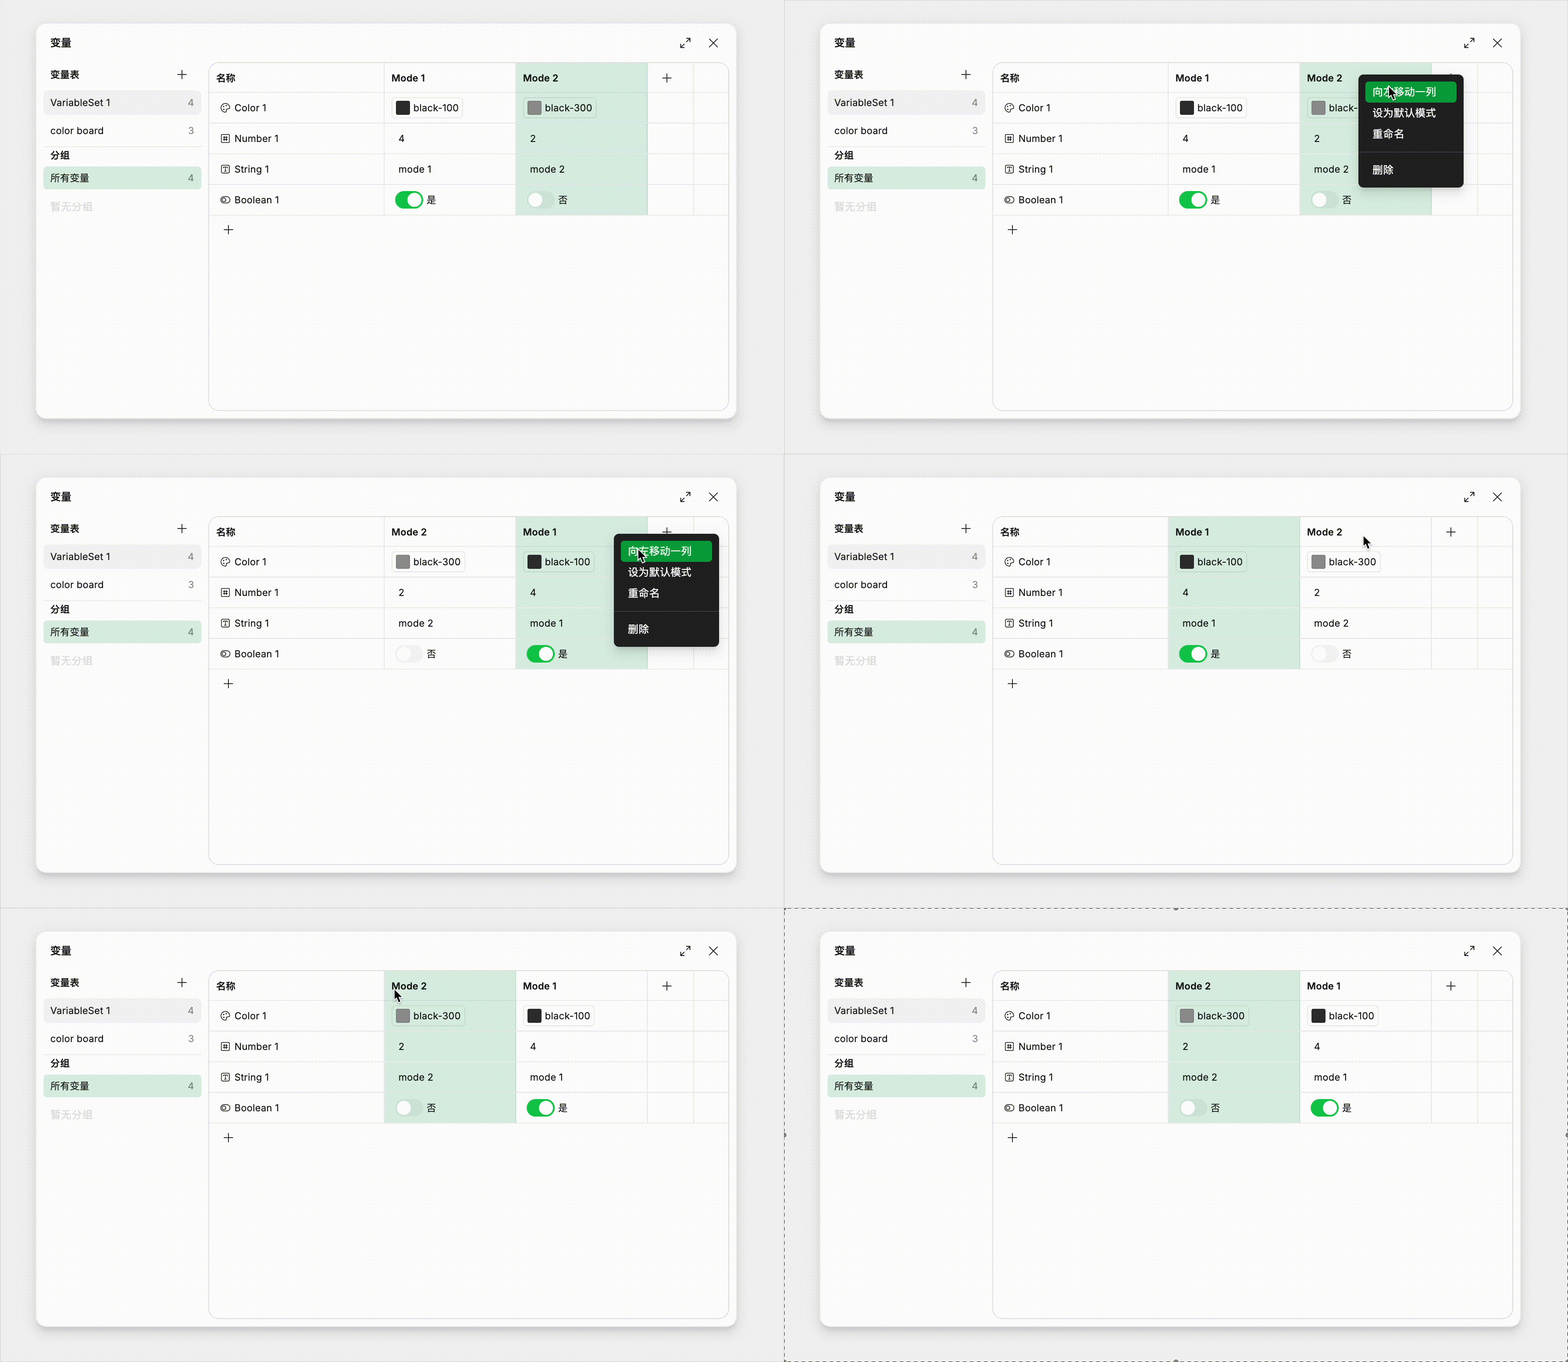
Two ways to adjust mode order:
- Select the mode column, then drag at the title
- Right-click → "Move Left One Column" / "Move Right One Column"
Order affects the dropdown sequence when switching modes on canvas.
Deleting Modes
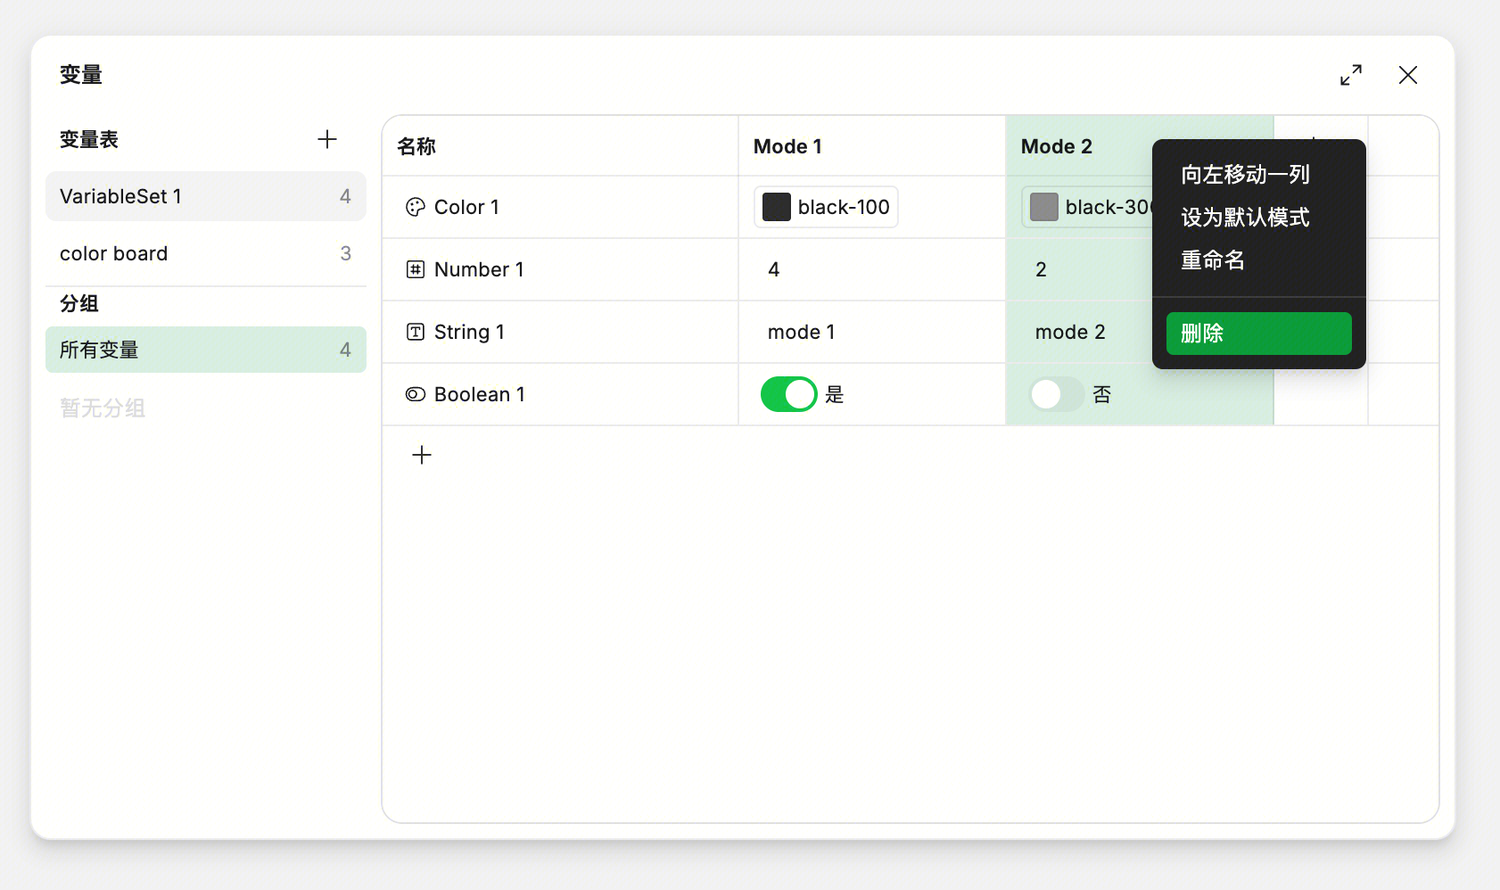
Right-click mode title → "Delete."
Deleting a mode only removes "that column's values" — it doesn't affect the variables themselves. If any layers are currently using that mode's values, they'll automatically fall back to the default mode.
Switching Modes on Canvas
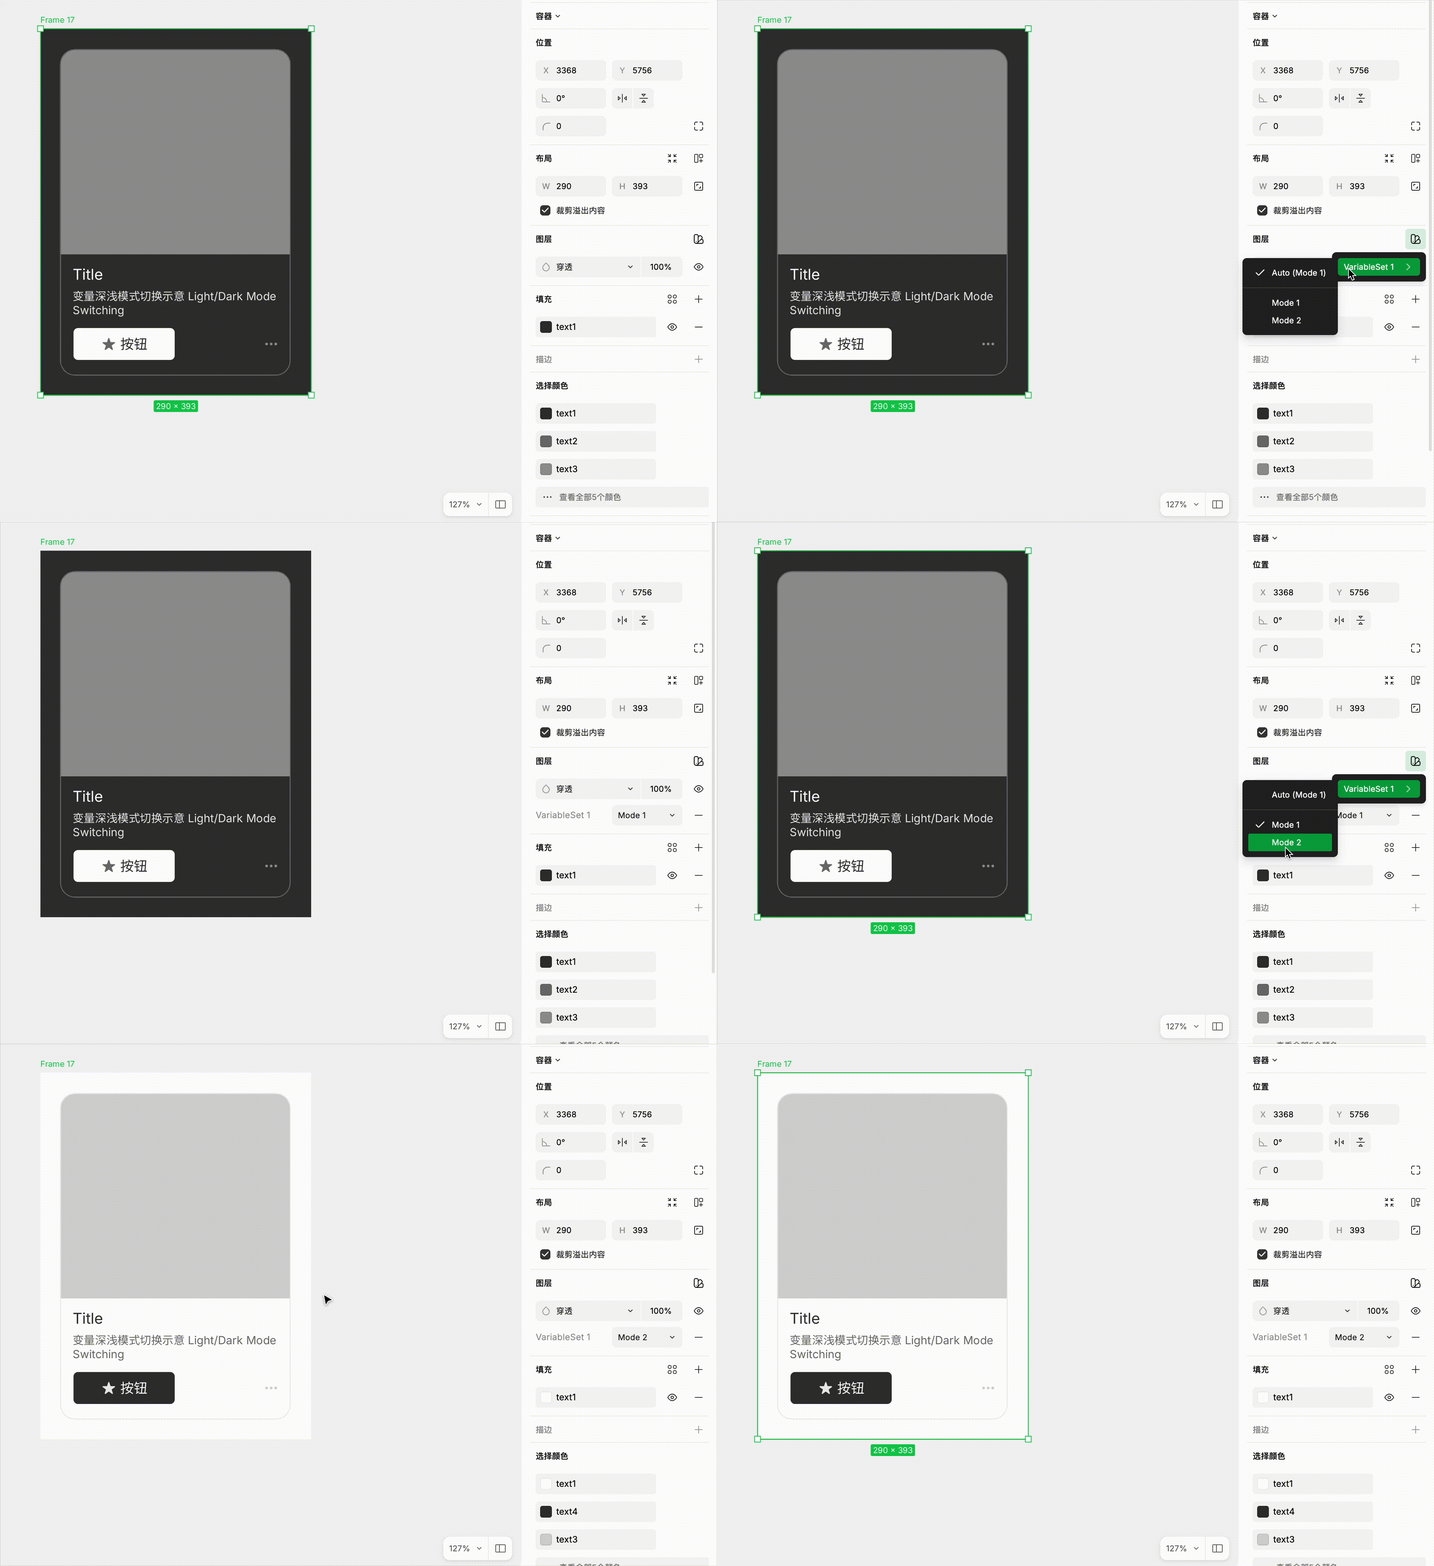
Variable collections can be applied to any frame. Select a frame, and in the right panel's "Layer Properties" area, you can choose which mode that frame uses. Layers within the frame will instantly switch to the corresponding mode's values.
This is how light/dark theme switching actually works: letting designers preview different theme appearances on canvas with one click.
Scoping
Why Scoping Is Needed
As variables grow in number, when a designer chooses a fill color variable for a rectangle, the dropdown lists all color variables — text colors, backgrounds, strokes, and shadow colors all mixed together. Long and easy to pick the wrong one.
Scoping is designed to make each variable only appear where it should.
Example: You create a variable called "Text Color" and set its scope to "Text Fill." Then in other contexts (like shape fill or stroke), this variable won't appear in the variable selector, preventing misuse.
How to Set Scoping
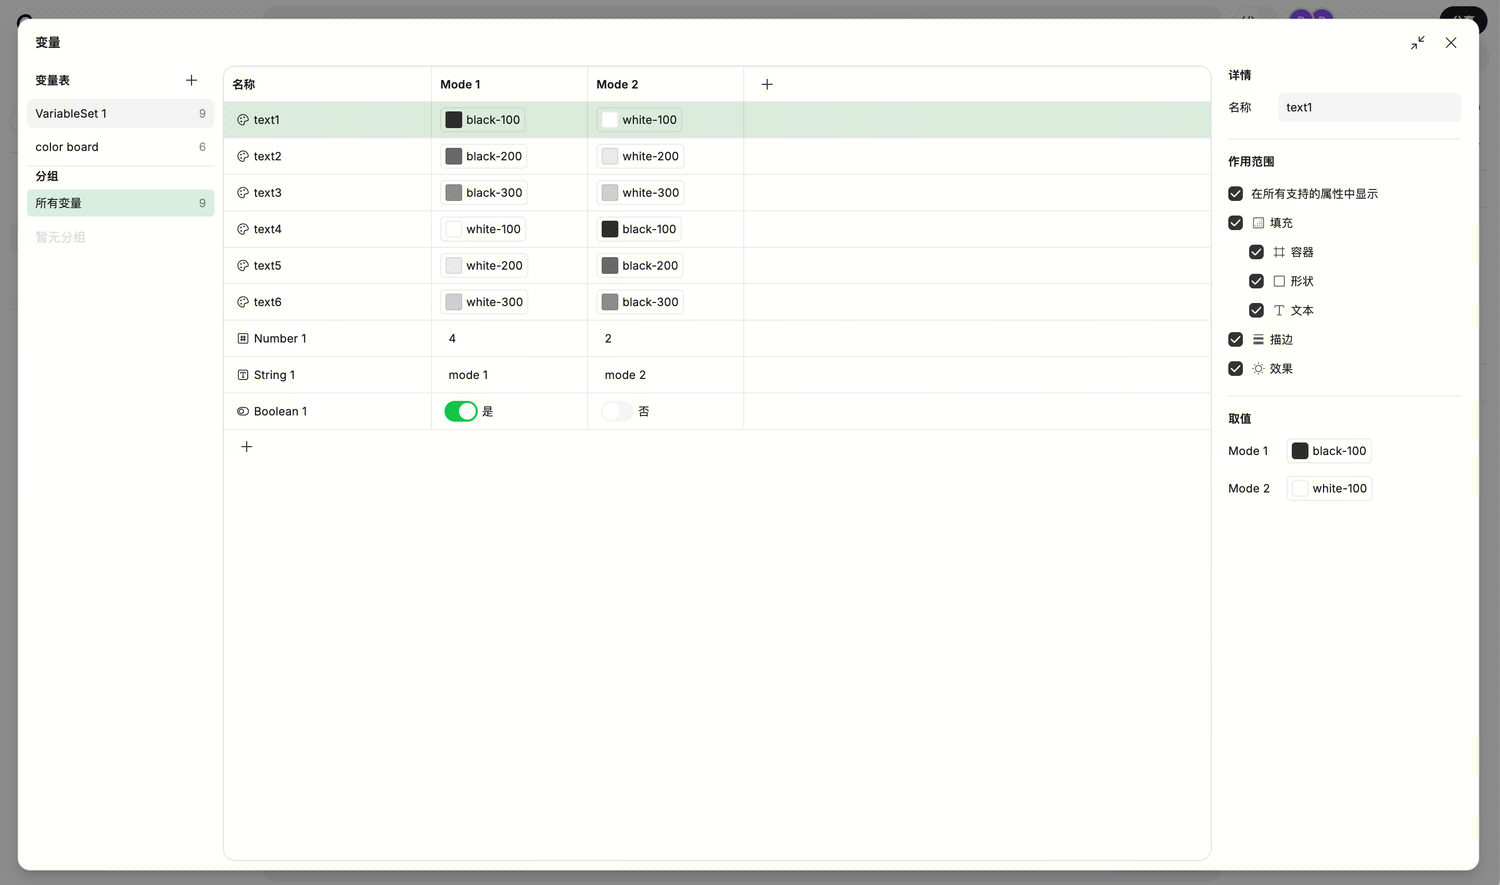
Open the Variable Manager and select the variable you want to configure. A "Scoping" configuration area appears on the right, with checkboxes to define which properties this variable can be used on.
By default, new variables have all properties checked.
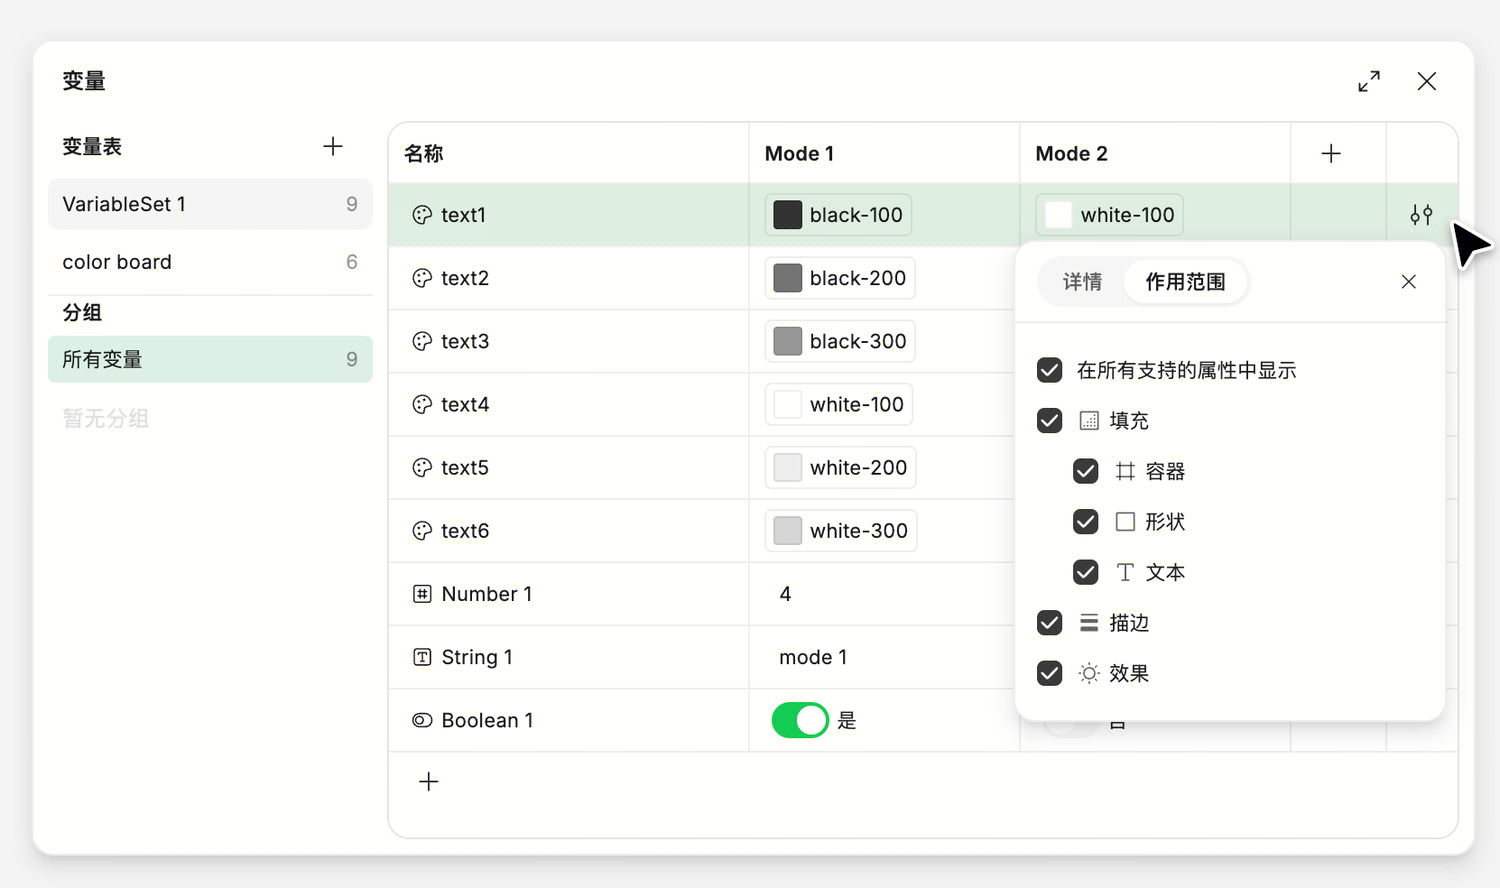
In small-size dialog: Hover over the rightmost cell of a variable row to reveal a settings icon. Click to switch to scoping view.
Scoping Options for Different Variable Types
| Scope Option | Description |
|---|---|
| Color Variables | 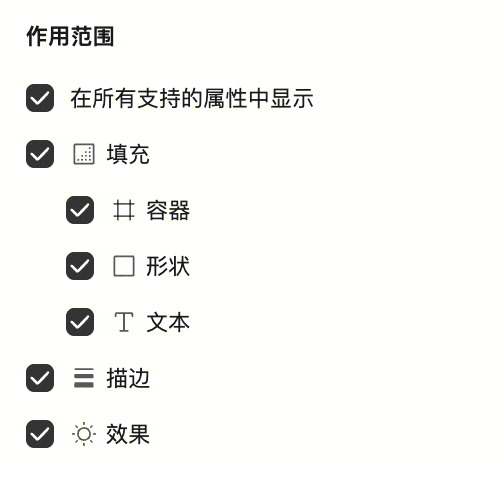 |
| Number Variables | 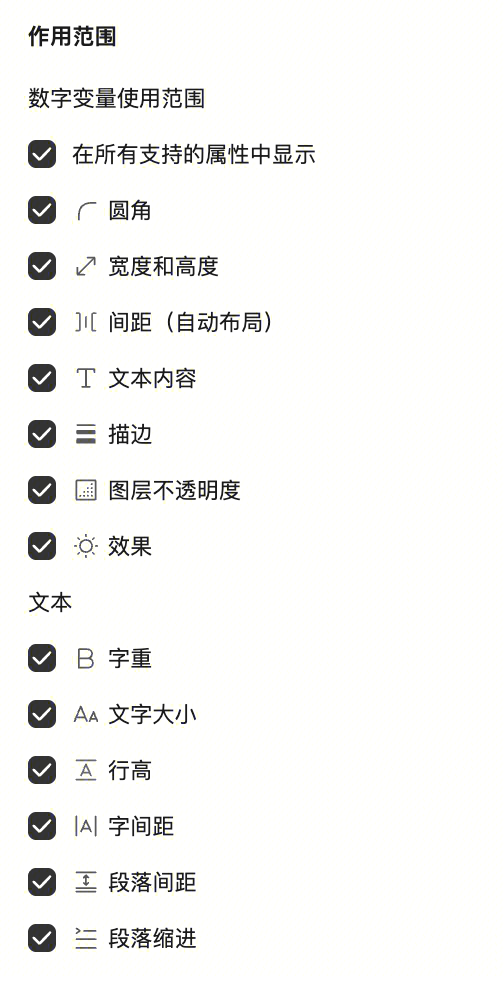 |
| String Variables | 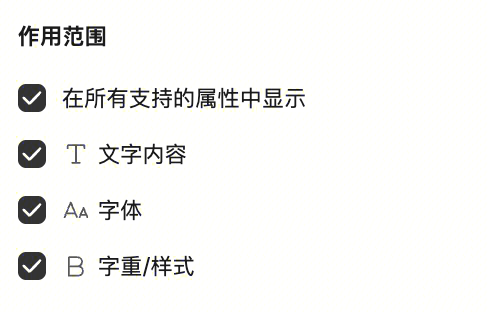 |
| Boolean Variables | Boolean variables have no scoping — they can only be used for show/hide and component boolean properties. |
Scoping Changes Take Effect Immediately
After setting scoping, all variable selectors on canvas will update in real-time — variables that no longer fit the scope will immediately disappear from lists. However, already-bound variables won't be unbound.
For example:
- You bind a rectangle's fill to the "Brown" variable
- Later you change "Brown"'s scope to "Text only"
- The rectangle's fill remains bound — the color won't change
- But if you try to re-select a variable, "Brown" won't appear in the dropdown
This design avoids breaking existing designs — new rules only apply going forward, and existing bindings don't automatically expire.
Usage Recommendations
Start with all scopes enabled
When first using variables, keep all variables defaulted to full scope. As the number grows, gradually narrow scoping.
Use "Modes" instead of complex variant-switching approaches
If you previously used variants to manage "light/dark themes" — making two variants for every component is very complex. Instead, define button fill colors using variables. The component only needs one version, and mode switching changes button colors directly. This is more efficient than adding variants and helps streamline the library.
Give variables a clear naming convention
As mode counts increase, variable naming becomes critical. Use / for grouping, like:
Color/Semantic/Body
Color/Semantic/Background
Color/Semantic/Border
Color/Base/blue-500
Color/Base/gray-100
A clear naming structure helps team members quickly find the variables they need.